In Star Wars Jedi: Survivor there are a lot of interesting characters that you meet in the game. One of them is Rayvis, a large bulking alien that you pursue at one point in the game. In the level where you try to find him it can be quite confusing to traverse. There’s a lot of puzzles and areas to clear to try and find him.
In this guide, we’ll show you how to Pursue Rayvis in the game as we go through a High Republic Base filled with Droids and hazards. Now let’s try and find Rayvis and confront him!
How to Pursue Rayvis
When you get to the section in Star Wars Jedi Survivor where you’ll need to locate Rayvis on the Shattered Moon you’ll have your work cut out for you. This level is massive with a lot of different ways given to you to traverse it. Not only that but the game even introduces a new way of traversing in this level so there’s a lot to take in.
It’s easy to get lost here so let’s go through this level while showing you how to progress!

We’ll be starting at the Array Channel Meditation Point and head up to the waypoint shown on the map. There you’ll need to use Force Lift to open the giant door, there’s droids on the other side so be ready to wipe them out.

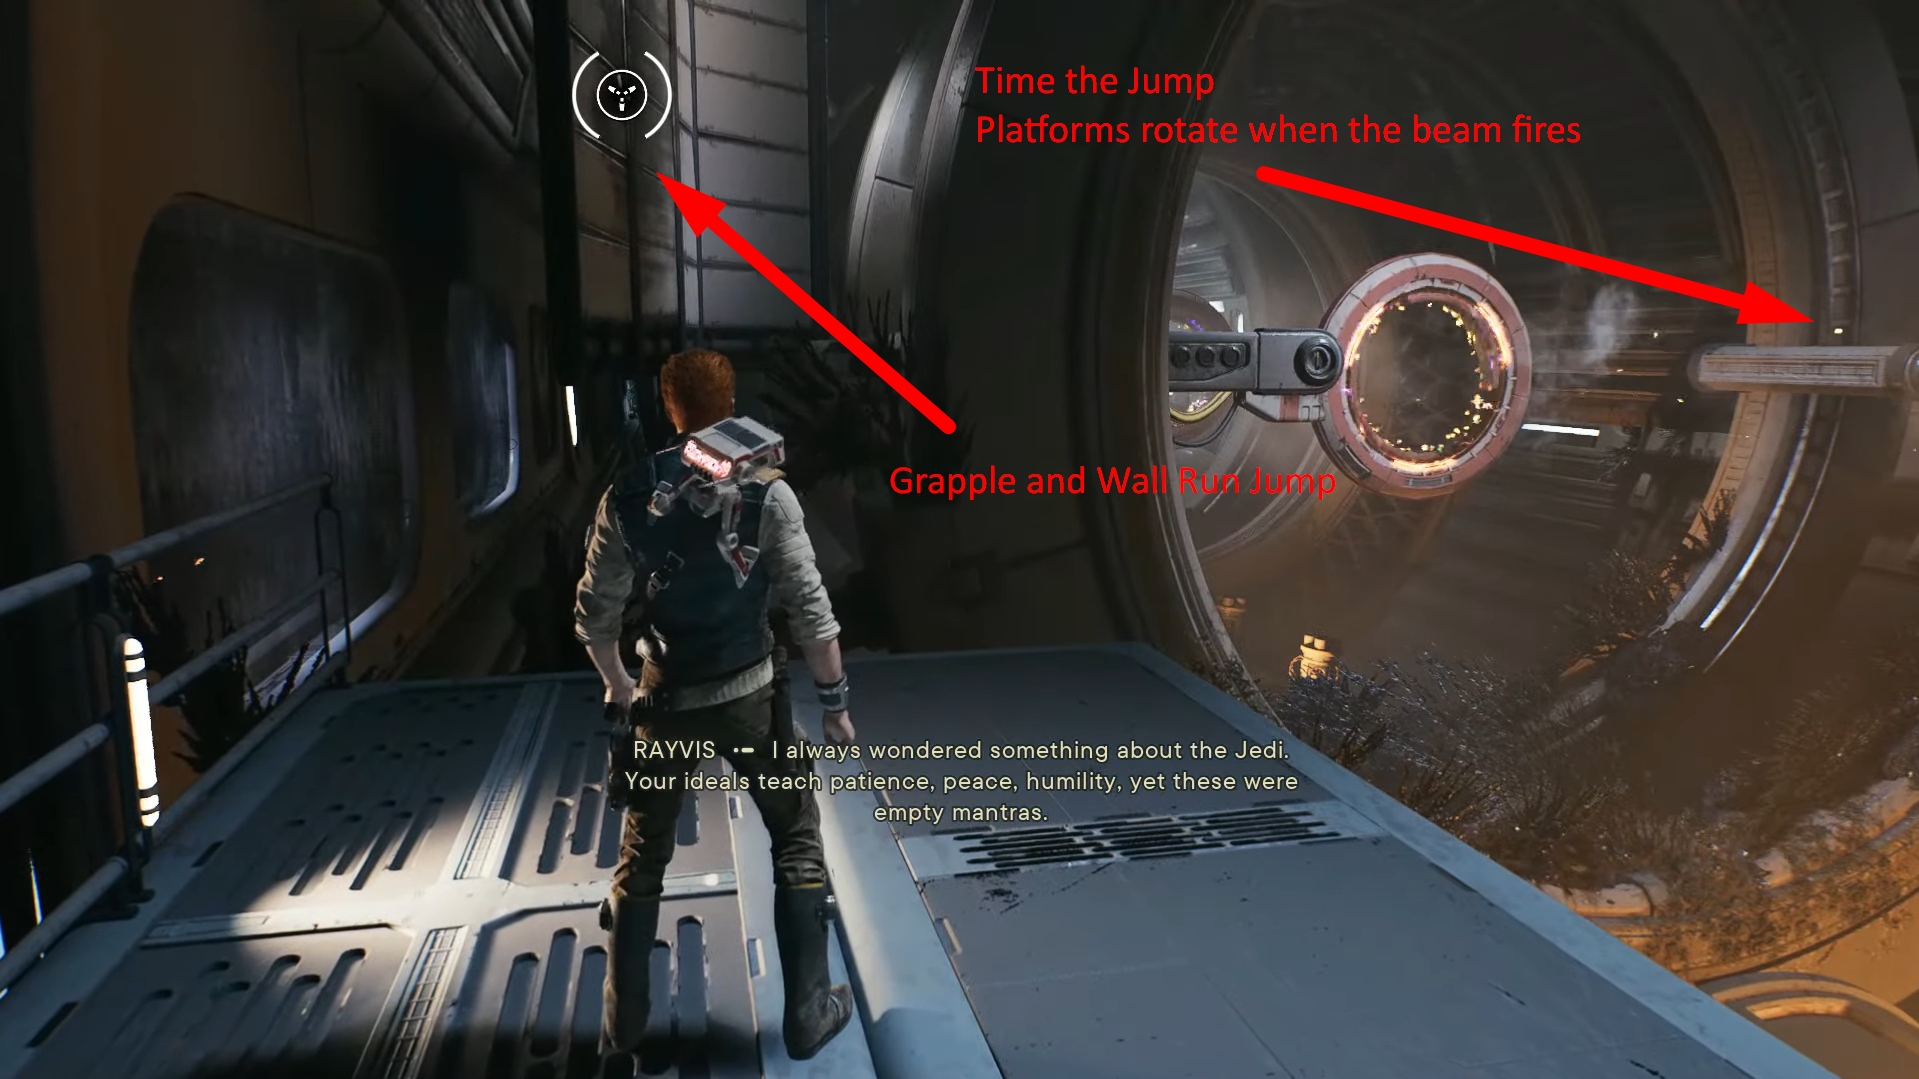
Once the droids have been dealt with go and find the grapple point shown on the image below. Climb up to the platform and follow the path, it’ll lead you straight to the beam.

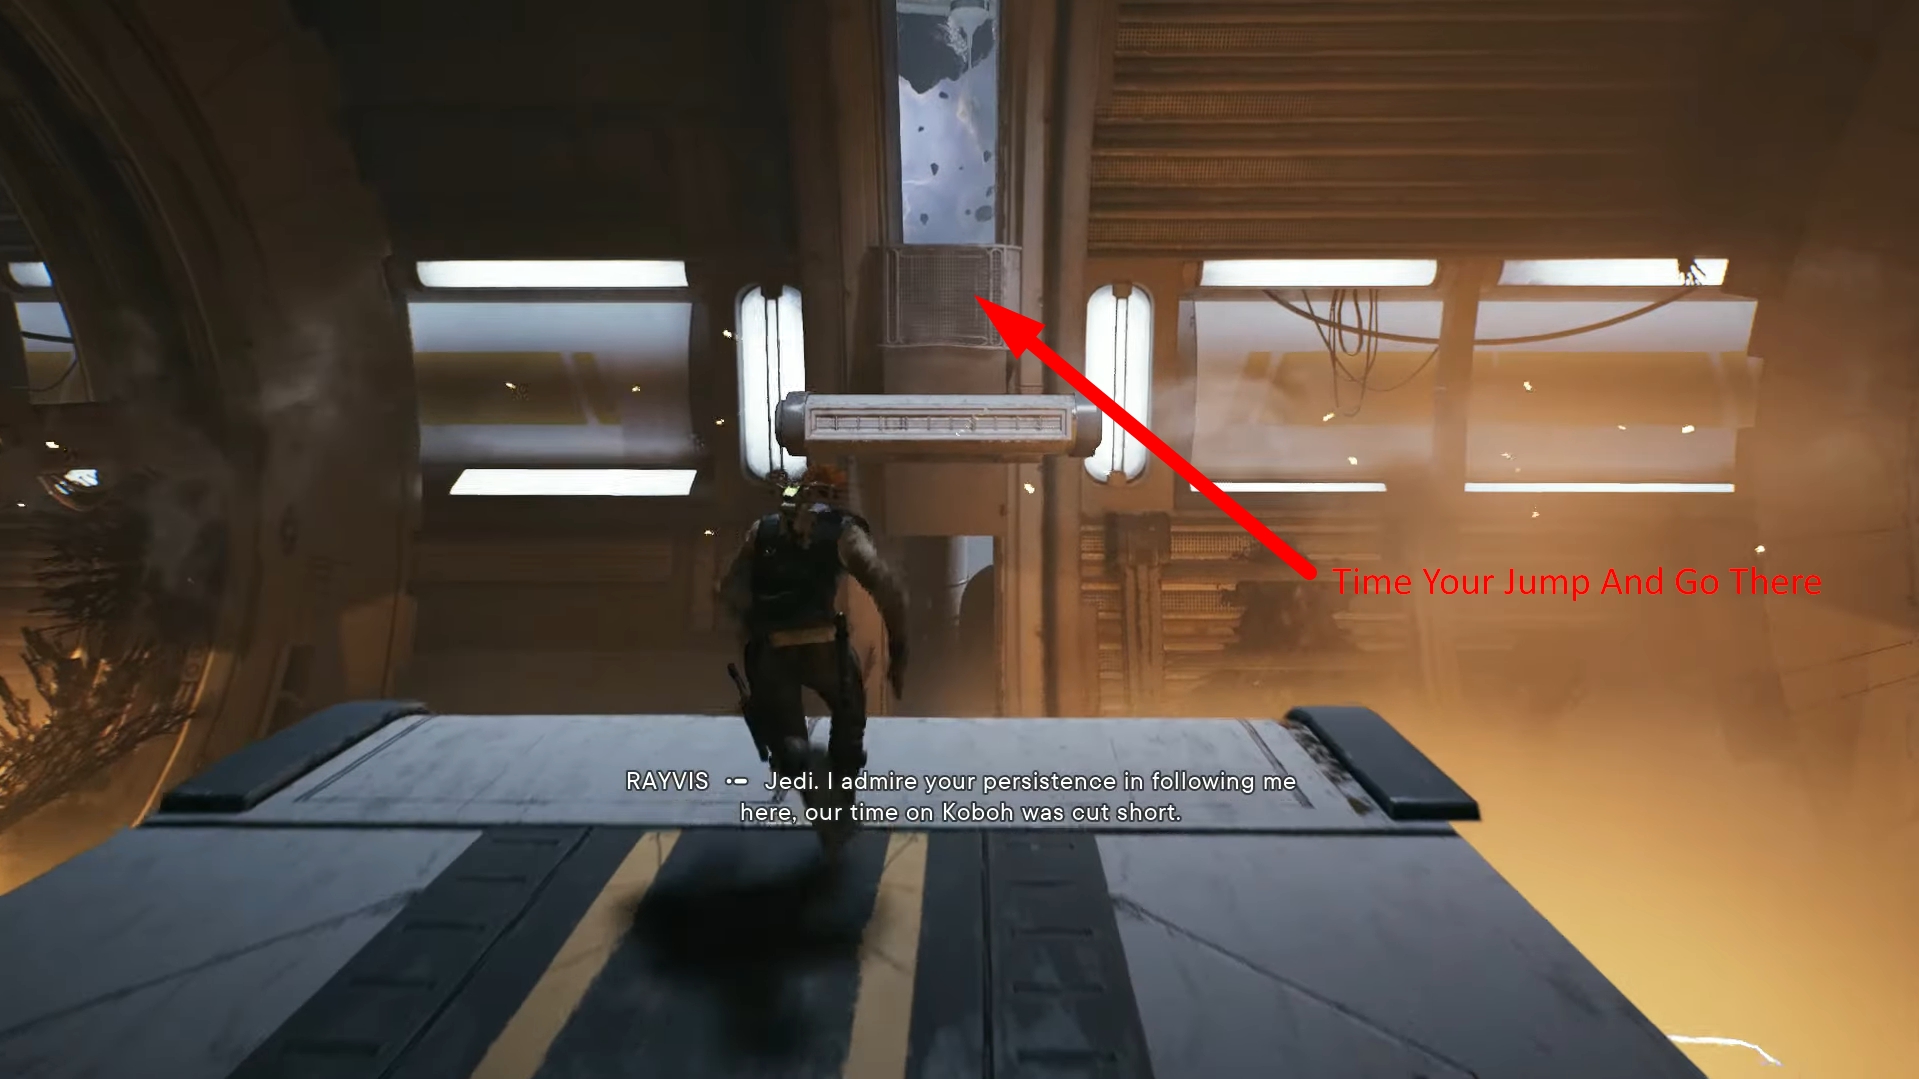
Once the beam is in front of you, you’ll see some droids just below it. They won’t be there in a few seconds so don’t mind them.

You’ll need to time your jump and get to the other side without the beam hitting you. My advice is to start your jump the moment the beam stops shooting.

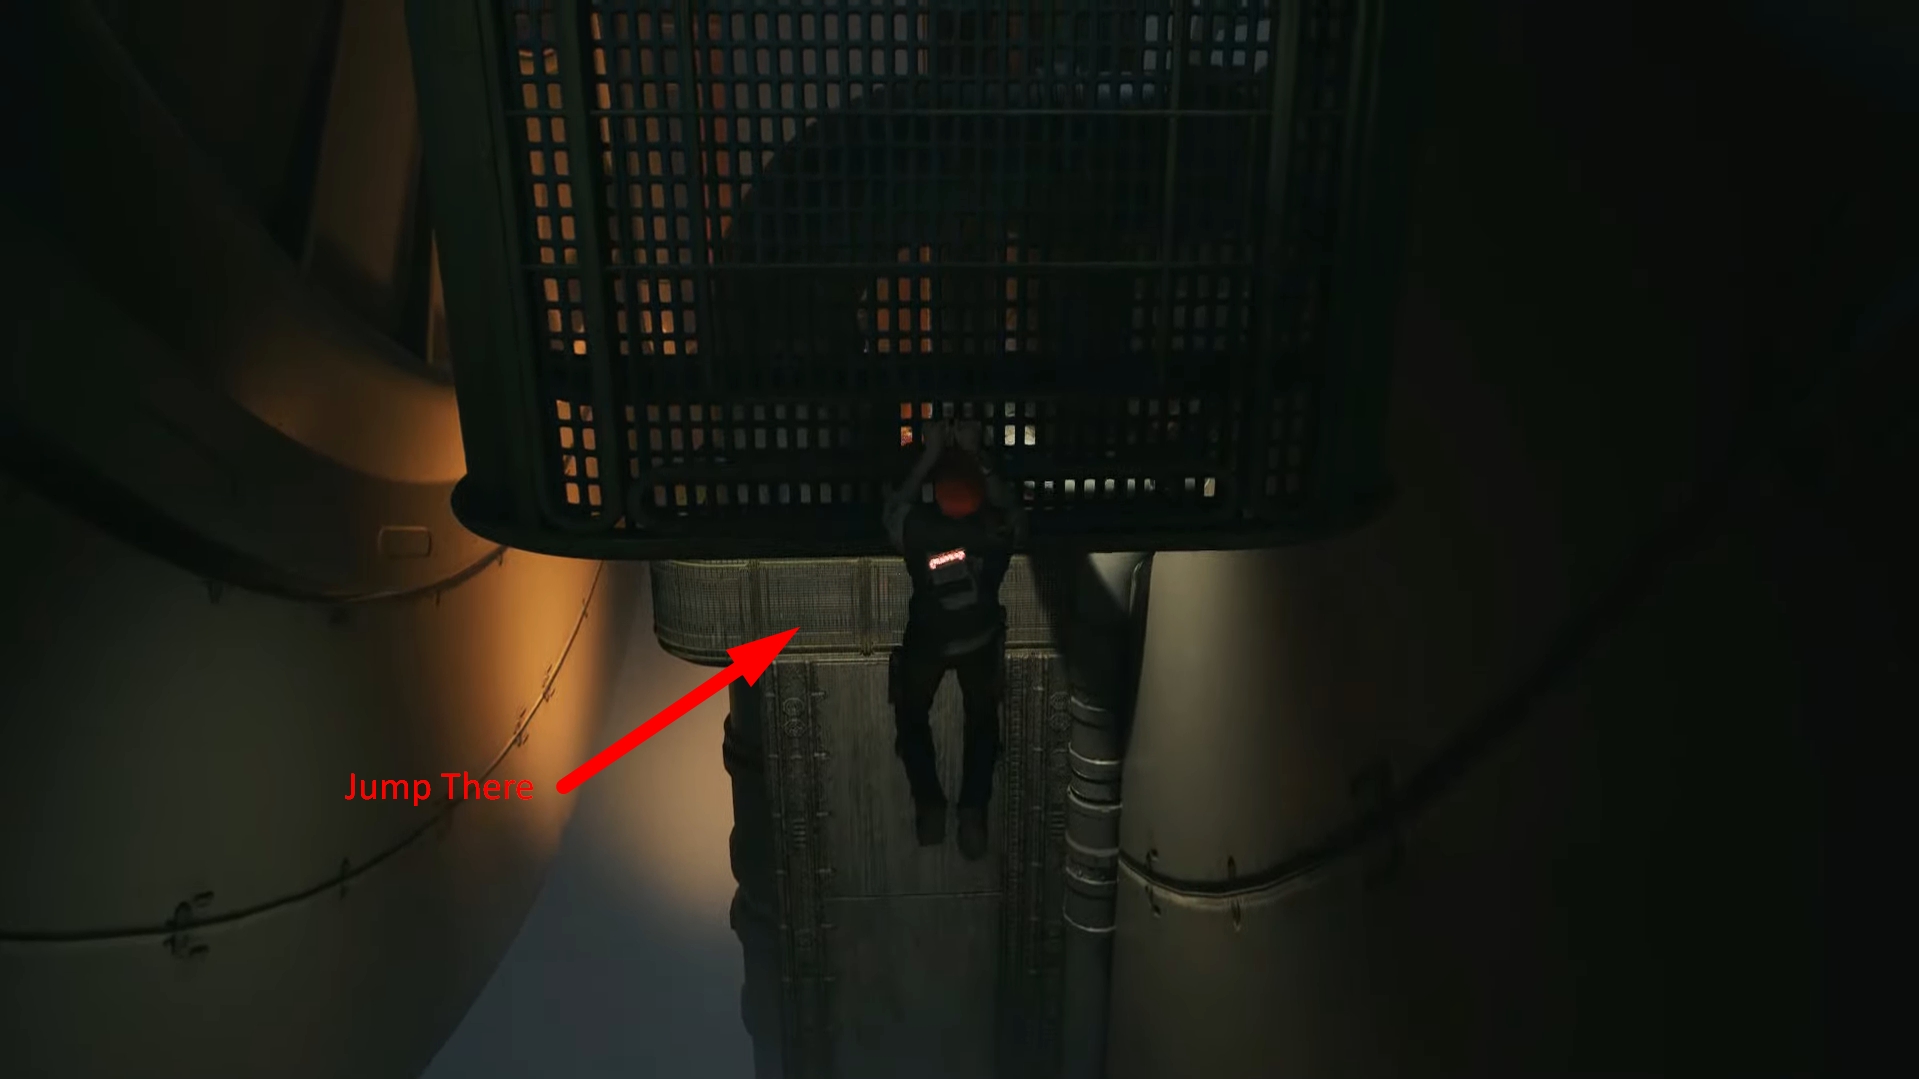
Once you’re on the other side go through the platforms including the one that goes up and down. You’ll need to make your way into the beam chamber itself by jumping and climbing the wall below it.

Hope you like timing your jumps and movement because you’ll be doing a lot of that in the future. Here you’ll need to time your entrance to the chamber, again try to go in right after the beam fires. Run as fast as possible through the chamber and jump down to the left.

Once outside of the chamber you’ll need to time your grapple this time, going to the wall section shown below. You’ll then need to jump to the right side where there’s a platform there. Then you’ll need to follow a path, through a defense turret.

Next to the turret is a door you can force lift to open. From there time your jump again going to the other platform on the other side. Then climb the wall to the outside of the facility.
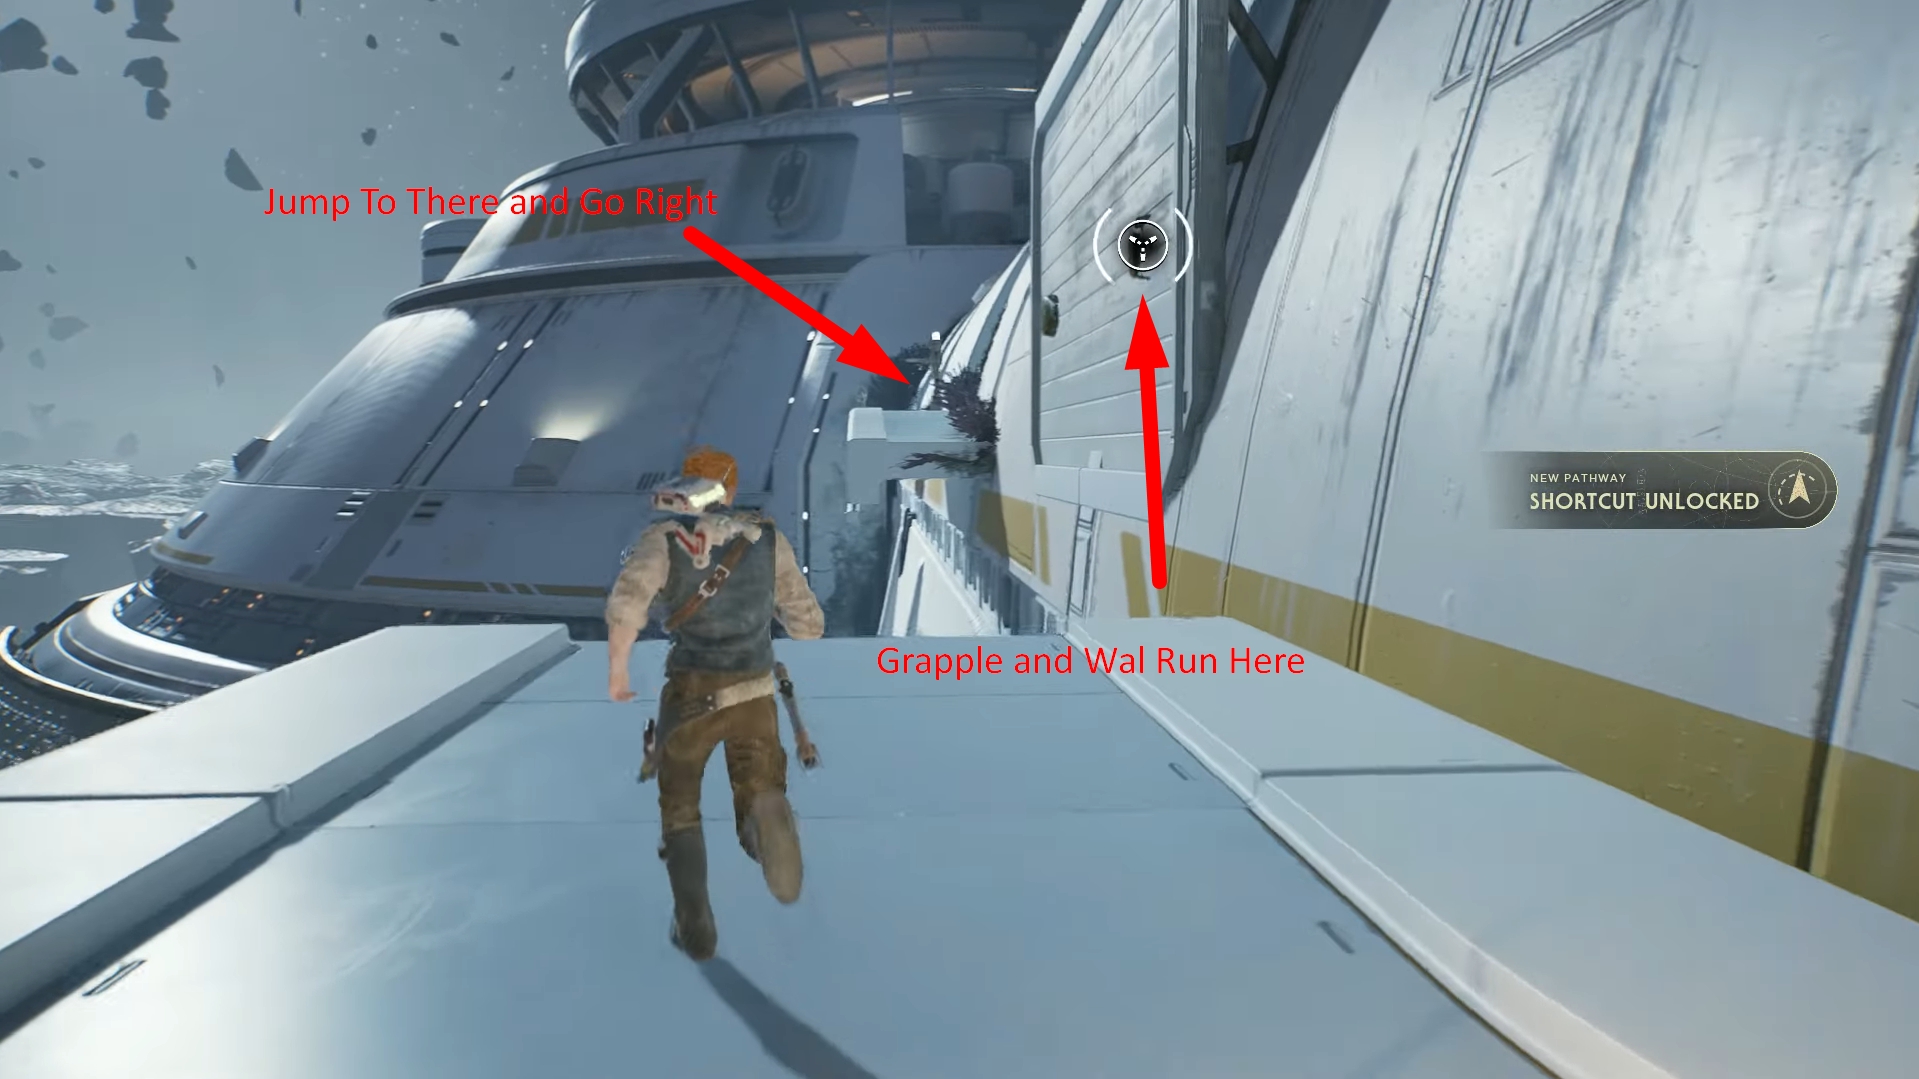
Now that you’re outside just go to the right and there, you’ll find a wall to grapple and wall run on. This will let you jump the gap to the next platform, then just go right.
You’ll be inside the building again and this time there’s droids around to defeat. Watch out for the laser that’s goes through the platform, whoever designed this walkway should be fired!
Once the droids are out of the picture just go through the area at the back and head left.

There you’ll find a wall you can climb up to and Greez will contact you. Once you’re up the wall go to the left and drop down and grab the wall shown on the image below.

Now climb down to the tip of the wall and this is where it gets a bit tricky. You’ll need to grab the wall below and at the back of the wall you’re on.
Drop down, jump in midair, do a midair dash and hopefully you’ll get to the wall. Then just jump and dash till you reach the area you can hold on to.
Now follow the wall to the left and there you’ll hop a gap and then see some electricity. You’ll need to time your jump to the wall and repeatedly jump-dash to the top where there’s more droids.

Clear the droids out and to the right is another wall you can climb to get to the first platform.

Traversing this part is a bit tricky because not only do you need to time it right, but you have to do it in one go.
You’ll need to wall jump onto the platforms, jump the gap to another platform, wall run and jump to another wall run and jump, off to another platform and finally get to the end.

Make sure to start the jump right before the beam ends so you have enough time, then use the grappling hook to traverse the area faster.
You know you’re at the end when there’s small room with computers and a light. From there go right and grapple to the ceiling.

Remember the beam chamber? Well, we’re going inside it again so buckle up! Go to the very end of the ceiling climbing section and drop down to the wall above the chamber. The wall itself will drop down slightly and you can then jump into the chamber! Remember to time it right!

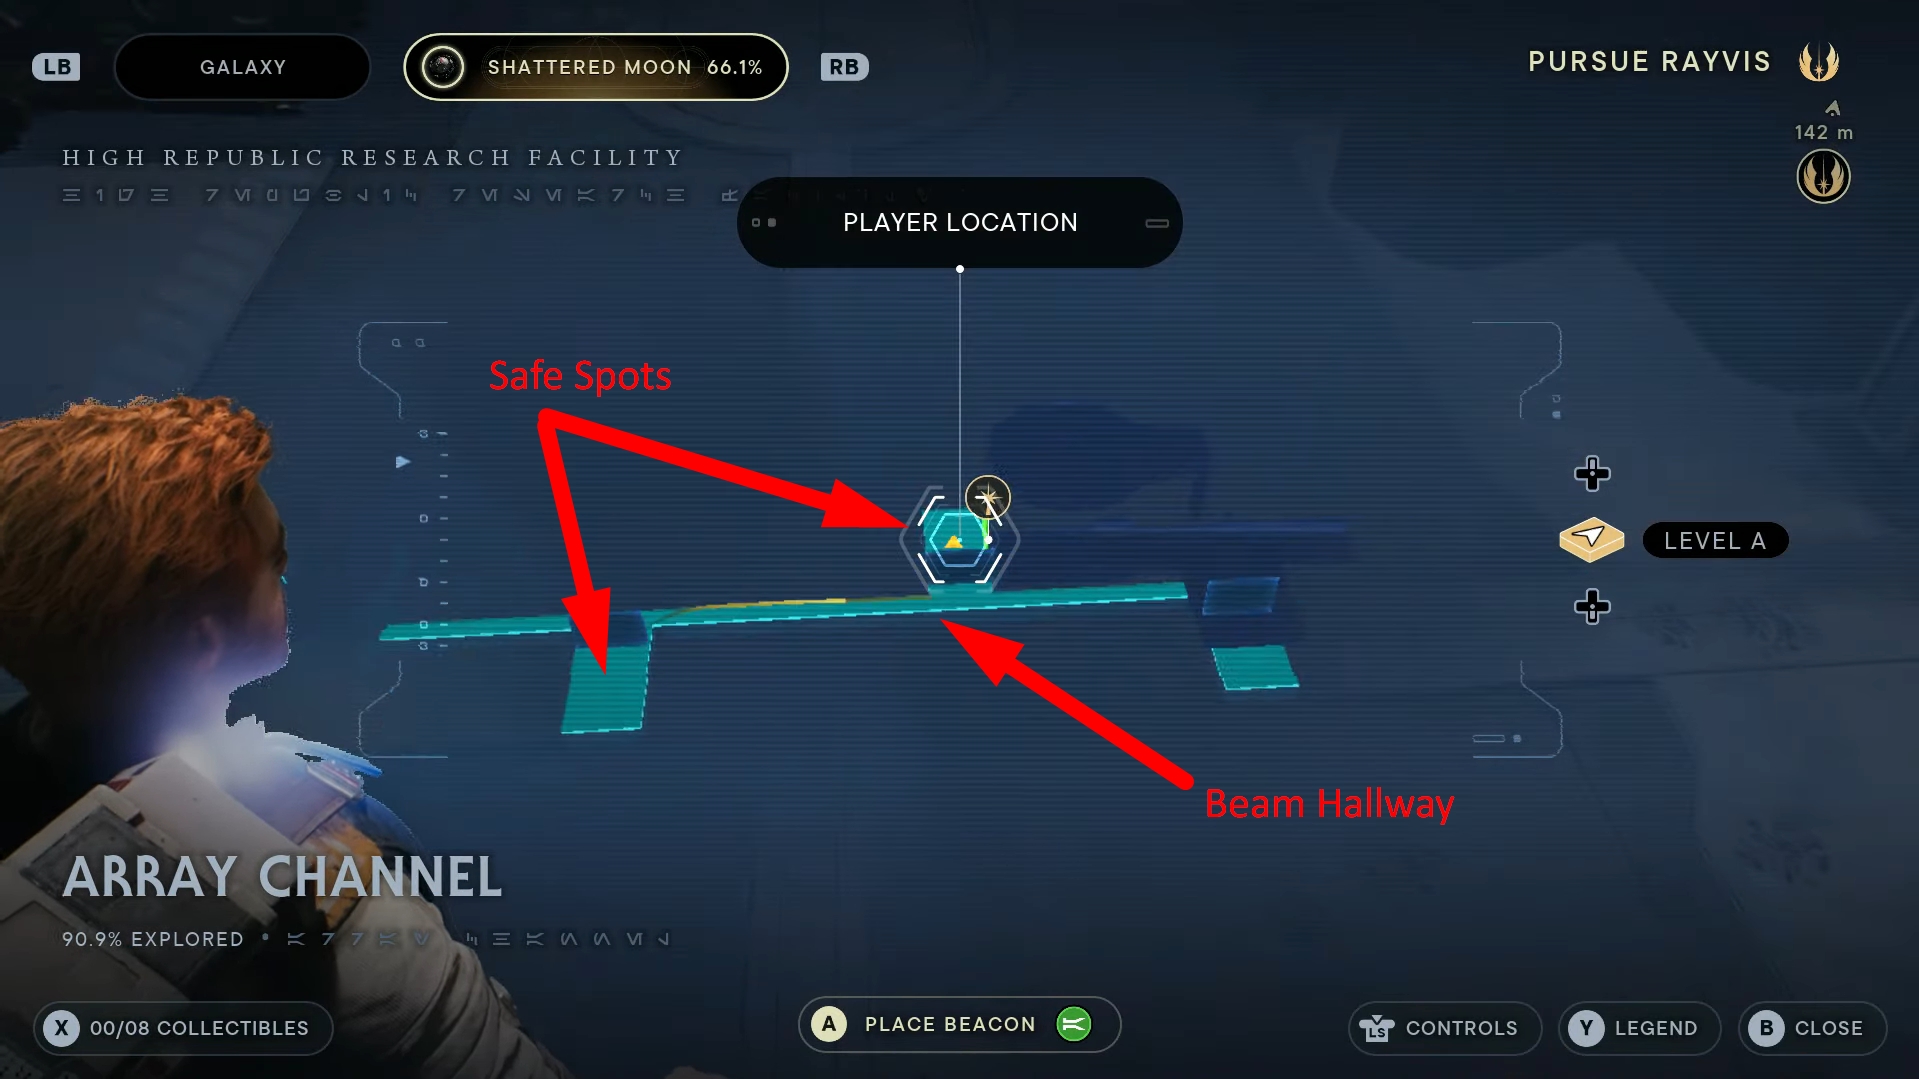
This time the chamber has “safe spots” at the sides so you can survive. The first one is to the right, then the second one is to the left.
Once you reach the left safe spot you can look for the small hole in the wall covered by a grate. Force pull it and squeeze through the gap. Once you’re through climb the wall to the right.

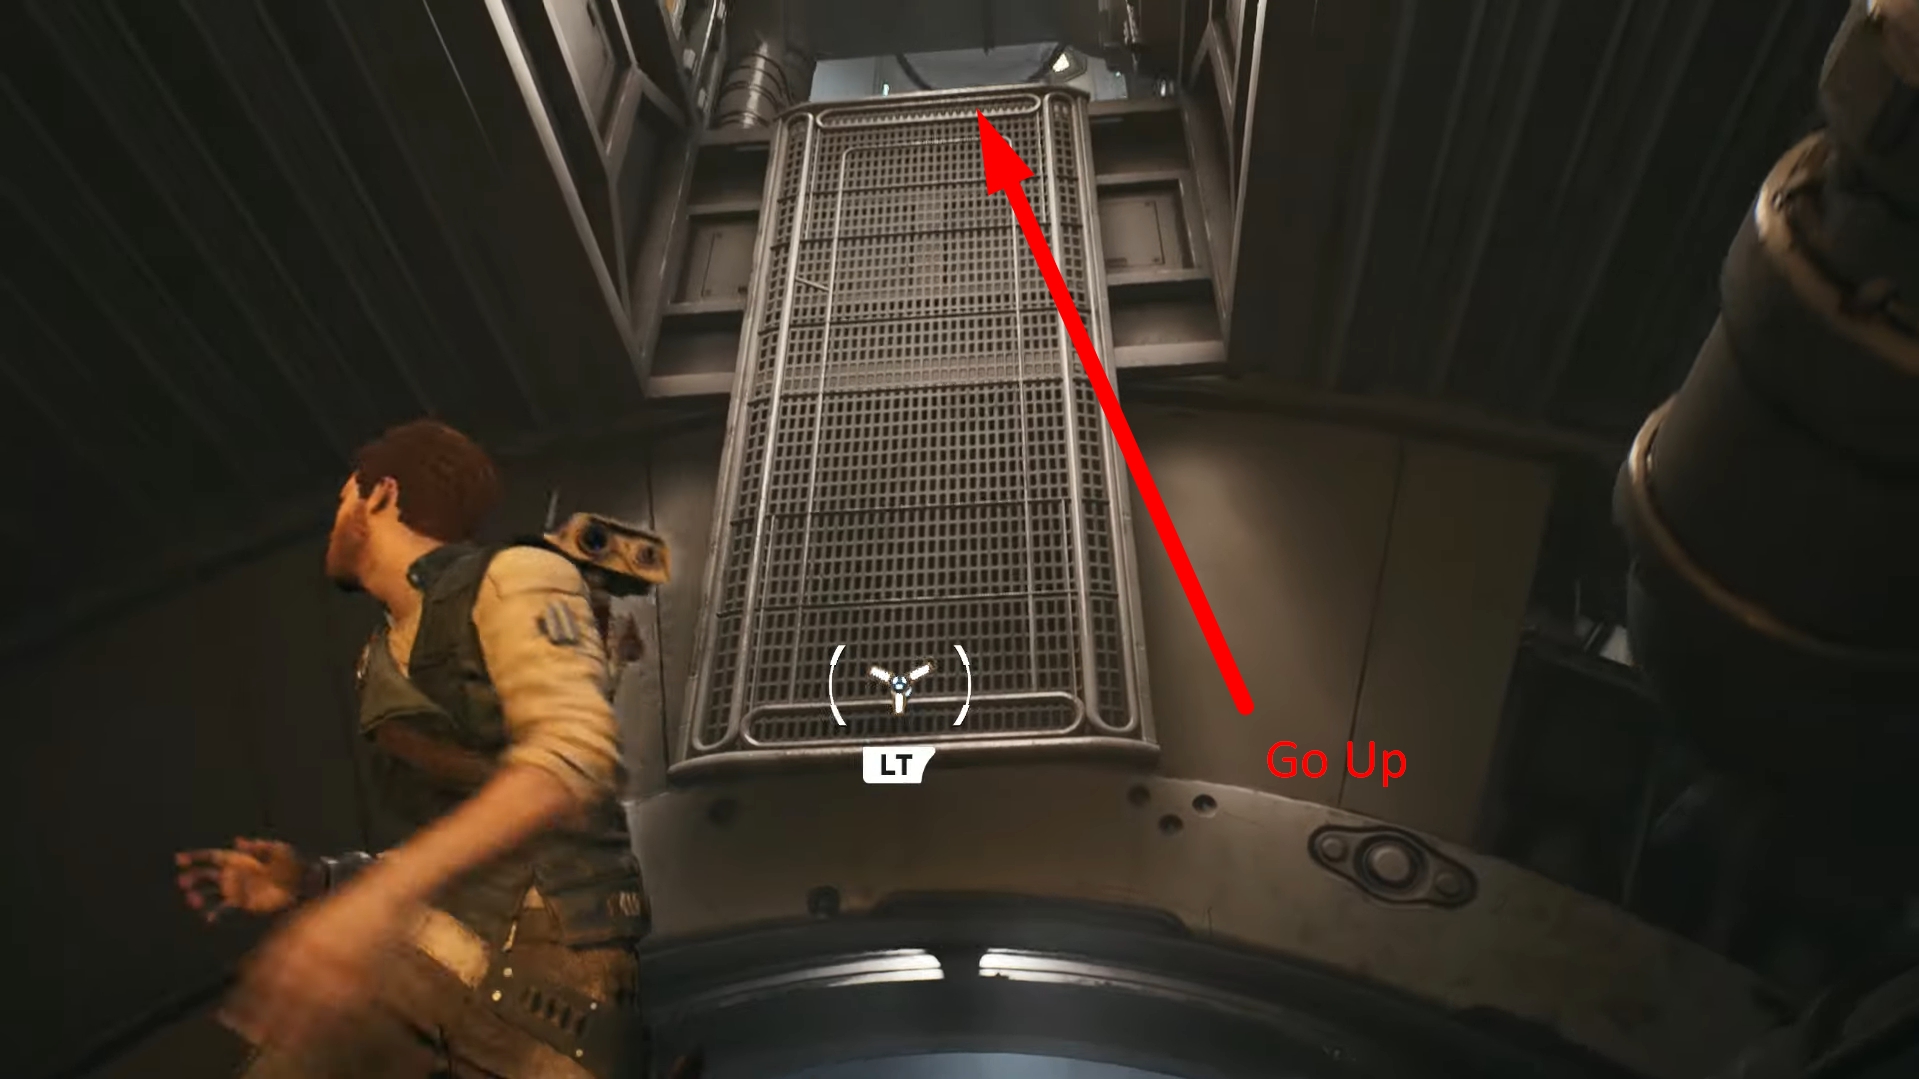
Once you’re on top go to the left and keep your eyes above. There you’ll find a hole on the ceiling with a wall you can climb, this will lead you to an elevator you can use.
The elevator will lead you to the Research Laboratory area of the level. Don’t worry, this is technically the halfway point of finding Rayvis in the level!
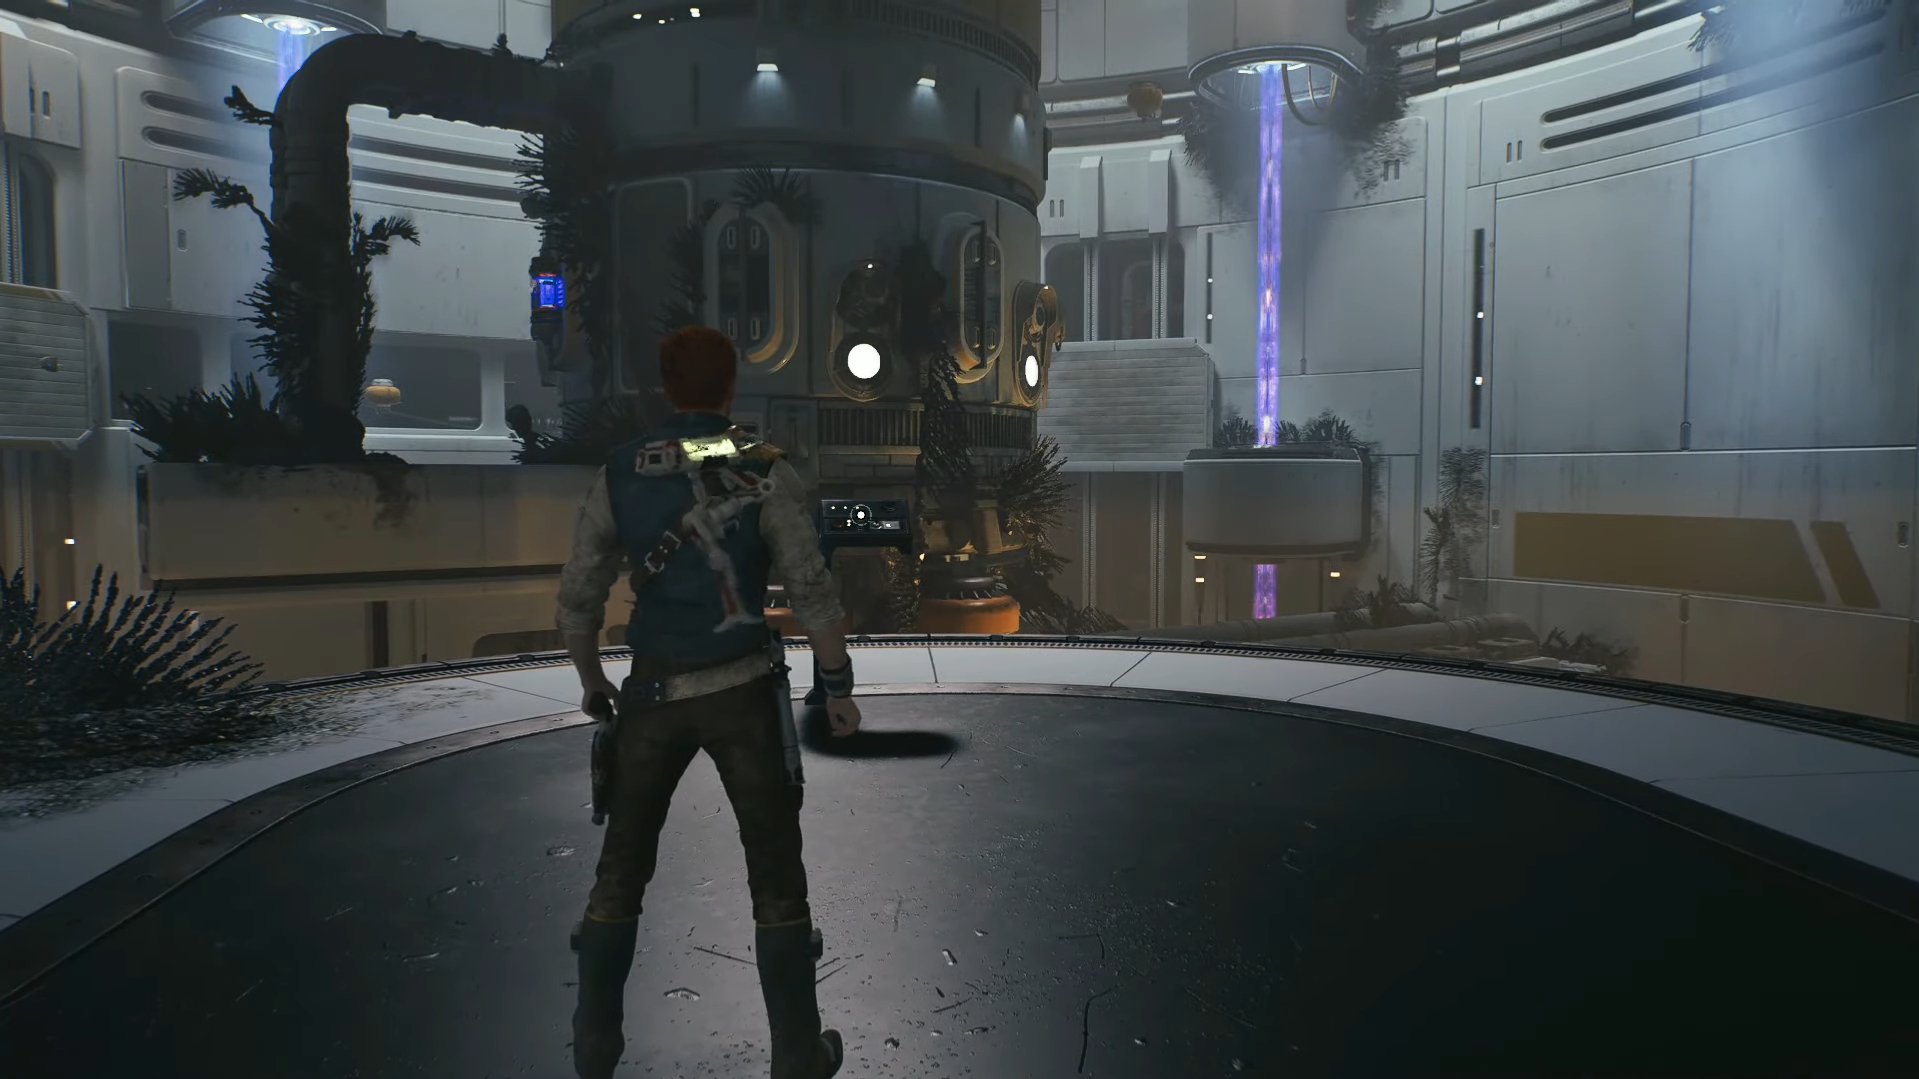
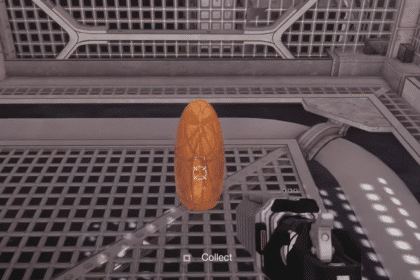
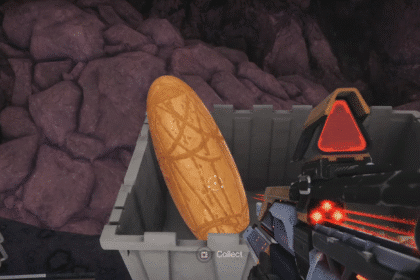
Now once you take in the view, go to the left down a ramp and jump into the window shown below. There’s some droids there so make sure to disassemble them with your lightsaber.

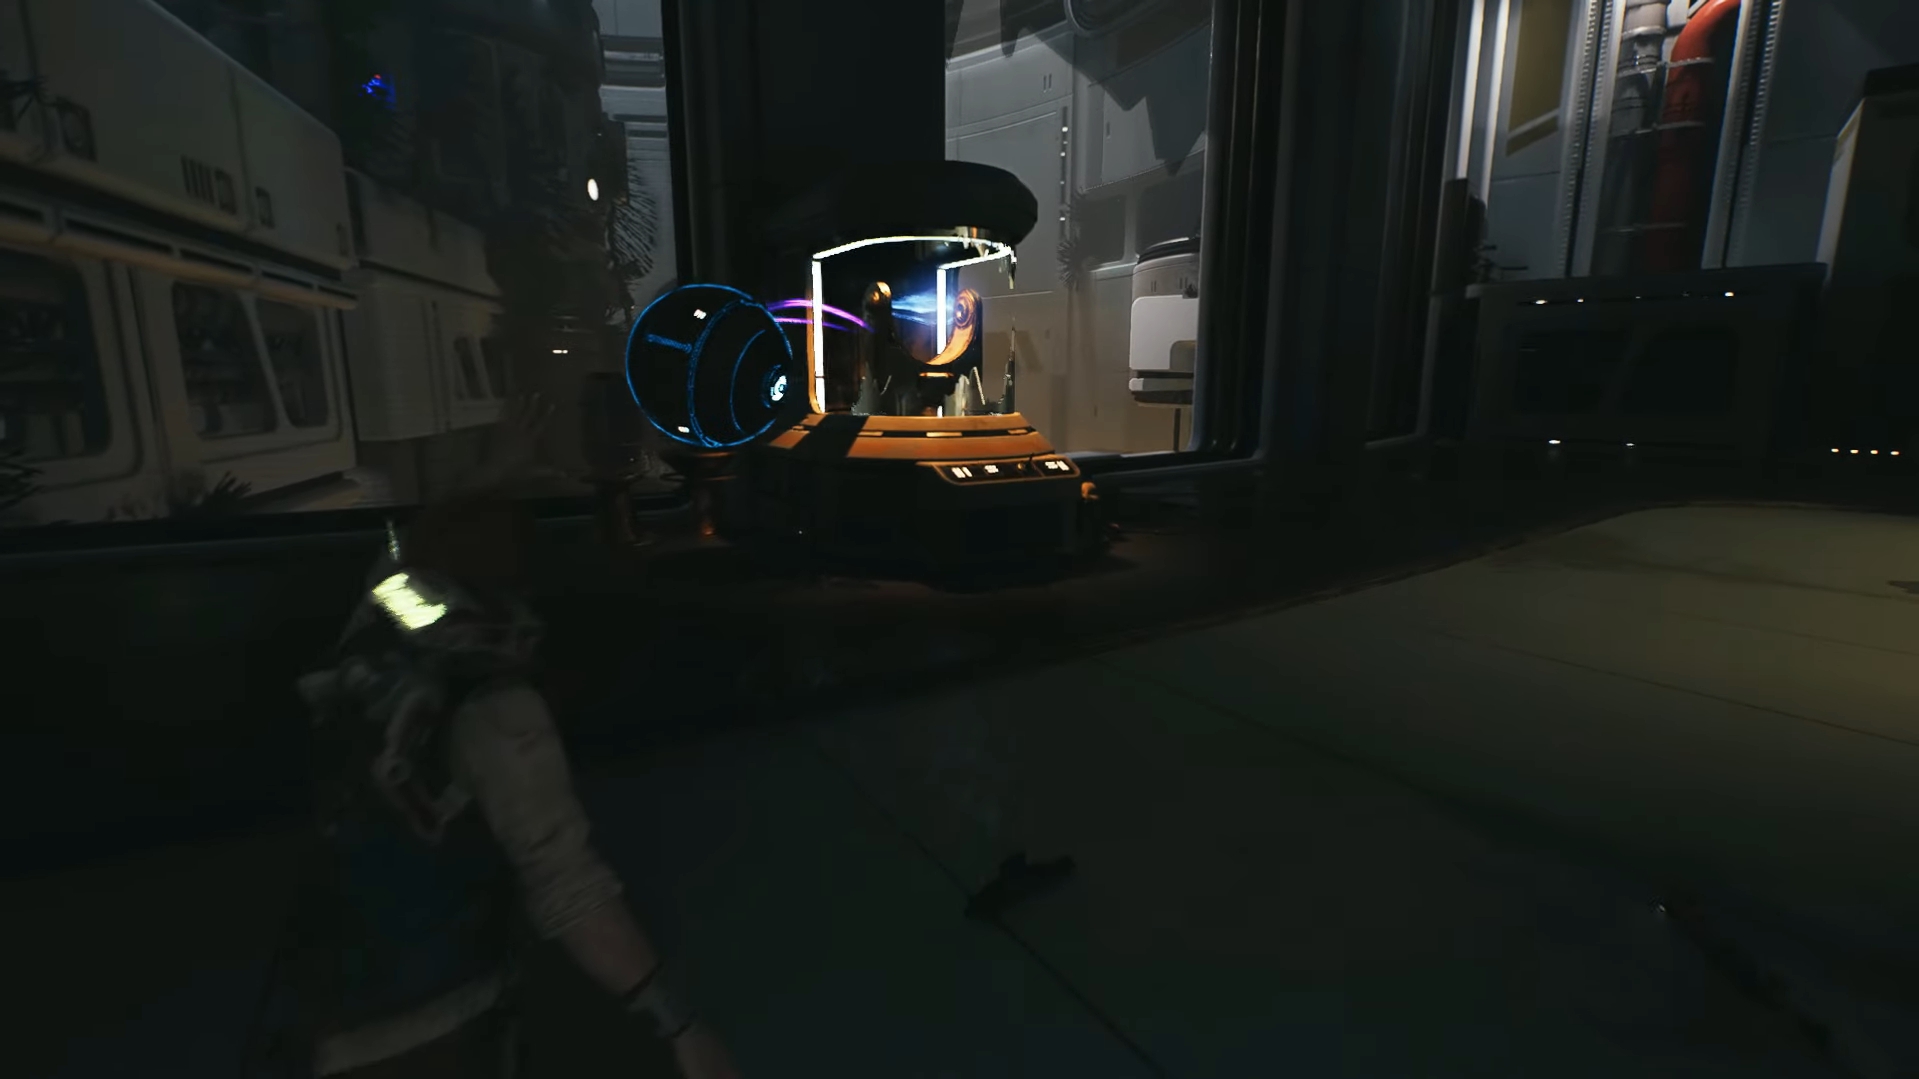
Inside that big window is a puzzle involving some orbs. In our guide on the orb puzzle in this area we show how to solve it so make sure to check it out!
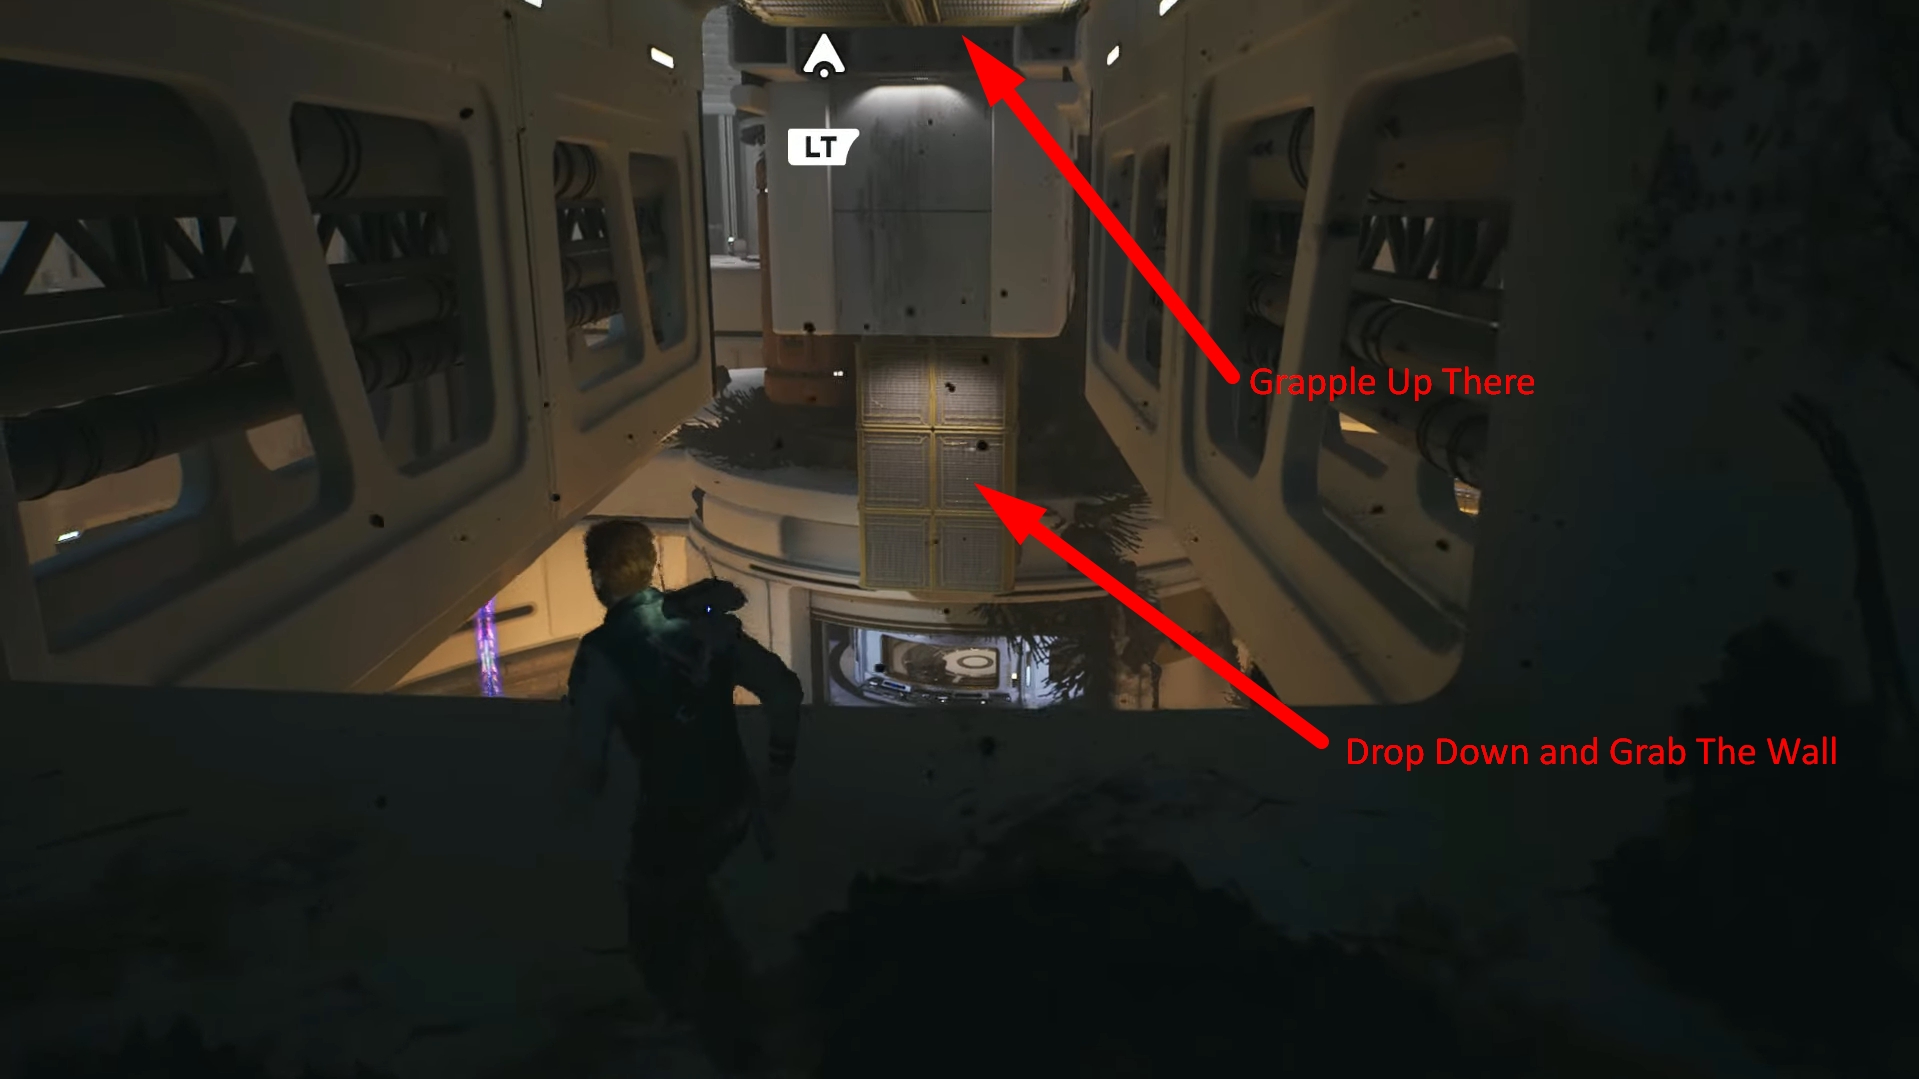
Once you’re done with the puzzle and destroyed the two obstacles, you’ll see the path shown on the image below. Grapple to the ceiling and go to the very back, then drop down and grab onto the wall.
You can then drop down to the walkway below and go forward to see a room with a smaller circular room inside. Head inside the smaller room and interact with the table to the right of the entrance, this will upgrade your Ascension cable.

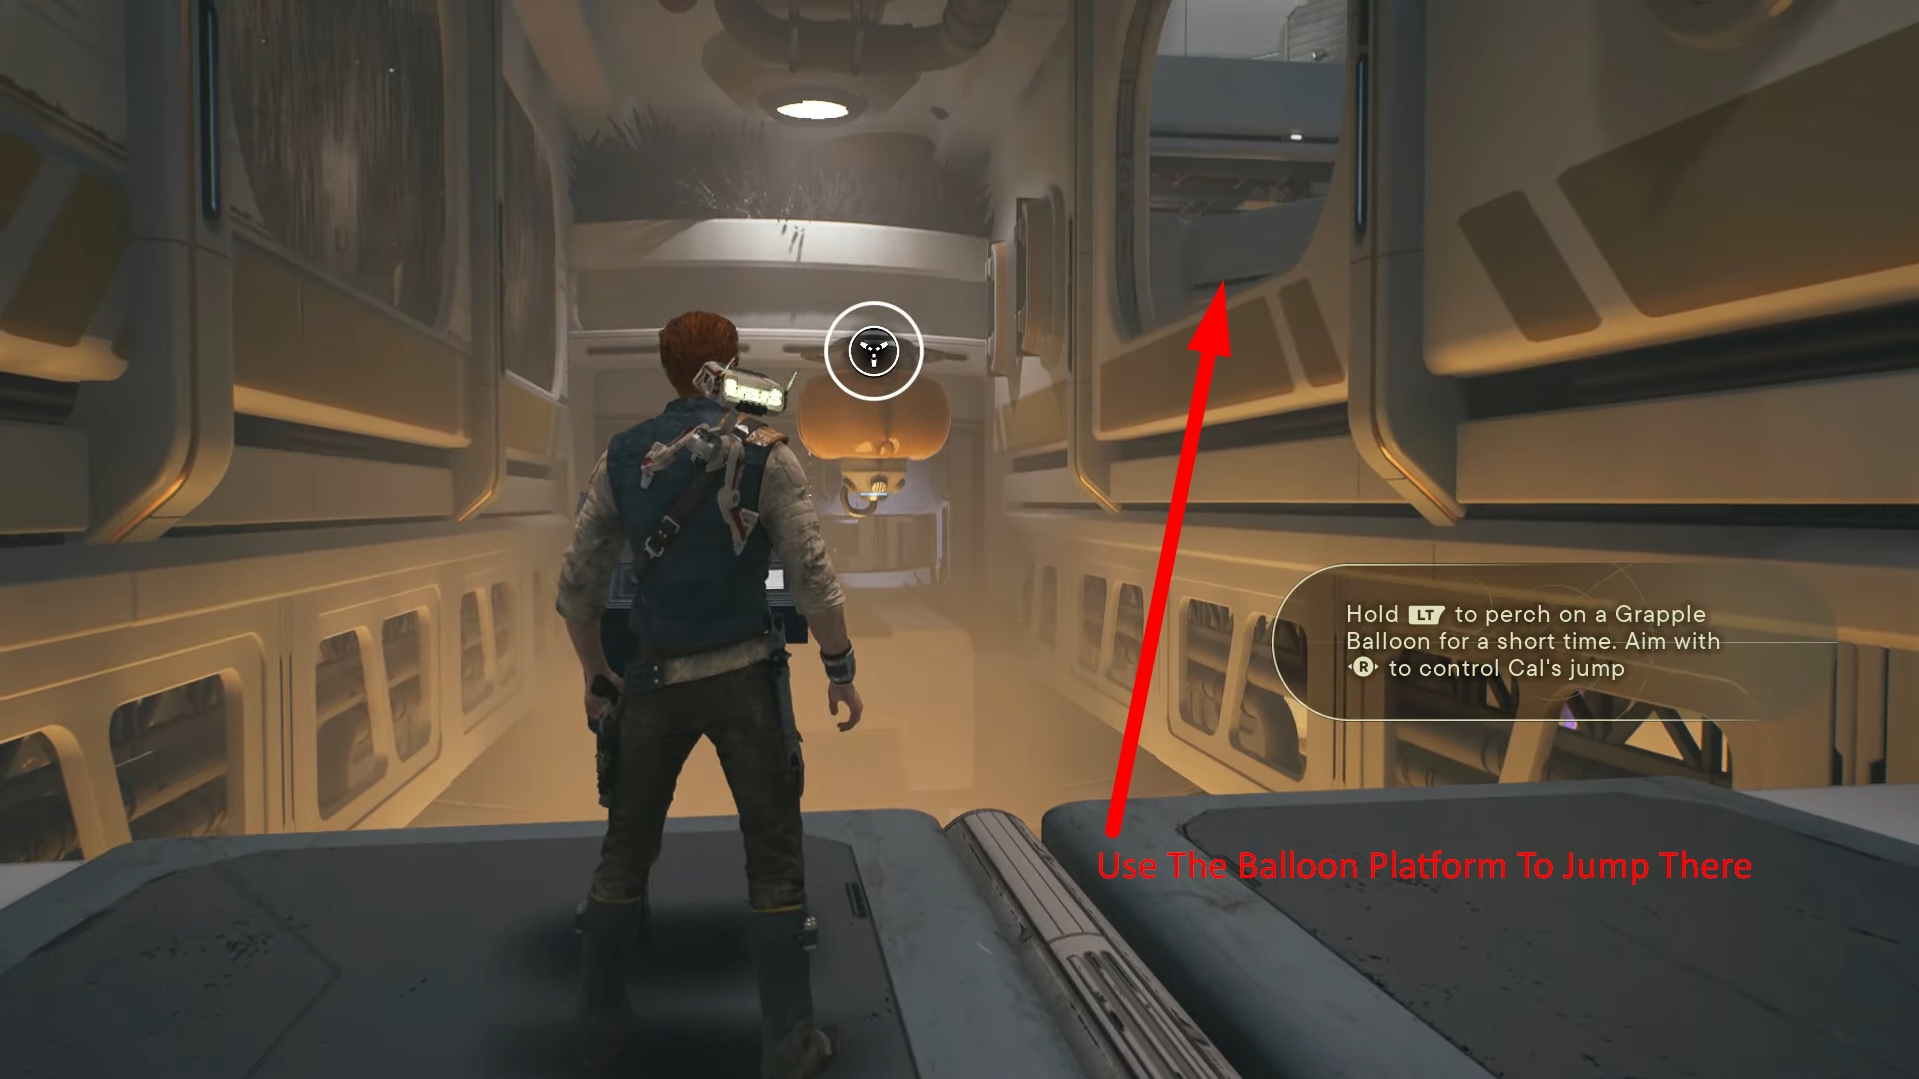
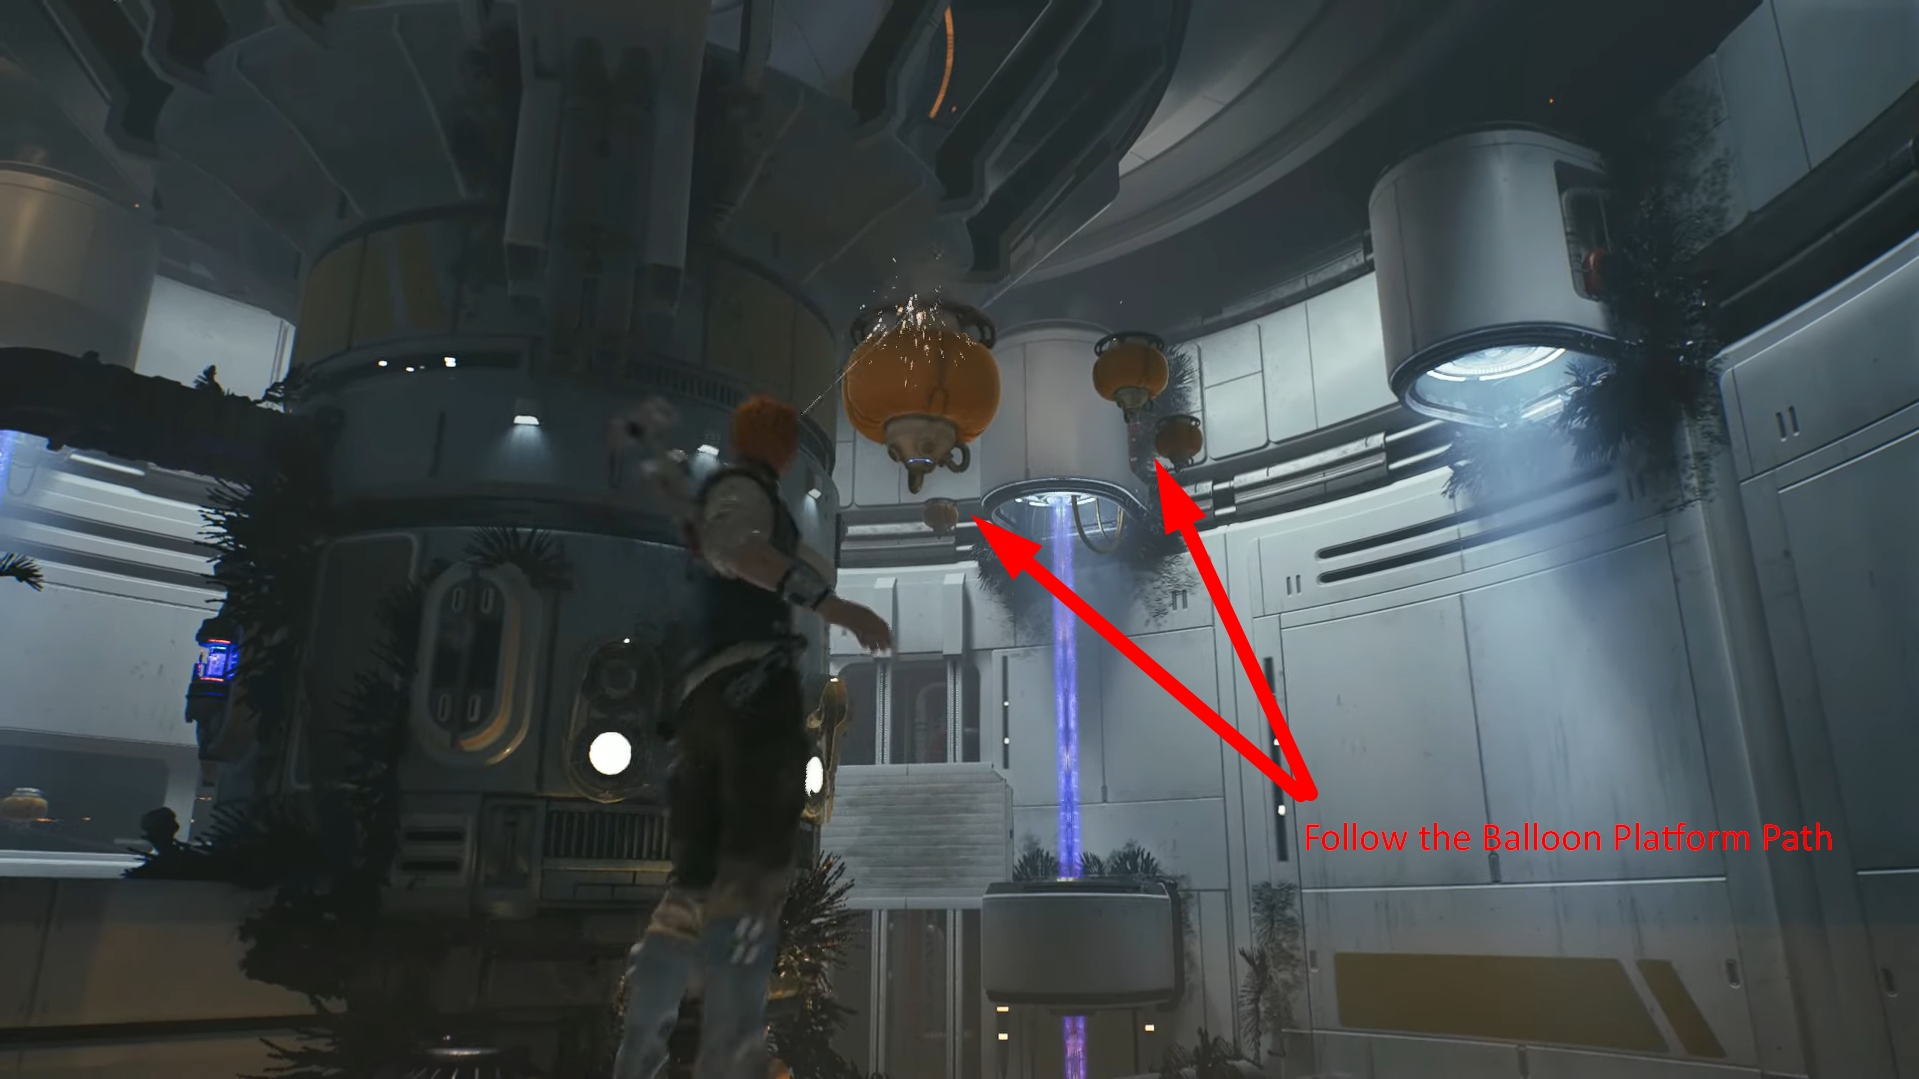
Now go out of the small room and go to the other side of the big room that leads to the first place you’ll use the upgrade. You can now grapple onto the balloon platforms in the area.
Grapple to the balloon and then jump to the other side where there’s a console. Activate the console on the other side.

This will open the door to the right, now grapple onto the balloon platform again and jump through that door, making sure to see where to go next.
Your goal is to jump into that wall shown below and climb up to the next platform.

Now walk to the other side of that platform where there’s another console you can interact with. This will summon a Balloon platform, you can then grapple to it and then jump to another balloon platform shown below.

Once on the second balloon platform just look at the way you came from and above and you’ll see a wall to jump onto and climb up.

Once up the wall you’ll then need to do some wall running and jumping, grapple onto another balloon platform and jump and grapple to another wall. Then you’ll need to wall run and jump to another balloon platform.
Make sure to not hit the beams along the way or you’ll die!

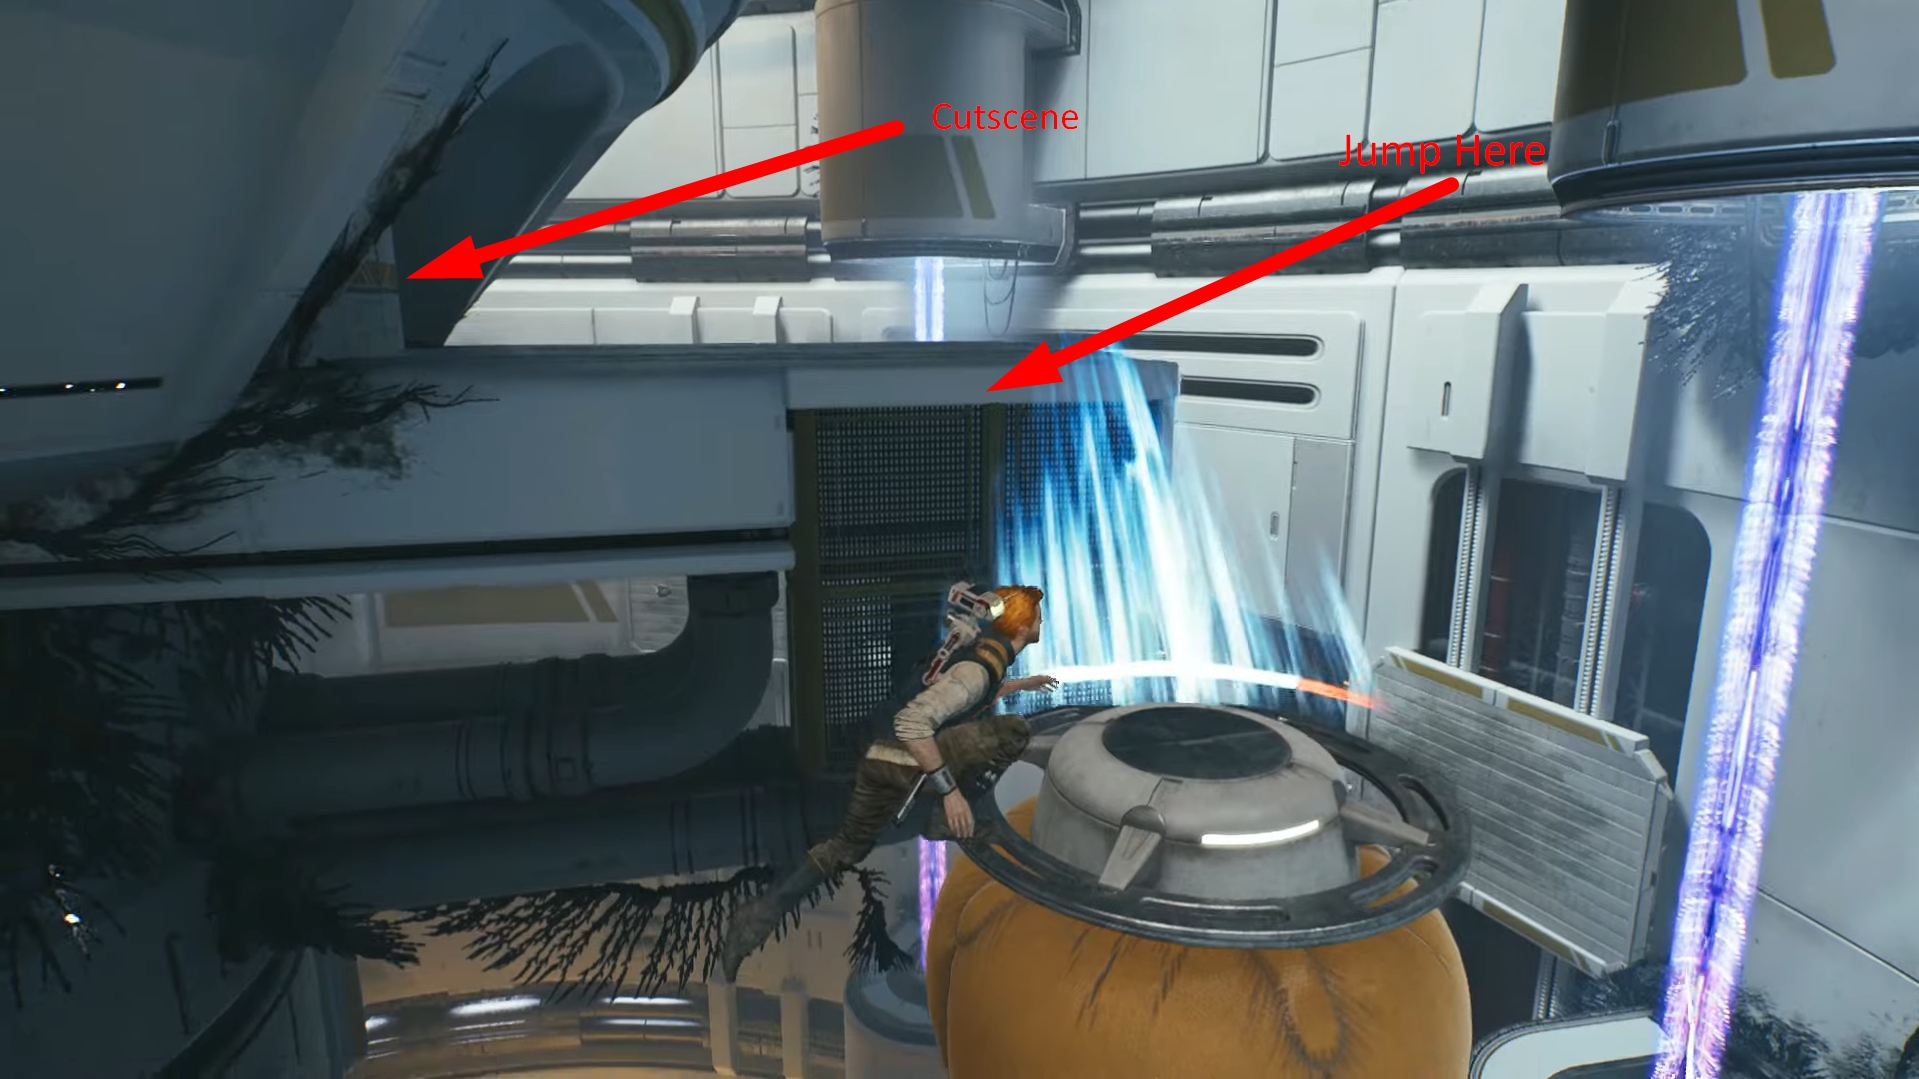
Below is an image that shows where to go next, after jumping onto the balloon platform jump again to a solid platform with droids on it. Clear the droids and grapple to the other balloon platform and jump back to where you started.

Once you’re back at the entrance there should be a console there. Use the console and it’ll spawn a bunch of balloon platforms that lead up. Grapple and jump following these platforms.
When you reach the last platform jump onto the wall shown below and climb up, then go to the left through a door to finally find Rayvis!
That’s how you pursue Rayvis in Star Wars Jedi Survivor. That was a long one but hopefully it was worth it!
ALSO READ: Star Wars Jedi: Survivor – Alignment Control Center: Location & Puzzle Solution