
Grounded 2 features a variety of collectables and items that you’ll come across as you progress through the game. In most cases, it is quite obvious where you’re supposed to use them. However, there are two keys that you’ll come across, with no clear indication of where you’re supposed to use them. If you’re trying to get these keys, or can’t figure out where to use them – we got you covered! In this guide, we’ll show you the all the locations of the keys and the chests that you use to open them. Without further delay, let’s get into it!
All Keys Locations
There are a total of 2 keys that you can find in Grounded 2 – during the early access period at least. This is the Sizzling Key and Frostbitten Key. You’ll more than likely getting these keys towards the late to end game stage, as they require prerequisites or are linked to late game objectives.
Both these keys can be used to open Buried Treasures, and we’ll be providing the locations for those too!
Keep in mind that we’ll be referring to late game spoilers. So, if you’d rather discover things about the story yourself, turn back now – at least for the Sizzling Key!
If you’re only interested specifically in finding the frostbitten key, our how to get and use frostbitten key guide has you sorted!
Key Location #1 – Sizzling Key
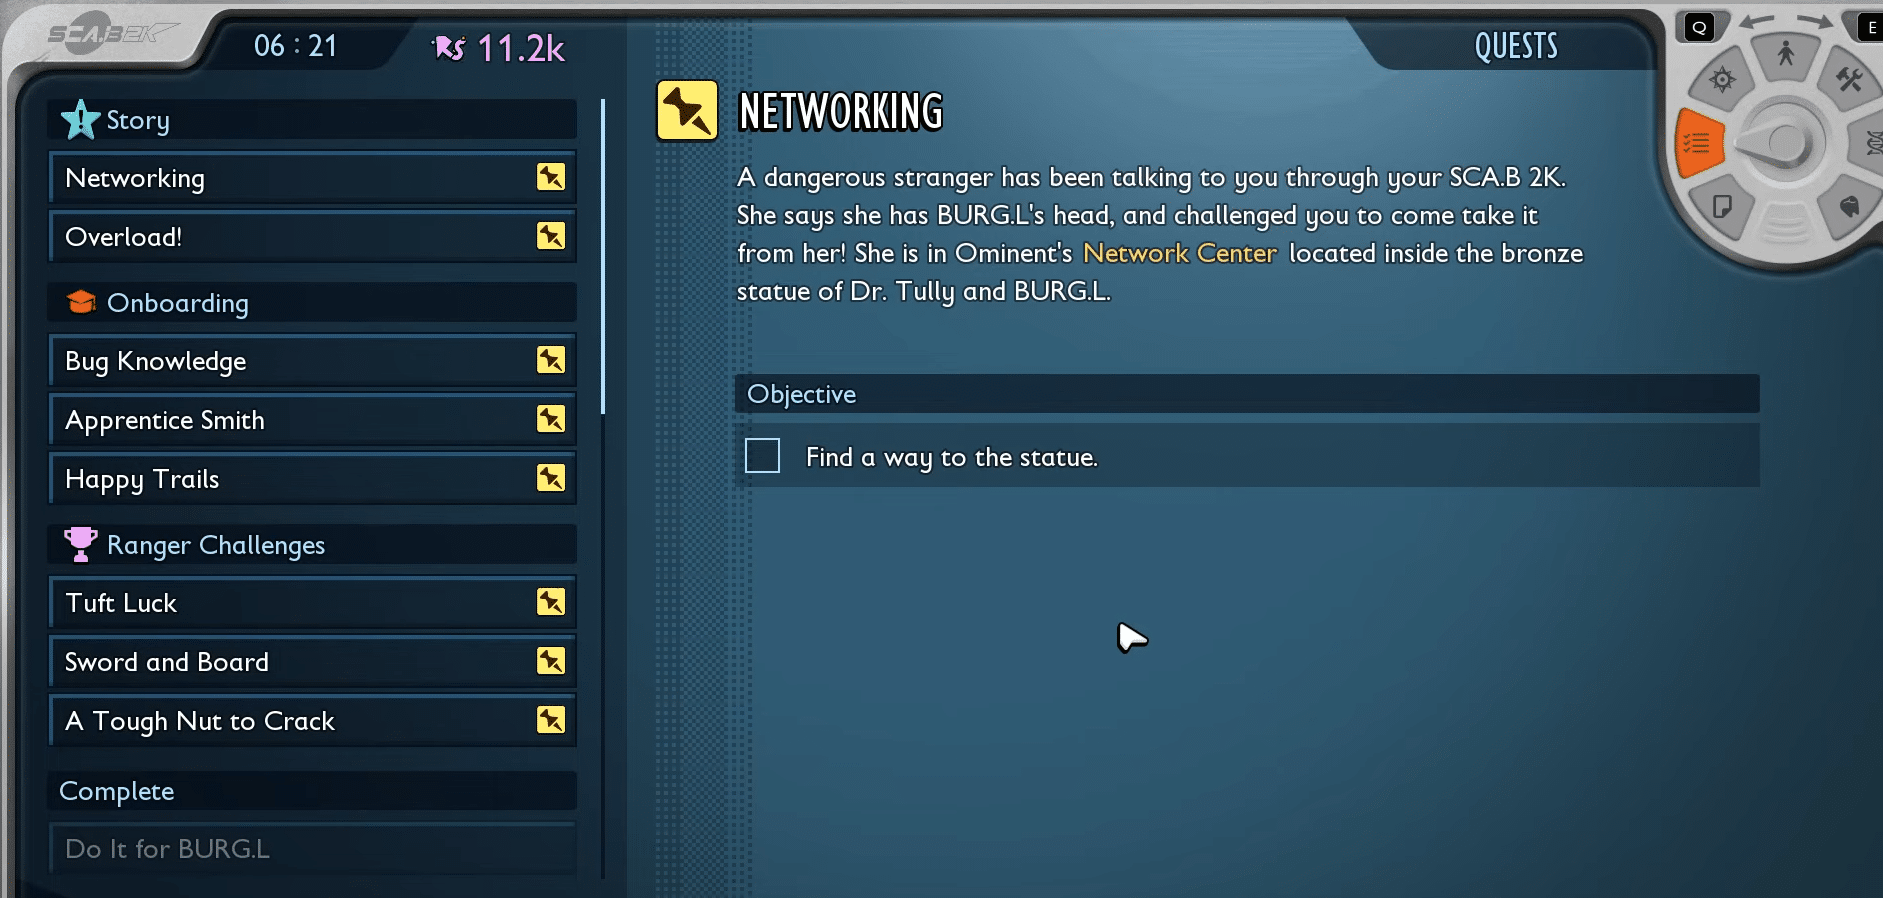
To obtain the Sizzling Key, you will need to complete the Networking story quest in Grounded 2. This is the final quest in the early access of the game. So, you will need to progress all the way to the end.
Once you’re set to head to the Statue region, you’ll know that you’re on the journey to key the Sizzling Key.

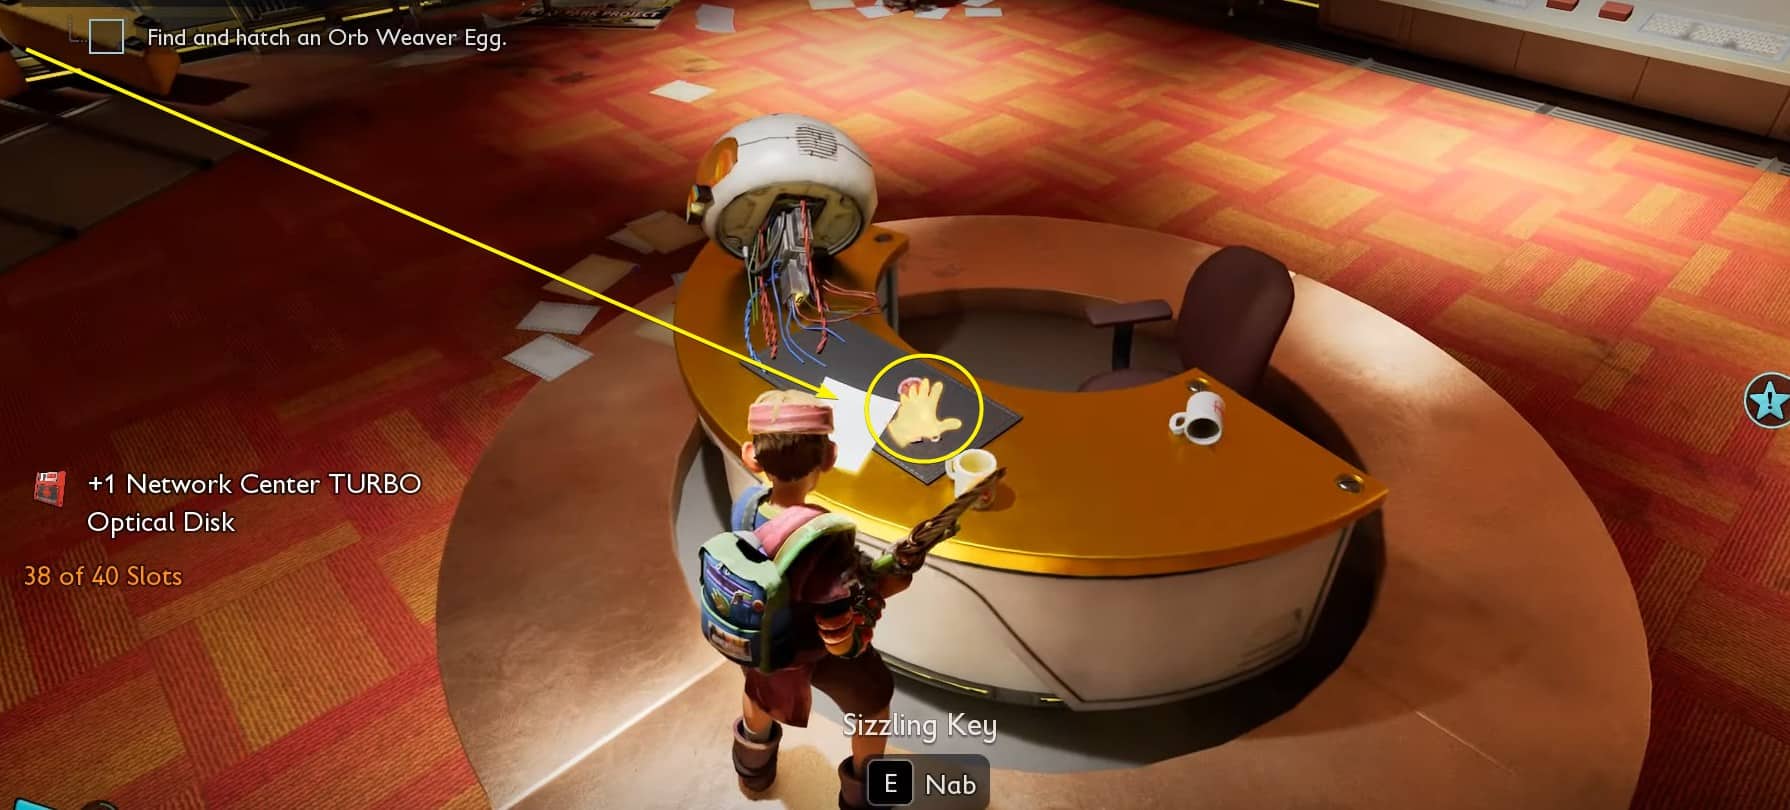
As part of this quest, you will need to defeat two bosses before you get access to an office. If you’re having trouble here, our masked stranger boss guide has you covered!
Once you have access to the office, look on the desk. Next to the Optical Disk and documents, you will also find the Sizzling Key. Make sure to pick it up before proceeding.
Where To Use Sizzling Key
Now that you have the Sizzling Key, you’ll be heading to the Pine Hill region located in the top left corner of the map. You’ll be using it to open a Buried Treasure in a secret location.
Navigate To Buried Treasure Location
To get to the Buried Treasure, you’ll be heading to a secret corner in the Pine Hill region. You’ll want to start from the spot indicated below on the map.
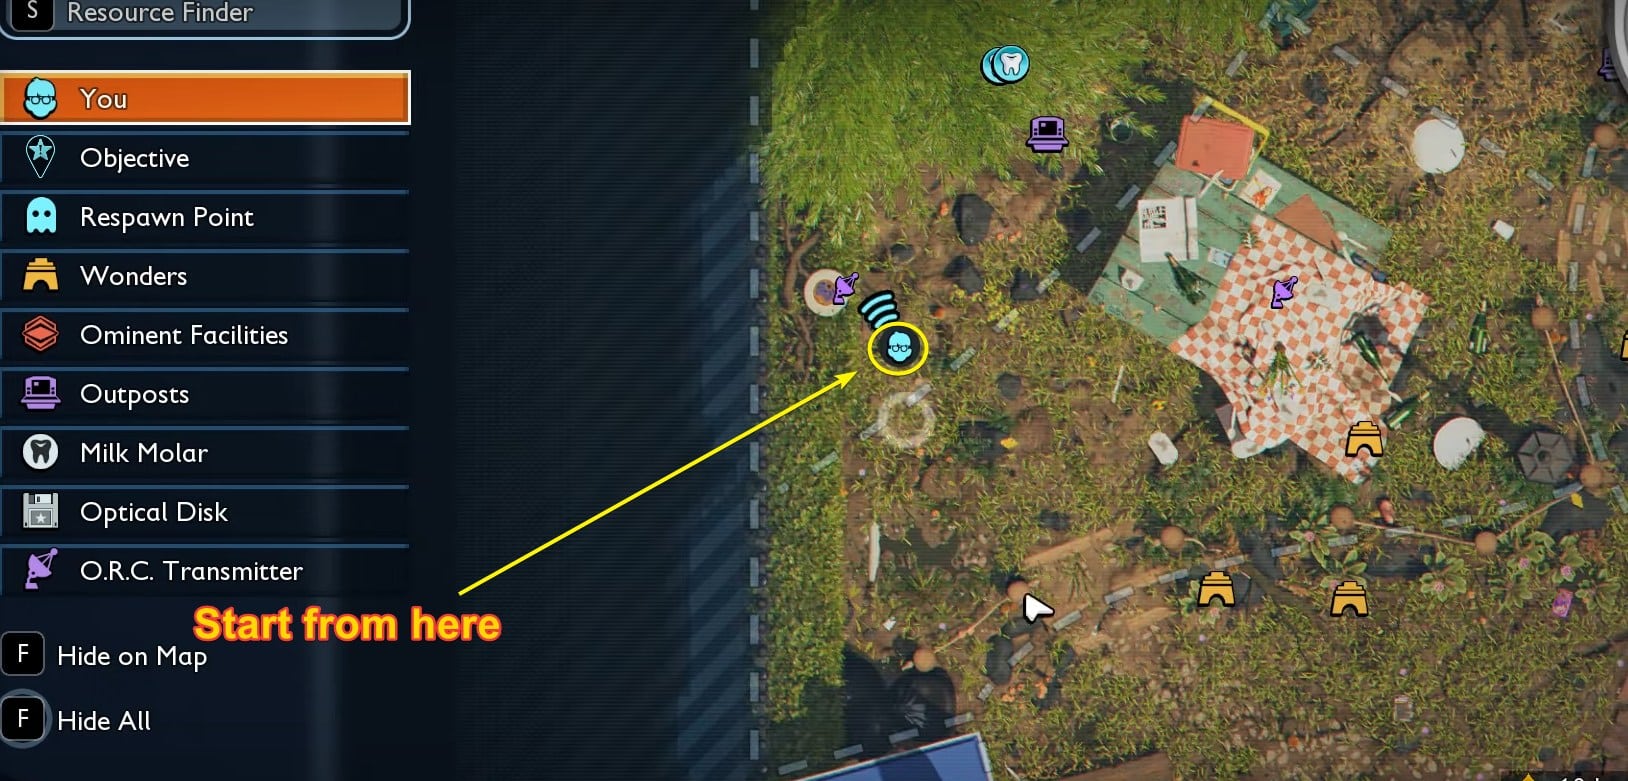
This is because this spot has a dead root blocking the path and you’ll need to break it. Once broken, follow the branch ahead as it forms a natural path that you can follow towards the buried treasure location.
Keep going ahead until you come across a smooth rock. At the end, towards the corner, you’ll find some pop caps. Drop down into the hole and look underneath the pop cap and you’ll see something shining.
Dig Buried Treasure (Opens With Sizzling Key)
Next, all you need to do is dig out the Buried Treasure from underneath the pop cap. You’ll need to use a Tier 2 Omni-Shovel – which you’ll more than likely have at this stage.
Once dug up, use the Sizzling Key to open it.
Doing so will give you x2 Spicy Globs, which is a unique material that you can use to craft the Spicy Coaltana. You’ll already have this recipe after completing the final quest, and getting the Wolf Spider Chunks.
Be sure to craft it as this an end game level weapon – that will help you against most enemies in the game. It can be used to inflict the Sizzling effect.
Below is the exact location of the Buried Treasure, for reference, in case you get lost navigating the Pine Hill region. After all, it has a lot of levels.

Key Location #2 – Frostbitten Key
To get to the Frostbitten Key, you will need to go to the Ice Cream Cart region – which is available fairly early on. However, there are certain prerequisites you’ll need before you go here.
We also recommend being prepared as the enemies here will be quite difficult to deal with.
Prerequisite: Wear Fuzzy Gear Set
Starting off, before you go anywhere, you’ll want to have the entire Fuzzy Gear Set. This is because this set provides you with Chill Reduction, which significantly reduces the rate of Chill.
Chill is an effect that you’ll face in the Ice Cream Cart – and it can easily kill you if you’re not prepared. So, be sure to have it before you brave the icy depths and equip it.

Head To Frostbitten Key Location
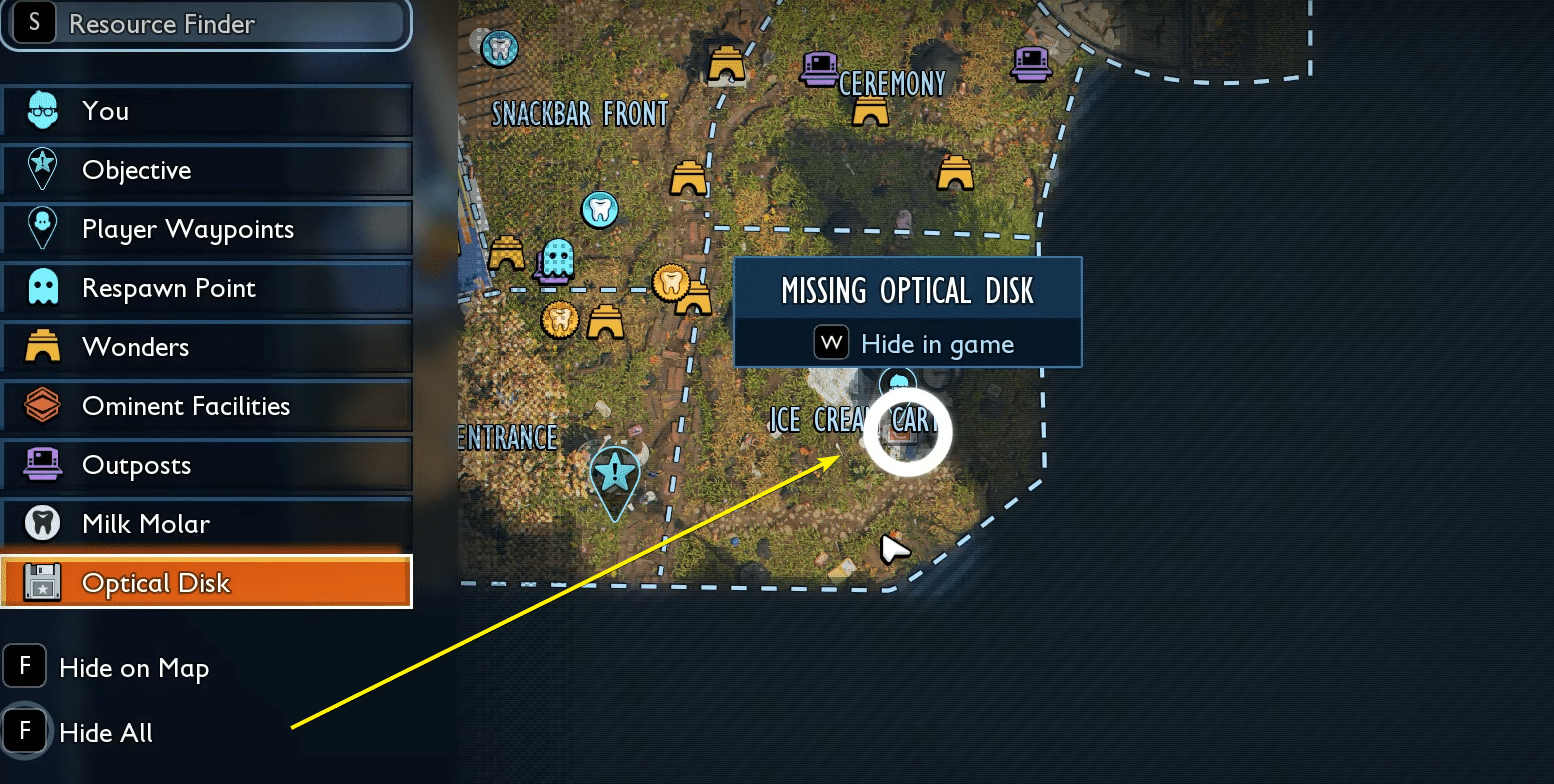
Once you have the Fuzzy Gear Set equipped, make your way to the Ice Cream Cart region. This can be found in the bottom right corner of the Grounded 2 map.
Specifically, you’ll want to go for the Missing Optical Disk as the Frostbitten Key can be found right next to it.
Once you’re ready, it’s time to hit the ground running and make your way to the depths of the Ice Cream Cart. The moment you hit the ice, the Chilling effect will start.
So, you want to hurry and make your way to the Ice Cream Cone that acts like a tunnel.

From here, you want to continue going ahead and navigate deeper inside. Here, you’ll come across a bunch of Northern Scorpion enemies so be careful. Near a fallen ice cream cone, you should see a faint pink glow.
This is the Missing Optical Disk that can be found right next to a dead body. The Frostbitten Key will be right next to the body as well – so be sure to pick up all the loot here.
If you’re trying to get more of these collectables, you’ll want to check out our all missing optical disk locations guide.


Where To Use Frostbitten Key
Now that you have the Frostbitten Key, you’ll be navigating straight from the spot where you found it from. There are a few key steps you’ll need to follow so you can get to the Buried Treasure that opens it.
Navigate To Frozen Fan Blades
After you have the Frostbitten Key, there is still work to be done. You’ll want to navigate to the higher levels of the Ice Cream Cart. The easiest way to get here is by going left of where you entered from when going to the dead body.
Either way, once you get to the top, you should see a copper pipe that forms a bridge into a lit opening. This opening leads to the Frozen Fan Blades. Follow this pipe all the way to the end and enter inside.
Bust All Icicles
Once you reach the Frozen Fan Blades, you will see that icicles are blocking the mechanism. You will need to break all the icicles that are holding the fan in place.
There are x3 icicles in total that you will need to bust.

Once the icicles are broken, the fan blades will move a bit. Go to the other side of the mechanism and you’ll see that an opening has revealed. Enter inside and navigate through the tunnel all the way to the end.
You can also find a Mega Milk Molar on the side if you’re interested in it.
Dig Buried Treasure (Opens With Frostbitten Key)
After you get out of the tunnel, you’ll come across the Frozen Sickles. Before you pull them out, however, be careful as doing so will spawn a variety of Northern Scorpion enemies.
Once you clear the enemies, you will also unlock the secrete of the frozen sickles. This will give you the recipe that will allow you to build this Legendary Weapon. It allows you to inflict Chilling on other enemies – freezing them.

Once the enemies are cleared, go underneath the nearby Banana Peel. Here, you should see the prompt for Buried Treasure on the ground. You can dig it up but keep in mind that you’ll need the Tier 2 Omni-Shovel to be able to do it.
After you dig it up, you can open the locked chest using the Frostbitten Key. This will give you x2 Mint Globs which are a unique material you can use to craft duplicate Frozen Sickles.
It is certainly worth it as the Frozen Sickles are one of the best weapons in Grounded 2.
Wrap Up
That’s everything you need to know about getting both keys in Grounded 2. Both of these keys allow you to get rare unique materials that you can use to craft duplicate weapons. These weapons are the best in the game, so you’ll definitely want to get them – especially since they complement each other. Both of them will allow you to deal different effects, which will help you exploit insect weaknesses. Since we’ll be getting more content with future updates, these weapons will certainly come in handy!


