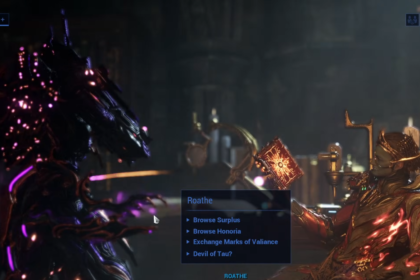
We got another brand new Abyss 12 in Genshin Impact. And you know what that means…
Yep, another cycle of chaos, monster spam, and questionable design decisions.
This Spiral Abyss Floor 12 (Version 6.12 / Luna 3) is honestly bonkers, mainly because HoYoverse went absolutely wild with enemy density. We’re talking 41 enemies in a single chamber. That said, it’s actually a really fun Abyss if you bring the right teams, and surprisingly manageable even with four-star characters.
In this guide, I’ll break down: the best teams for each half, why Pyro and Plunge absolutely dominate this cycle, what mechanics actually matter (and which ones you can ignore), and why this Abyss is secretly easier than it looks.
Abyss Buffs and Why They Matter

This Abyss lives and dies by its buffs, and if you play into them, everything suddenly makes sense. Floor 12 revolves around the Ley Line Discorder:
For the first half, off-field characters gain a massive 75% Pyro damage bonus. This works incredibly well for characters like Durin and Mavuika, but it does not work for Xiangling since she snapshots her Burst. That’s important to keep in mind if you’re wondering why her damage doesn’t feel as boosted as expected.
The second half gives a flat 75% bonus to Plunging Attack damage. This single buff completely defines the meta for this Abyss. If you’re plunging, you’re winning. If you’re not, you’re making things harder than they need to be.
On top of that, the Blessing of the Abyssal Moon triggers a shockwave every two seconds when Swirl is activated. In chambers with multiple waves, this adds a surprising amount of free damage and heavily rewards Anemo units.
The short version is simple: Pyro, AoE, grouping, and plunge attacks are the winning formula.
Best Teams for the First Half – AoE Chaos

The first half is pure enemy spam. If your team lacks AoE or grouping, you’ll feel it immediately.
Even without perfect artifacts or Viridescent Venerer, this team handles robot dogs, Cryo Cicin Mages, and absurdly high enemy HP pools with no real issues. If there’s one lesson from this half, it’s this: bring grouping, bring Pyro, and bring AoE.
If you have premium options, this half becomes even more comfortable. Venti, Kazuha, and Sucrose are absurdly strong thanks to Swirl shockwaves. Xiao and Wanderer thrive in the density-heavy chambers, and characters like Neuvillette or Childe scale extremely well when enemies refuse to stop spawning.
One of the strongest budget-friendly teams here is Ifa, Faruzan, Bennett, and Xiangling.
Faruzan

Faruzan at C6 is the real MVP, providing constant grouping that trivializes massive waves of enemies. She’s on a four-piece Tenacity of the Millelith, which buffs team damage and helps boost both Xiangling and Ifa. The extra grouping from C6 is exactly why Faruzan is so insanely strong in this Abyss. She also significantly boosts Ifa’s damage.
Ifa

Ifa, running a DPS-oriented build with The Widsith and a four-piece Scroll of the Hero of Cinder City, brings strong AoE damage and even more grouping than you’d expect. He’s at Constellation 6, with talents at 6/12/12.
Bennett

Next up is Bennett. My Bennett is level 100, so I’m using the Sapwood Blade instead of a level 90 Alley Flash. You do lose a bit of base attack, but it’s still perfectly fine. He’s on a four-piece Noblesse Oblige, built primarily for Energy Recharge, and he’s also Constellation 6.
Xiangling

After that, we have Xiangling, built with a very standard, cookie-cutter setup. No cookies involved, just cookie cutters. She’s on four-piece Emblem of Severed Fate, running the usual ATK%, Pyro, Crit build at Constellation 6, with her talents shown here as well.
Abyss 12-1-1 – Why AoE Is Mandatory

This chamber is the main reason people panic when they see Floor 12. You’re dealing with multiple waves of robot dogs, multiple waves of Cryo Cicin Mages, and then a single chunky enemy with roughly 1.2 million HP at the end.
The key mechanic here is the Cryo Cicin Mage shields. Their durability depends on how many flies are alive. Kill the flies and the shields basically fall apart. Pyro makes this trivial, and grouping saves an absurd amount of time. Without AoE, this chamber feels endless. With it, the entire thing collapses quickly.
Best Teams for the Second Half – Plunge Meta Is Real

The second half is where plunge teams completely take over.
One of the strongest overall teams here is Gaming, Fischl, Iansan, and Chevreuse. The plunge damage buff turns Gaming into a monster, and he directly counters the Furnace Shell Mountain Weasels. Fischl adds constant off-field damage, Chevreuse enables Overload resistance shred, and Iansan keeps the team fueled and buffed.
Even with slightly imperfect stats, this team demolishes the second half.
Other plunge-focused teams perform just as well. Xiao, Veresa, Shenhe plunge variants, and similar comps all thrive here. Plunging attacks remove massive chunks of enemy armor, deal bonus damage once that armor breaks, and counter multiple boss mechanics at the same time. This half of the Abyss is basically begging you to plunge.
Gaming

Gaming He’s using Fruitful Hook with a four-piece set, Long Night’s Oath in my case, since I don’t have a good Crimson Witch set. He’s Constellation 6, and yes, his talents are crowned.
Iansan
Next up is Iansan, built with slightly lower attack since she’s level 100. She’s using Favonius Lance and a four-piece Scroll of the Hero of Cinder City at Constellation 6. High crit rate, solid Energy Recharge, very consistent.
Fischl

Then we have Fischl, built more toward DPS with The Stringless and a four-piece Golden Troupe, letting her contribute a surprising amount of damage.
Chevreuse
Finally, there’s Chevreuse… and yeah, that crit rate is absolutely abysmal. I didn’t even realize how bad it was until now. She’s running a triple HP build with Songs of Days Past.
Abyss 12-1-2 – Furnace Shell Mountain Weasels

These enemies are pure pain if you don’t understand the gimmick. They burrow underground and create an armor ball that takes reduced damage from normal attacks. Non-plunge damage barely scratches it.
Plunge attacks, on the other hand, remove 25% of the armor per hit. Once the armor breaks, they take increased damage and die quickly. They do have 50% Pyro resistance, but between plunge buffs and Overload shred, it barely matters.
If you’re plunging, this chamber is easy. If you’re not, it’s miserable.
Abyss 12-2 and 12-3 – Boss Breakdown

In 12-2-1, the samurai enemies must be killed close together or the survivor will heal. After that, you deal with a Ruin Guard and a Ruin Drake, both of which resist Physical damage. It’s straightforward as long as you don’t let the samurai heal.
12-2-2 features Hydro-infused enemies that are completely immune to Hydro damage and can’t be Frozen properly. Overload works extremely well here, and plunge DPS continues to dominate.

The first boss of 12-3 is the Mechanized Fortress. It starts with a ridiculous 150% resistance until you apply enough Pyro to enter its burn state, dropping resistances to 50%. After that, it enters a Cryo shield phase. Breaking that shield removes 30% of its current HP and leaves it vulnerable. Burning reactions fill the Pyro gauge very quickly, making characters like Xiangling and Durin excellent here.

The final boss, the Arithmetic Enhancer Mek, comes with a thick Geo shield. Blunt damage and plunge attacks break it quickly, with claymores being the most effective. Zhongli trivializes the fight, but even without him, there’s plenty of time as long as you avoid tanking attacks.
Day 1 Speedrun Notes

For speedruns, Nefer completely dominates multi-wave content thanks to fast hits and strong AoE. Mavuika deletes bosses once shields are down, and resistance shred makes a massive difference throughout the run. Zhongli remains one of the safest and fastest ways to handle shield-heavy mechanics.
Not fully optimized, but still very clean clears.
Final Tips and Wrap-Up
If you want the short version, here’s what actually matters. Bring Pyro for shields and bosses, bring grouping for 12-1-1, and bring plunge teams for the entire second half. Avoid Hydro DPS in the second half due to immunity.
Overall, this Abyss 12 felt easier than previous cycles because four-star units counter the mechanics perfectly, plunge damage is overtuned, and enemy density heavily favors AoE comps.
Check the comments to see what others cleared with, and feel free to share your own runs. Up next, I recommend that you check out our guide on All Bounty Token Locations in Genshin Impact Nod-Krai 6.0 if you still haven’t. You wouldn’t want to miss out on any content and rewards now, do you?