With the new Edge of Fate DLC expansion, fans of the long running game now have even more content to enjoy. You can now play new Raids, new missions and even get access to collectibles in Destiny 2. One type of collectibles that you can find are Urns, and you’ll often get a notification when you’re near them. Getting these collectibles can give you dimension materials and Fated Ciphers as rewards. However, most of these urn locations are hidden behind puzzles. In this guide, we’ll show you the locations of all the urns in the Outer Steppes region. Without further delay, let’s get into it!
All Outer Steppes Urn Locations Guide
There are 6 urn locations that you can find in the Outer Steppes region of Destiny 2 – with 3 in The Stacks and the other 3 in the Outer Wastes. Urns are secret collectibles that give you Fated Ciphers and dimension materials.
In this guide, we’ll look at the locations alongside how you can solve the puzzles for them. If you want to get more urns, you can check out our all central academy urn locations guide!
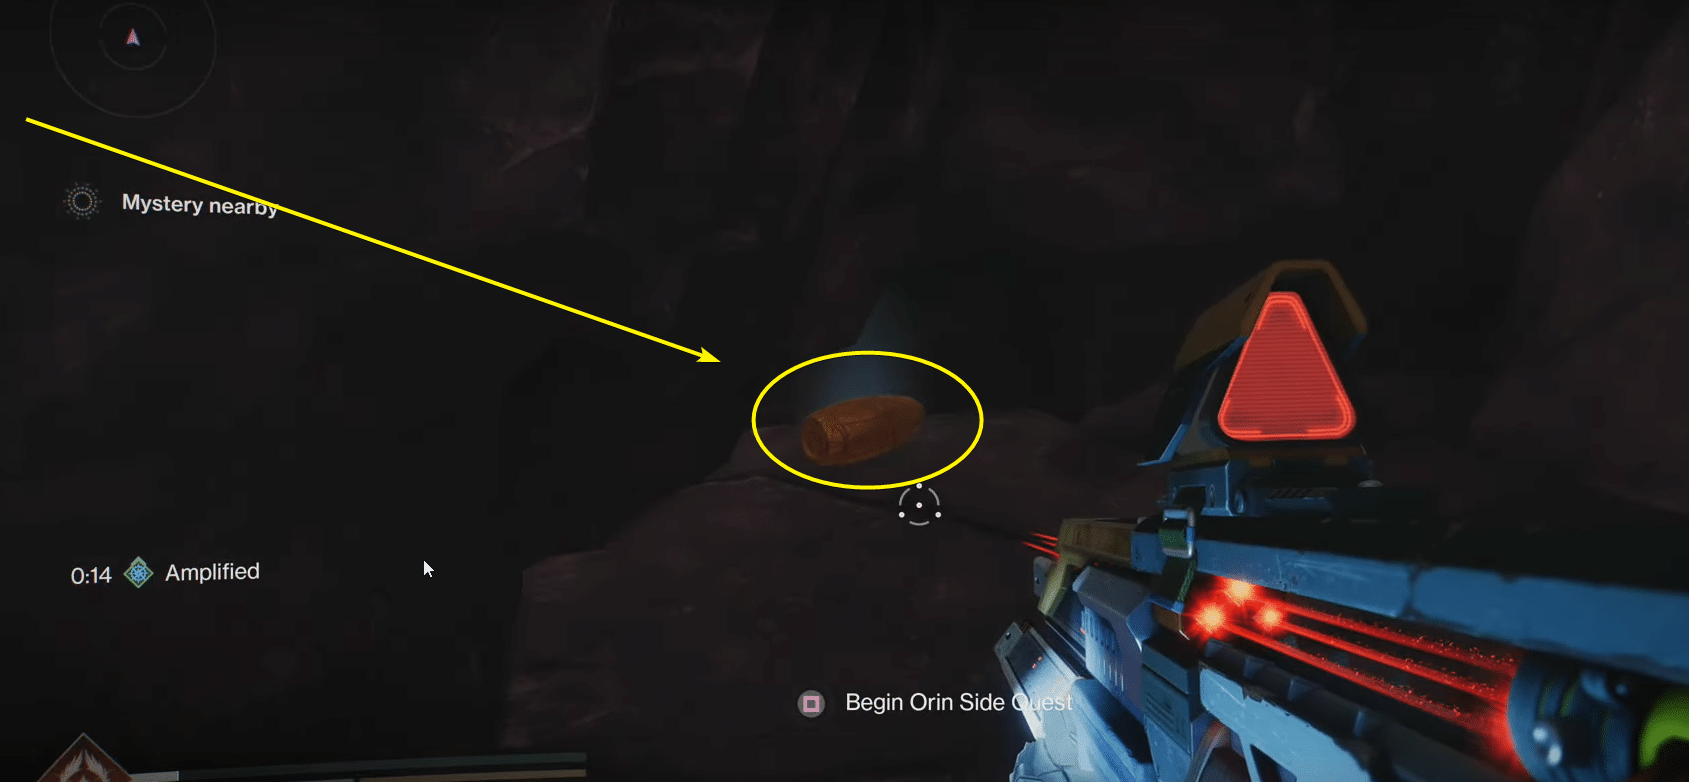
Urn Location #1 – The Stacks
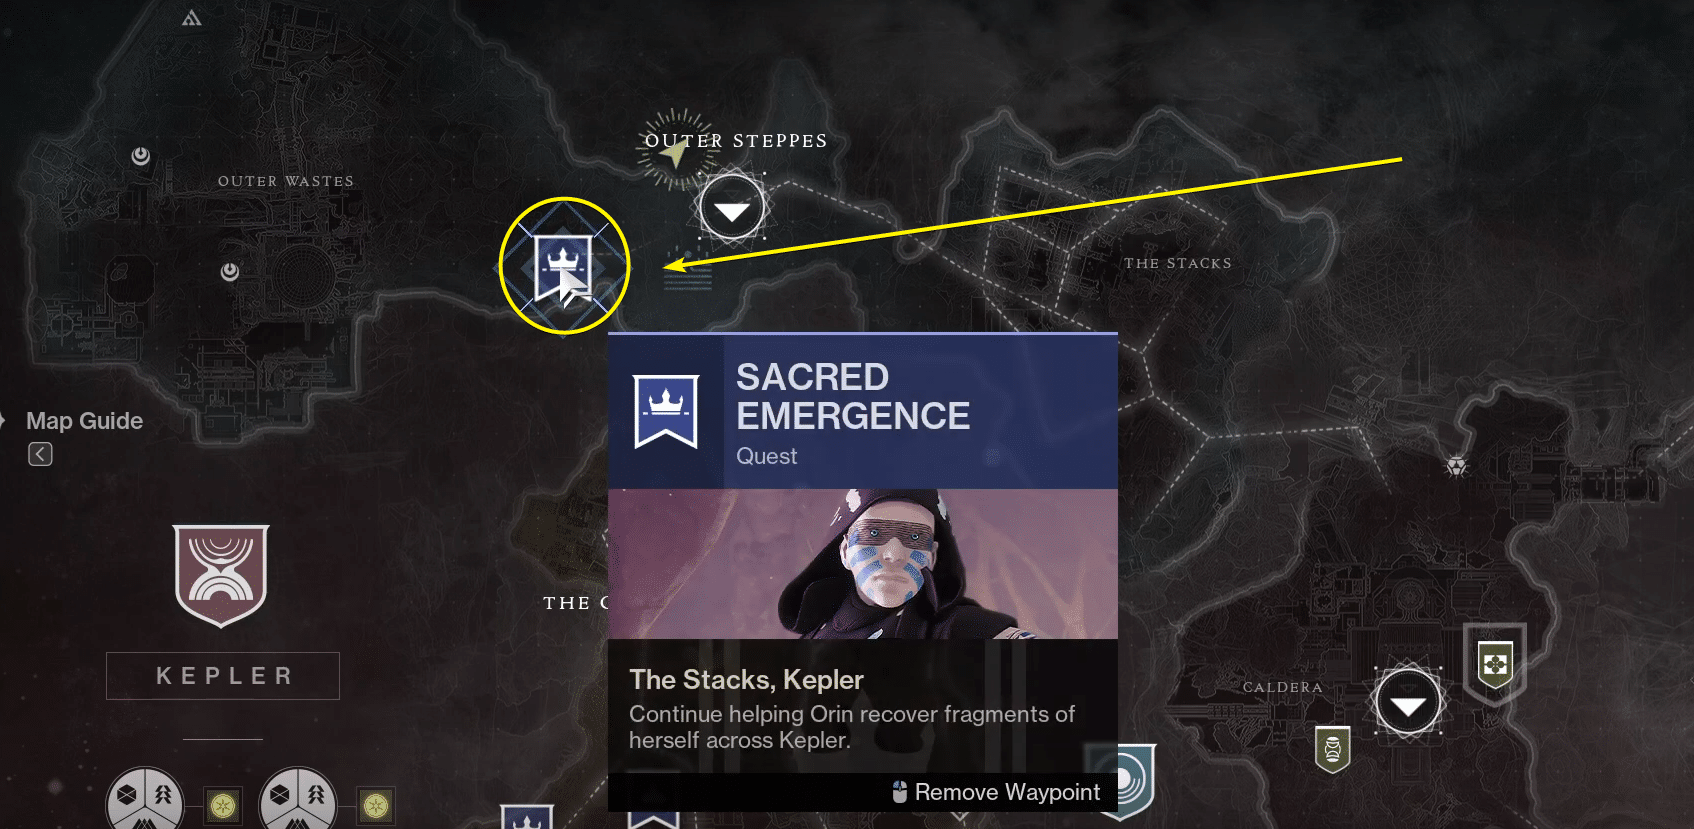
For the first location, you want to start out near the The Stacks patrol marker. From here, you want to get to the Sacred Emergence quest which is in a secret hidden area.
To get there, you need to follow the following steps:
- Transform into your Matterspark form
- Carefully jump down the cliff edge until you find a pipe opening
- Navigate to the other end of the pipe
- Grab the urn at the back of the cave near the Orin side quest.

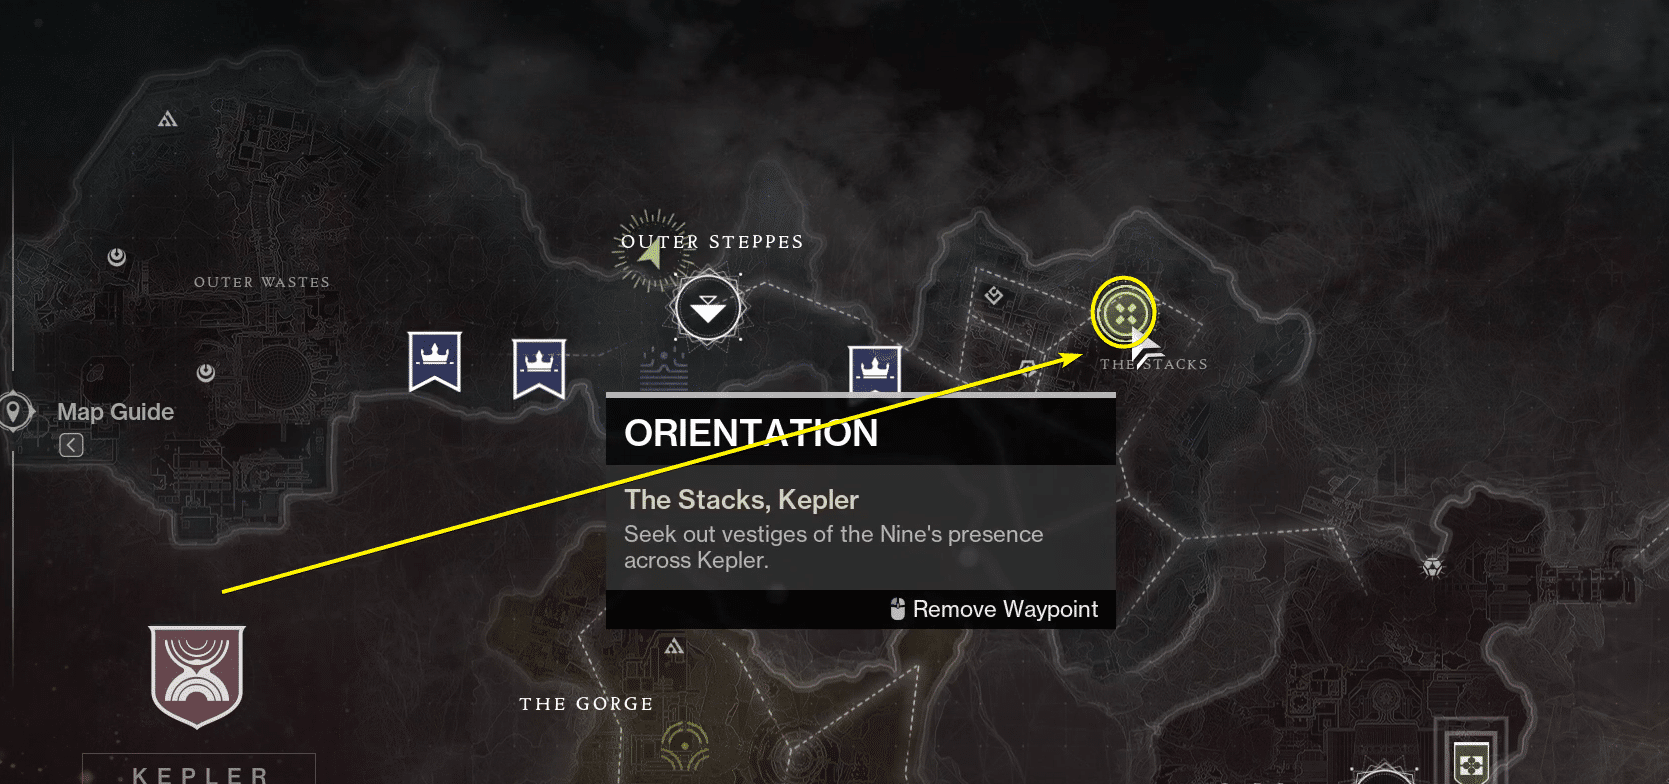
Urn Location #2 – The Stacks
For the next urn location, you want to make your way to the Orientation marker in The Stacks. If you do not have the marker, you can just navigate to the one shown below.
From here, you’ll enter a room that has a bunch of satellites that will redirect the Relocator beam. You want to shoot them until they are in the positions shown below.
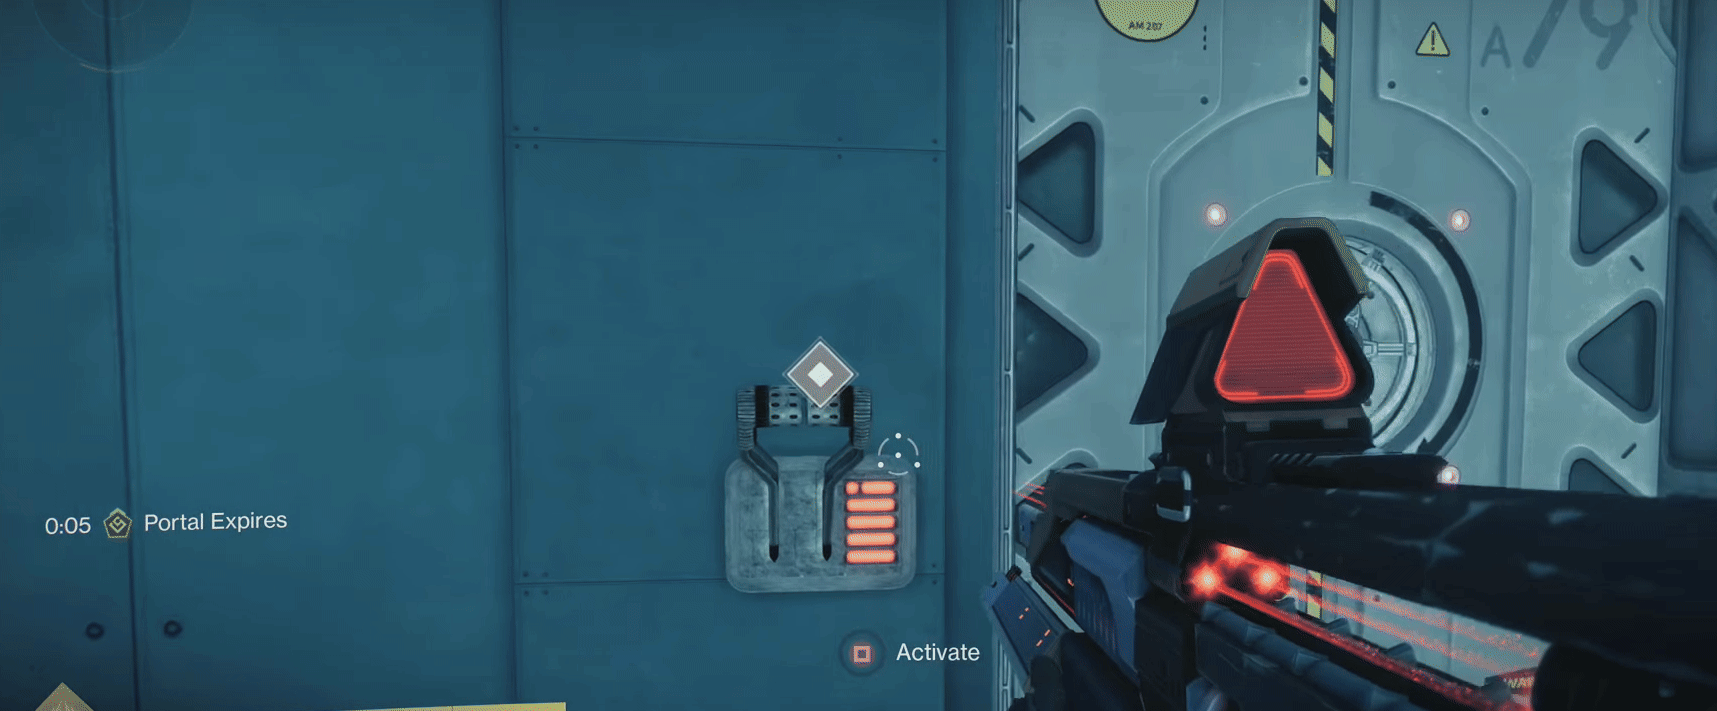
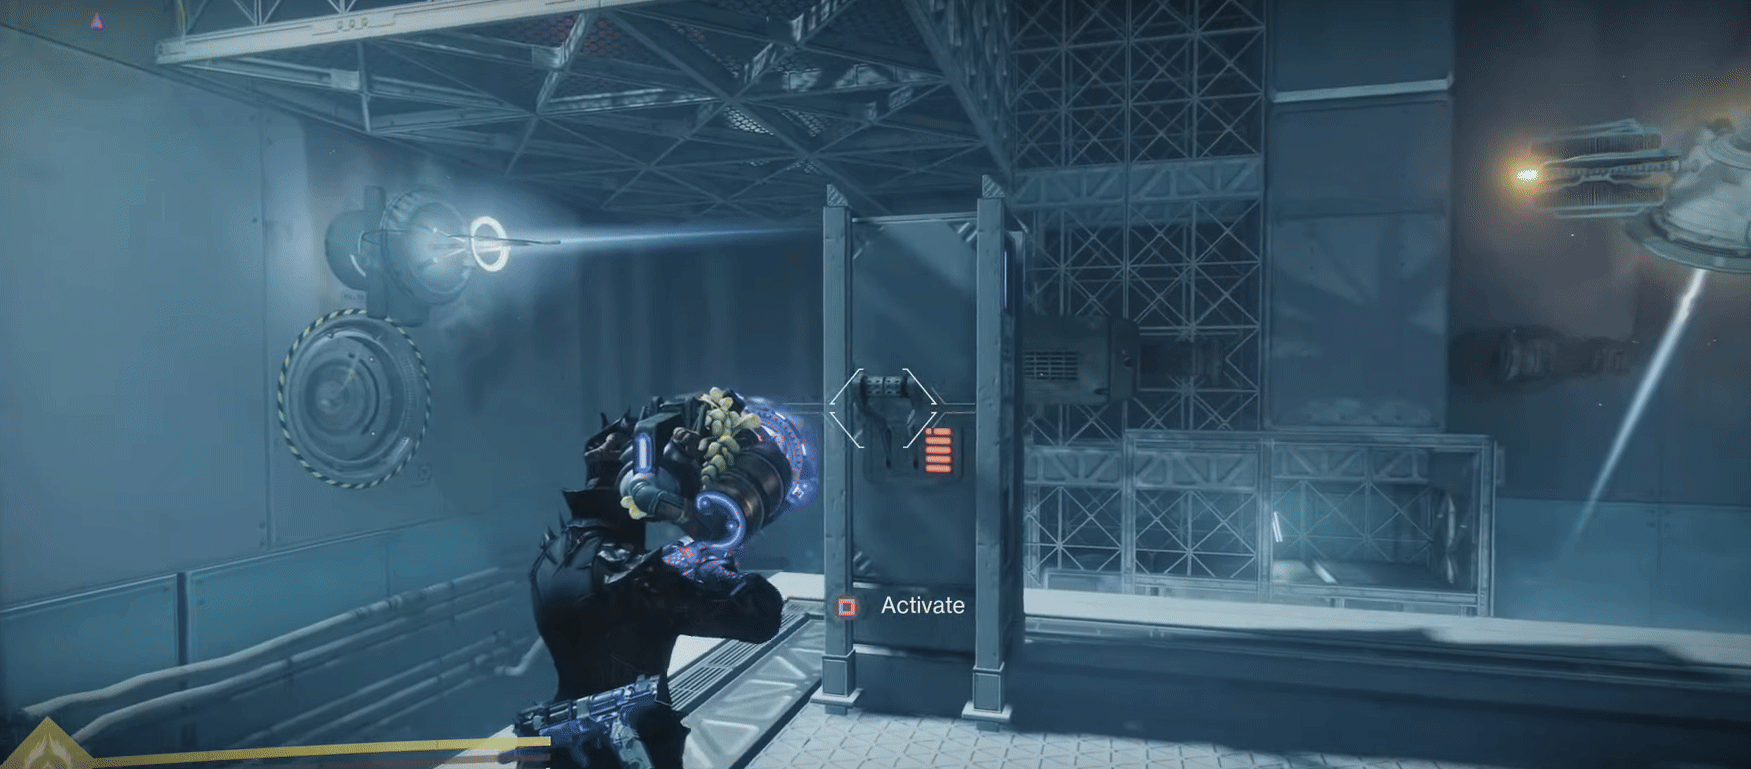
After that, fire the Relocator and use the nearby portal to enter the locked room.

In the locked room, activate the door so that you can open it. From here, shoot the satellites inside so that you can change the position of the beam.
Make sure you get the position right like the one shown.
Next, you want to reposition the satellites outside the room again until they are redirecting the beam shown below. After that, grab the Relocator.
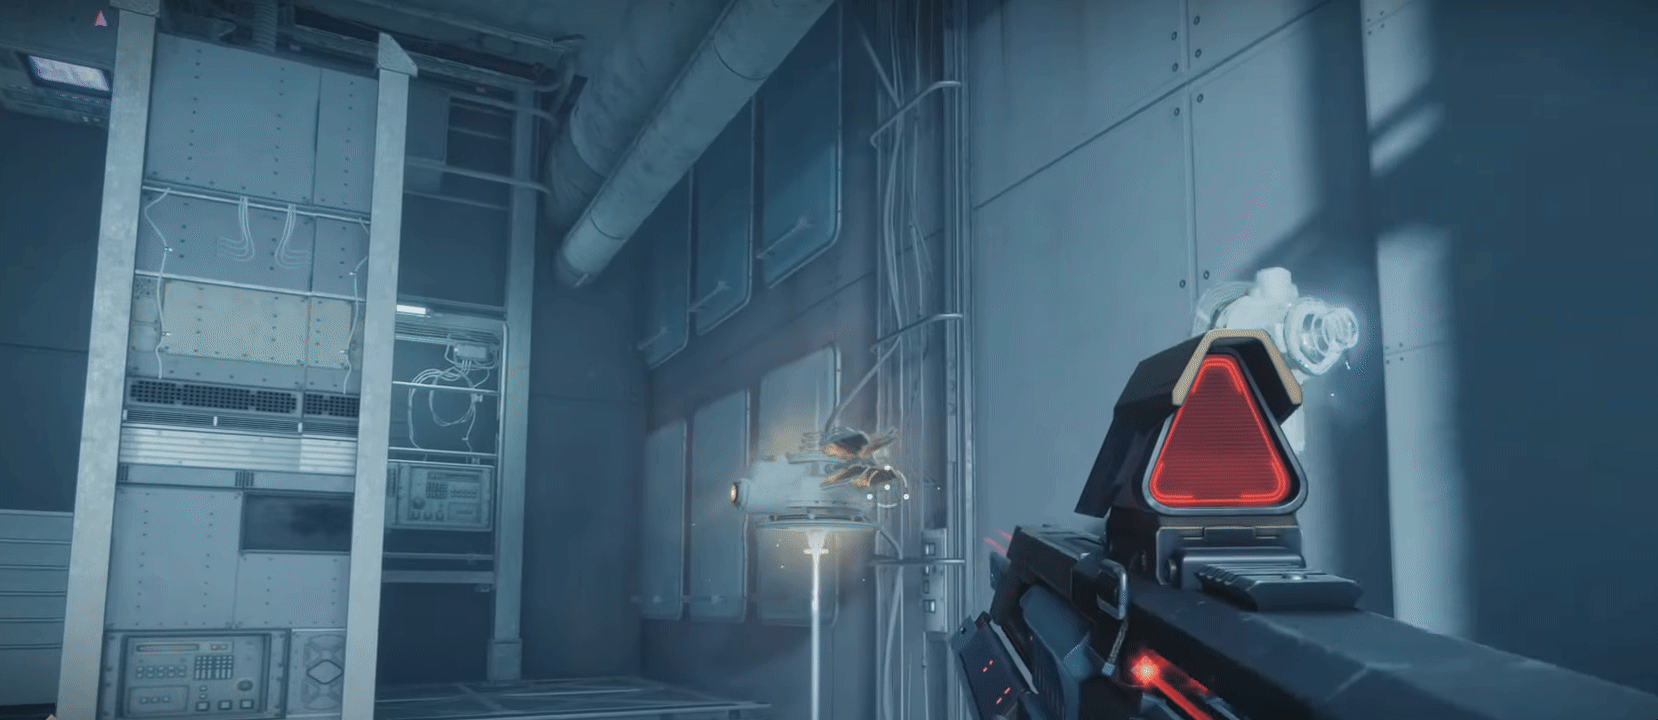
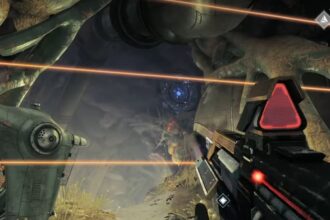
For the next part, timing and positioning is key. Start by standing near the switch and shoot the Relocator beam at the satellite. Just as you shoot it, pull on the lever so that the small hole opens and the beam goes inside.
It’s possible you might mess this part up so try it a few times until the portal opens. From here, head to the portal so you can be teleported. You’ll find the urn on the floor in the new room.
Urn Location #3 – The Stacks
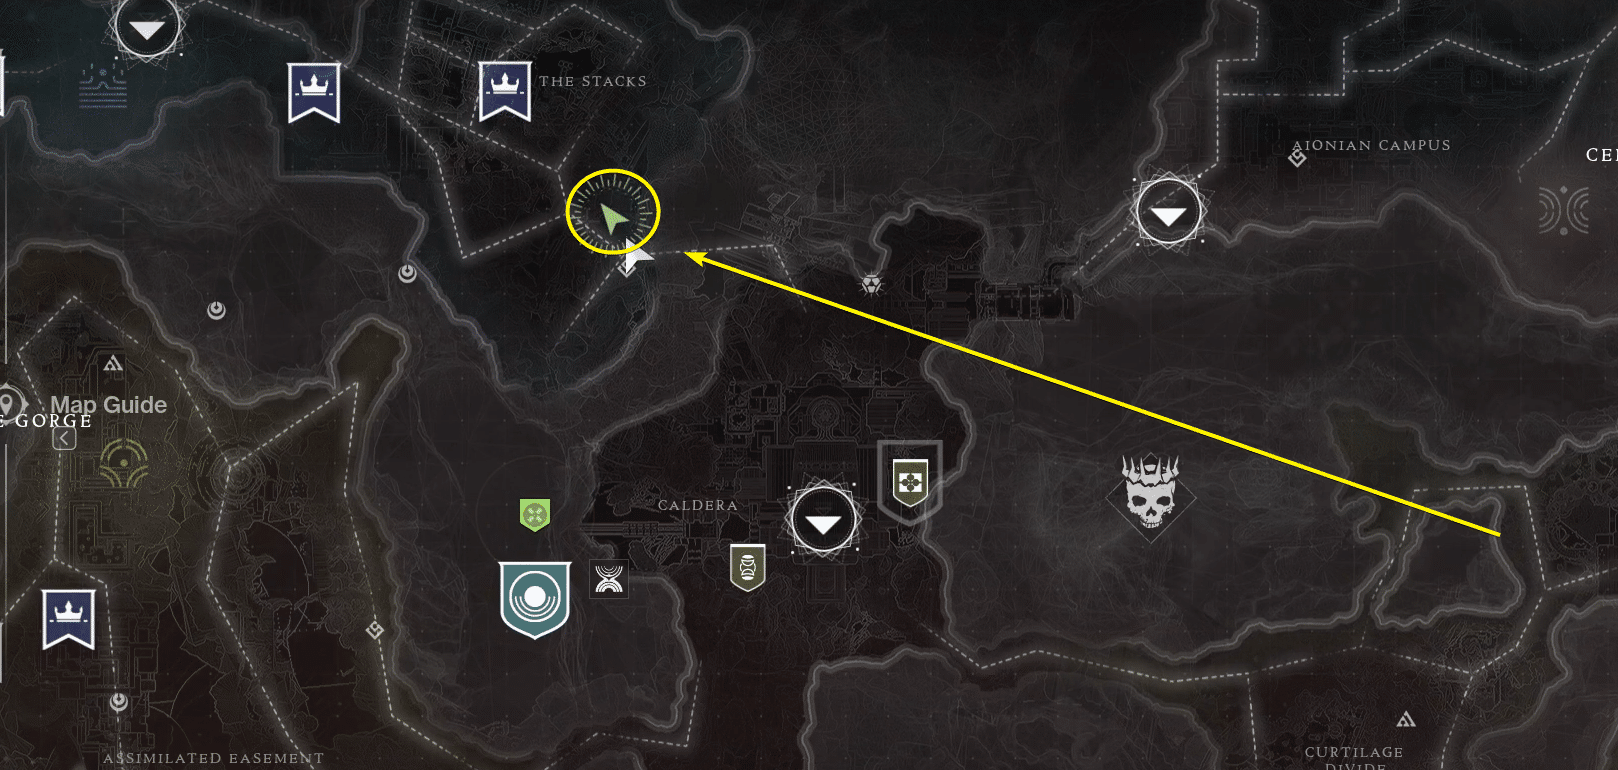
For the final The Stacks urn, you want to head to the location shown on the map below.
Near this area, you should see a bunch of satellites next to the Relocator. Start by repositioning the satellites near the upper platforms by shooting them just like below.

You should find two more satellites by jumping down and looking down from the corners of the cliffs and platforms. Make sure you shoot and reposition them as well.

Once they’re repositioned, grab the Relocator on the upper platforms and fire them at the satellites. Doing so should open a portal nearby. Head inside the portal and you’ll be teleported to a new room.
Look on the ground and you should be able to grab the final urn in The Stacks.

Urn Location #4 – Outer Wastes
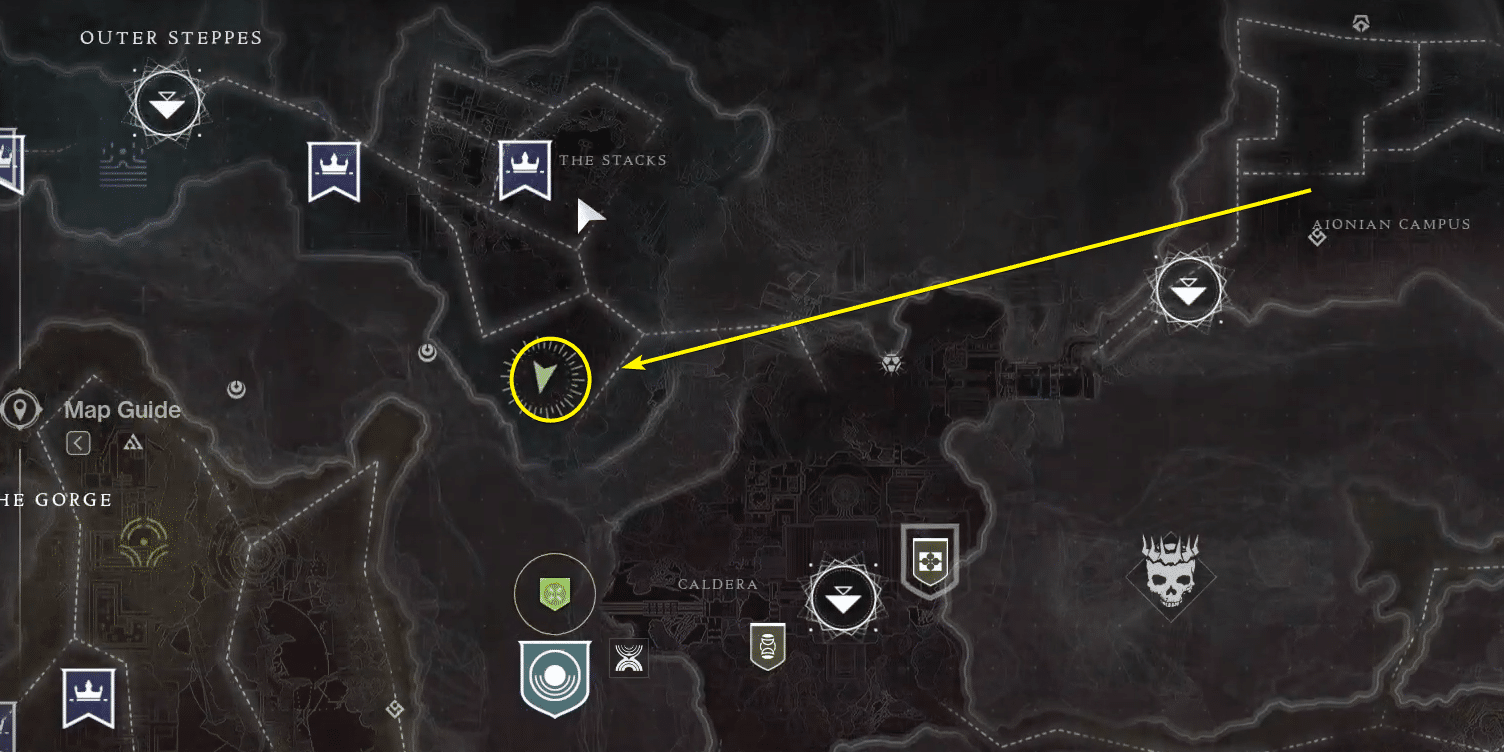
The first Outer Wastes urn is actually accessible from the The Stacks even though technically it falls under the Outer Wastes. Head to the location shown on the map below.
Here are the steps you need to follow:
- Navigate to the upper platform with an open pipe near it
- Transform into your Matterspark form and jump into the opening
- Navigate to the other end of the pipe
- Go to the back of the cave and you’ll find the urn there
Urn Location #5 – Outer Wastes
For the next urn location, you want to go the Turophile quest start marker that can be found in the Outer Wastes. If you do not have it yet, you can simply follow the map below.
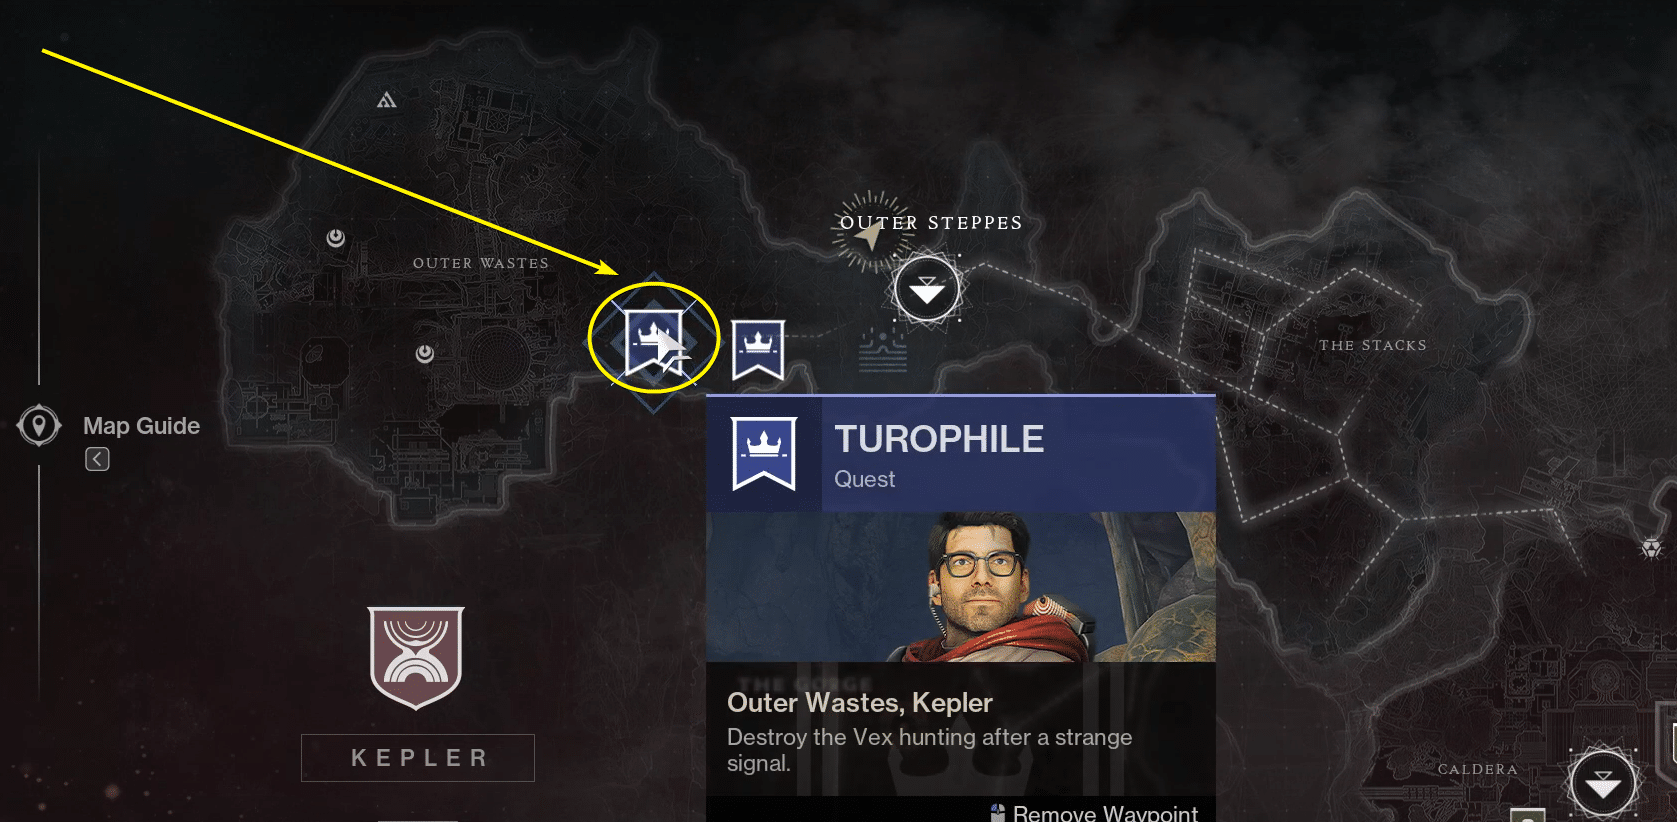
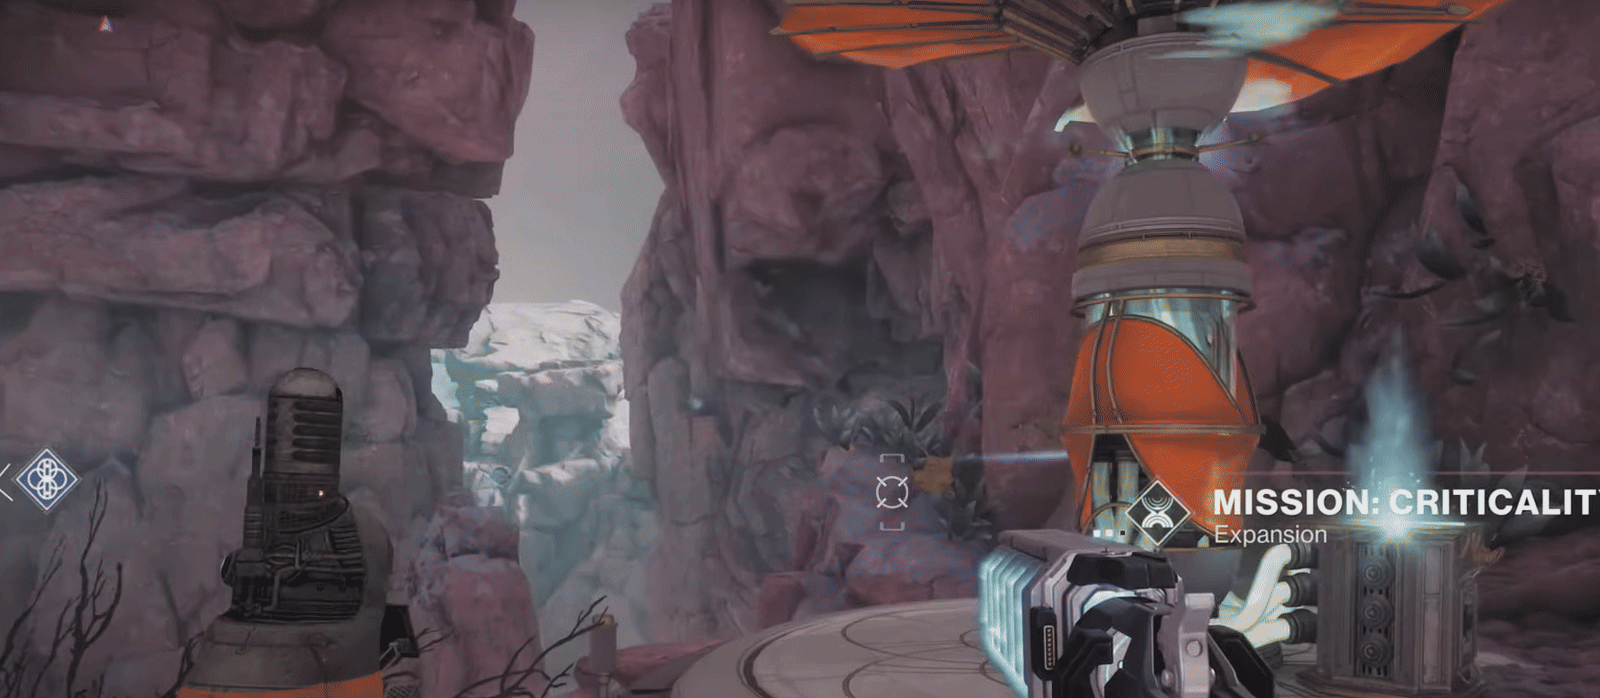
When you arrive here, you should see the Criticality Mission start. We recommend that you clear out the enemies in the area first so that you have an easier time repositioning the dishes.
From here, shoot the dishes as shown below so that you can reposition them.
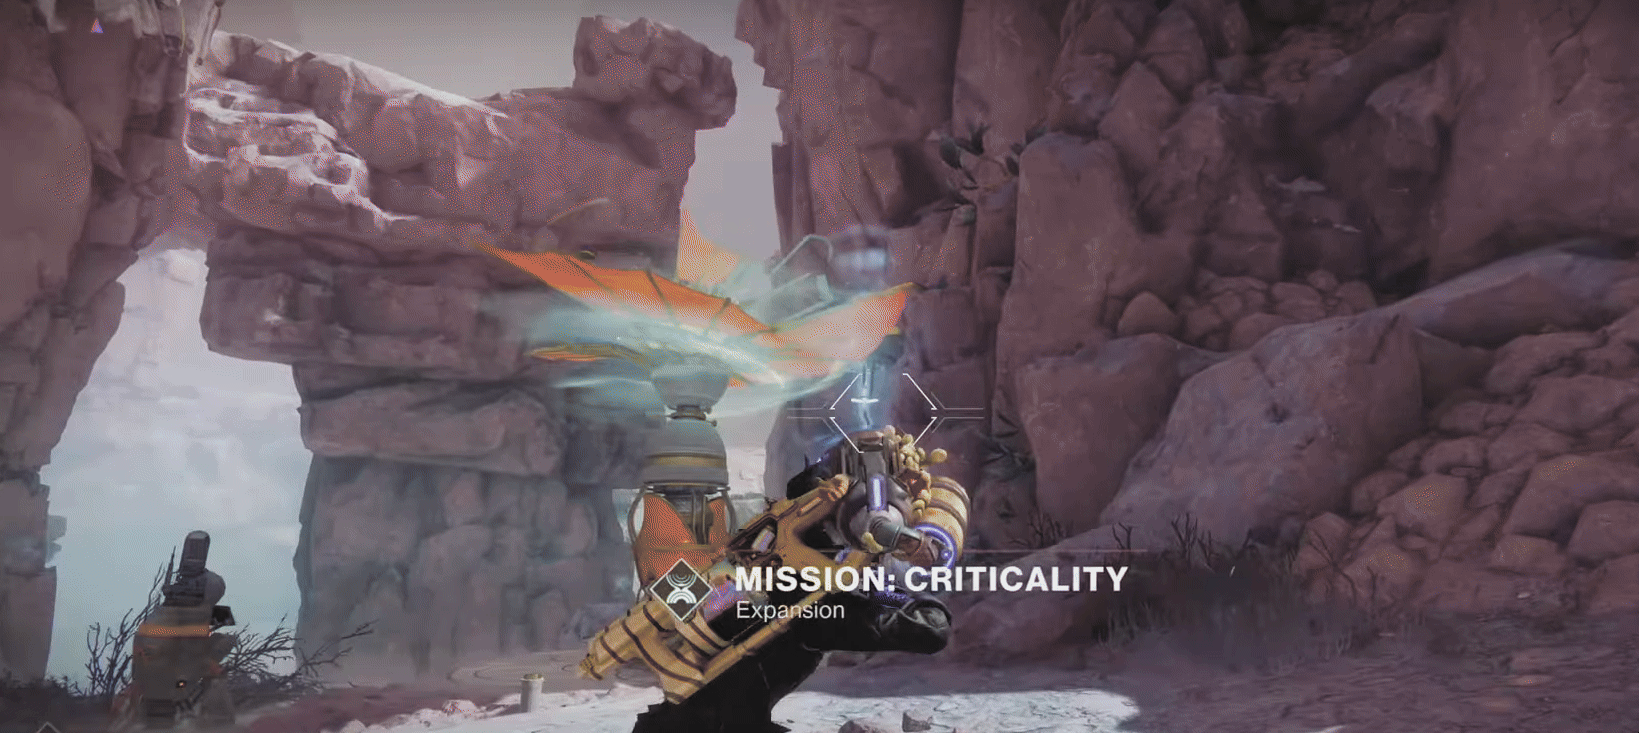
Next, grab the nearby Relocator and fire it at the satellites. Doing so will allow you to open the nearby portal and take you to the quest location.
Right next to the quest start, you should be able to find the hidden urn on the floor.
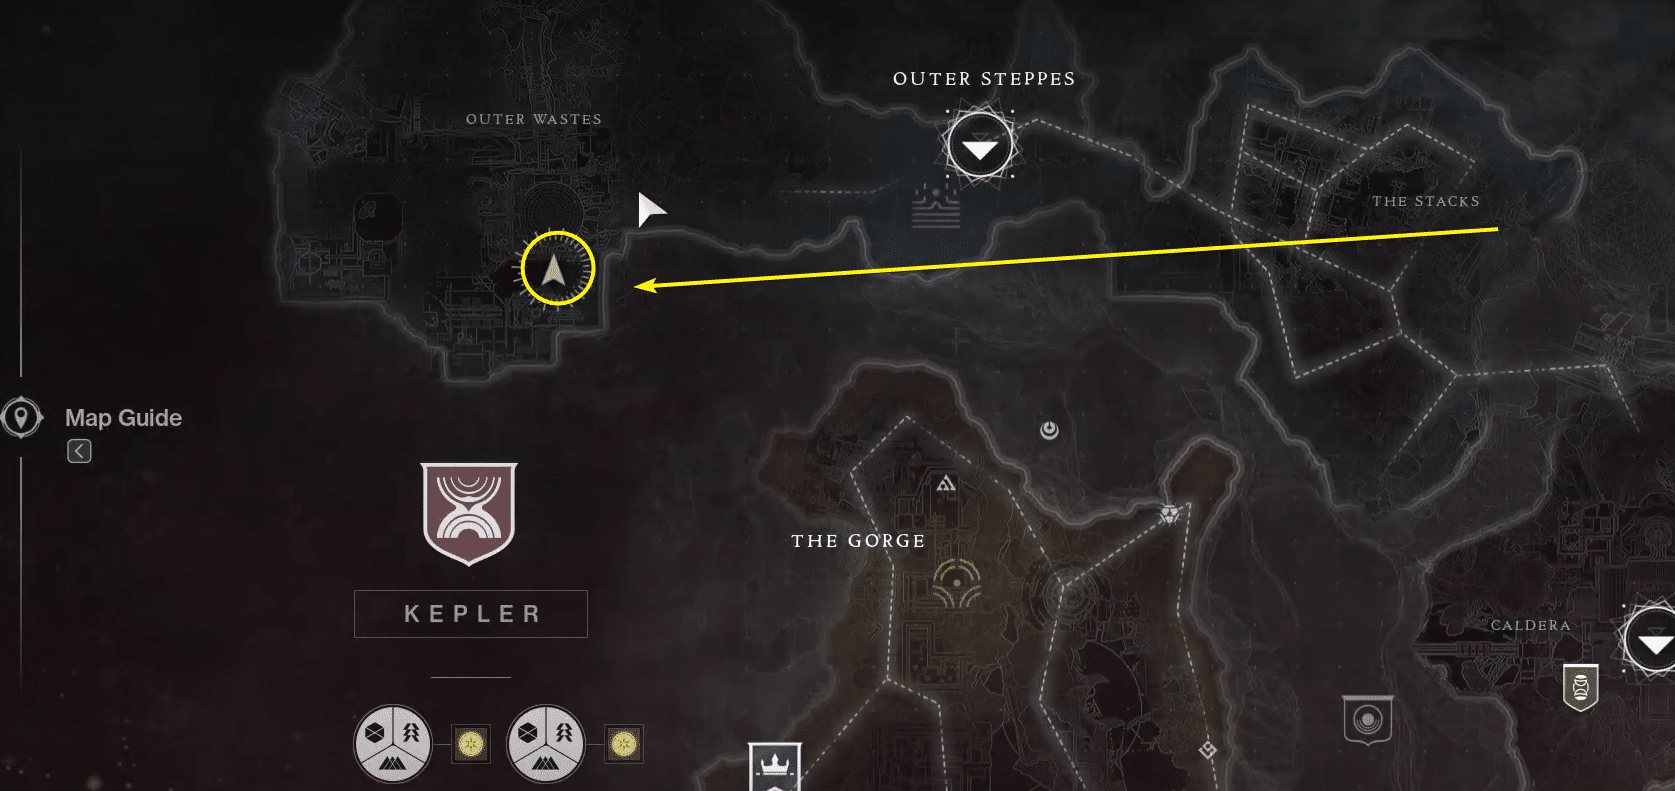
Urn Location #6 – Outer Wastes
For the final urn, you want to navigate to the area shown on the map, which is actually not far from the previous Outer Wastes urn.
Here are the steps you need to follow:
- Clear out the enemies in the area for ease
- Look above at the fan and you should see an enclosed blue flower pod
- Shoot it with your Graviton Spike in Arc Mode to open it up
- Switch to Stasis mode and break the revealed crystal
- Wait for the fan to stop moving and align
- Jump up and go through the fan opening
- Grab the urn at the back of the shaft

Wrap Up
That’s everything you need to know about getting all the Outer Steppes urns for the Edge of Fate DLC in Destiny 2. Getting all these urns should get you a bunch of materials and Fated Ciphers – alongside the Urn Collection: Outer Steppes triumph. This will help you get towards 100% completion with the expansion. Hopefully, you should be able to solve all the puzzles with this guide. We also recommend getting Graviton Spike upgrades, for which you can check out our intrinsic upgrades guide!