If you’re here, you’re probably deep into the Edge of Fate campaign and have hit the brick wall that is the Charge mission of Destiny 2. Trust me, you’re not alone. I ran this on Legendary solo while underleveled, and yeah… it was brutal. Between spark pylon puzzles, swarms of enemies, and a deceptively long layout, Charge is one of the more demanding missions in the new expansion. But once you understand the mechanics and where to go, it becomes much more manageable.
In this guide, I’ll break down every major section of the Charge mission—how to charge pylons efficiently, where to find hidden spark routes, tips for surviving bosses and enemy waves, and how to navigate the jumping puzzles and Mattermorph mechanics, so you can stop banging your head against the wall and finally start making real progress.
Charge Mission Guide (How to Charge Pylons) | Edge of Fate
The Charge mission throws everything at you: tight spark timers, hidden routes, environmental puzzles, and relentless enemies, all while expecting you to figure out how to charge pylons under pressure.
In this section, I’ll walk through each major phase of the mission step-by-step: from the opening pylon charges, to the air duct puzzles, reactor boss fight, Mattermorph terrain mechanics, and finally the brutal two-phase final boss encounter. If you’re stuck or just want to avoid wasting time retracing your steps, this guide has you covered.

Opening Section: Charging the First Two Pylons
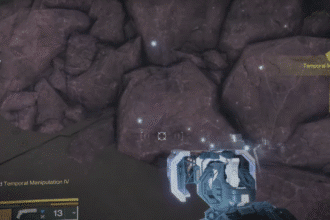
You’ll kick things off in a large room with your first objective: activate two pylons using spark energy.
- Clear the initial wave of ads to avoid distractions.
- Find the spark activation point and charge up.
- Move fast, you’re on a timer once you grab the spark.
- Each spark lets you charge one pylon before you have to return.
This room introduces the core mechanic you’ll be using all mission long: grabbing sparks and locating pylons while dealing with pressure from enemies and time limits.
First Puzzle Room & Platforming Section
Next, you’ll move through a minor jumping puzzle before arriving in a much larger combat zone.
Here’s how to handle it:
- First, clear out all enemies. You’ll need the space.
- Grab the spark from the central node.
- The first pylon is hidden in an air duct up high. You can reach it with a double jump or by wall-bouncing. (On PlayStation, I used L2 + X to boost up.)
- Follow the duct path and activate the pylon at the end.
- Go back, grab another spark.
- The second pylon is located through another air duct next to the spark station, tucked behind a gate.
Once both are charged, a path opens up, and you’re about halfway through the mission.
Return to the Reactor
Now it’s time to backtrack to the reactor room where everything began.
- Grab a spark, you’ll need it to progress through locked doors.
- The route is mostly traversal with a few enemy groups sprinkled in.
Use the spark to unlock the way forward and prepare for the next major encounter.
Reactor Boss Fight & Pylon Charge Phase
Once back at the reactor, you’ll trigger a multi-phase boss encounter.
- The arena quickly fills with ads, including a Brig, so take your time.
- Your goal: charge two more pylons while managing the chaos.
- As before, clear out enemies before you attempt the pylon charges.
- After both pylons are active, power up the generator and collect your loot.
This fight is hectic, but if you keep ads under control and don’t rush the spark runs, it’s doable even solo.
Jumping Puzzle & Final Puzzle Mechanics (Vine/Mattermorph Section)
After the reactor, things get… weird. You’ll run into a new sequence involving green vines (Mattermorph) that let you alter the map terrain.
Here’s how to beat it:
- Defeat a Servitor, it’ll drop a spark charge.
- Grab the vine energy and use it to create a floor or platform by shooting it at designated walls or objects.
- Carry the charge to the new platform and deposit it at the pylon.
- You’ll repeat this process multiple times.
- At one point, drop down into a room with a teleport cannon. Rotate the satellite and launch the spark to your destination.
Important: Vine-created platforms are temporary (around 30 seconds). If they vanish, re-activate the vine before continuing. Also, be sure to disable nearby lasers with the spark if needed.
Final Boss Fight & Last Puzzle
At long last, the real boss fight begins, and it’s a tough one.
- There are two phases, each with ads, damage checks, and mechanics.
- After damaging the boss, a Servitor spawns. Kill it, and it drops a charge.
- As before, grab the vine energy to create the dunking platform, then deposit the charge.
Repeat the sequence while fighting off waves of shanks, snipers, and psions. This section is very punishing solo, so here’s my best advice:
Tip: If you’re on Legendary solo, clear all ads before you focus the boss or mechanics. I tried to brute force it and failed. Every enemy matters here, don’t leave them alive.
Wrap-Up
The Charge mission is exactly what its name implies: non-stop energy juggling, aggressive enemies, and pressure from all sides. It’s challenging, yes, but totally beatable once you learn the flow. By mastering the spark mechanics and being patient during boss phases, especially on solo runs, you’ll come out of this mission with a lot more confidence for what Edge of Fate throws at you next. Want to dive deeper into mods and loadouts in Destiny 2? We’ve got a full guide that breaks it all down, check it out!