Alright, so you just beat your first major boss in Elden Ring: Nightreign, feeling good, maybe even a little cocky, and then boom, the map decides it’s time to throw a tantrum. Welcome to Shifting Earth. Suddenly, the ground is moving, the sky’s on fire, and your cozy little Limveld adventure just turned into a disaster movie. These events are completely separate from the main story but offer powerful incentives for players willing to take them on. In this guide, we’re focusing on the Crater, probably the first Shifting Earth event you’ll stumble into. It’s a fast-paced, fire-filled gauntlet that rewards speed, awareness, and preparation. I’ll show you everything you need to know, from how to find the Crater, what to expect inside, and how to survive long enough to earn your legendary weapon upgrade.
How to Complete The Shifting Earth Event (Crater)
Once you beat your first major boss in Nightreign, the world gets a little… unstable. You unlock a new system called Shifting Earth, dynamic events that twist parts of the map into completely new challenges. Think of them as limited-time dungeons that throw environmental chaos, unique enemies, and powerful loot your way.
There are four main events:
- The Crater
- The Mountaintop
- The Shrouded City
- The Rotted Woods
The Crater is usually the first you’ll run into, and trust me, it leaves a fiery impression. Why bother with these? Because they let you upgrade your main weapon to Gold Tier, which is HUGE. You’ll also unlock an achievement/trophy for your trouble.

Finding the Crater (And Why It Matters)
You’ll know when the Crater is active, your map gets a not-so-subtle marker, and the sky turns into a whole mood. Once you get near, a storm will start to close in. If you’re too slow? You’ll literally get locked in or wiped out.

Recommended Level: 8–10
Tip: Bring fire negation gear and use runes before you jump in. There’s no going back.
You’ll enter by sliding down two angled stone ramps into a hallway. That drop leads to a Site of Grace, your last moment of peace. Use it wisely.
Speedrun Mode: Because The Firestorm Won’t Wait For You
As soon as you drop in, the storm timer begins. Enemies spawn constantly, and the game doesn’t want you to fight them, it wants you to run. Seriously, only stop to fight if something is directly in your way.
- Fire Prelates: Big, chunky, and mean. These guys guard the gold fog door and will slow you down if you’re not efficient. Take them out fast and move on.
- Chariots, Finger Fiends, and the Hall of Nope: Soon, you’ll enter a hallway swarming with flame chariots and finger creepers. This part is chaos incarnate. Don’t stop, don’t look back, just dodge and run. You’ll find a break in the floor, this leads down into the actual Crater.
Look for tombstone platforms sticking out of the crater wall. These are your path down. Take your time here, one wrong drop and you’ll end up in lava. Again.
The Glowing Blue Tree – Your Emergency Exit
Halfway down, you’ll spot a glowing blue tree to the left. That’s your Spectral Hawk evac point. Use this to escape if you’re low on health, confidence, or just tired of being BBQ’d. I barely made it out with five seconds left on my first run, no shame in using it.

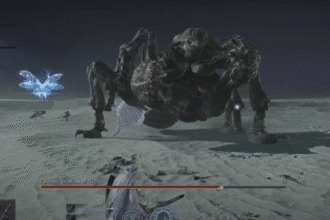
Final Challenge: The Magma Wyrm
At the very bottom lies your final test: the Magma Wyrm. He’s big, he’s angry, and he breathes enough fire to make a dragon blush.
Tip: Don’t go solo if you don’t have to. I ran with Iron Eye, Duchess, and Guardian at Level 9. Not a planned team, but they did clutch the win.
Avoid his fire slams, burn him down, and use summons liberally. Once he falls, you’ll get:
- “Great Enemy Felled” screen (which is always awesome)
- A Site of Grace
- Access to the Special Smithing Table (upgrade one weapon to Gold Tier)

The Special Smithing Table
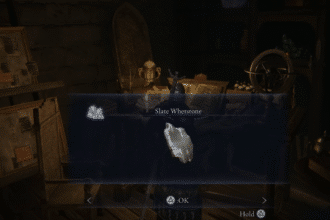
This is where the magic happens. Interact with the Special Smithing Table to upgrade any one weapon in your inventory to Gold Tier, your very own custom legendary.
Important notes:
- You can only do this once per expedition
- You’ll need the appropriate Relic for your weapon to get the best elemental damage
- Everyone in your squad can forge their own legendary
This is your chance to turn a well-loved weapon into a Nightlord-shredding beast.

Don’t Forget to Escape!
Once you’re done celebrating and bathing in rune glow, don’t dawdle. Head to the Spectral Hawk by the lava’s edge and fly out now. Missing this step is brutal. You’ll:
- Lose the bonus runes
- Drop a level
- Possibly lock yourself out of the event for a while
- And yep, you’ll have to refight the boss underleveled and sad
Wrap-Up
The Crater event is early-game Elden Ring: Nightreign content at its absolute best, high stakes, environmental chaos, and a fantastic payoff if you make it through. If you’re brave enough to dive in, you’ll be rewarded with a legendary weapon, an achievement, and the kind of adrenaline rush that only FromSoftware knows how to deliver. Just remember: Shifting Earth events rotate. Once they’re gone, they’re gone for a while. So if you see the Crater, go now. And if you’re running a Wylder, I highly recommend checking out my guide on unlocking Wylder’s Hidden Ability. Trust me, watching that greatsword burst into flames never gets old.


