If you’ve played R.E.P.O., you know just how chaotic and unpredictable the game can get. Whether you’re sneaking past a Huntsman or getting smacked into the void by an Upscream, each entity adds a unique challenge to the game. After countless hours of running, dodging, and (let’s be honest) dying, I’ve put together this guide to rank every enemy based on their threat level and impact on gameplay. This isn’t just a list of which monsters are the strongest, it’s a dive into what makes each one dangerous, frustrating, or downright terrifying. If you’re looking to survive longer, earn more money, or just understand which creatures deserve the most fear, this guide is for you!
While you’re at it, check out my complete R.E.P.O. monster guide, where I break down every entity in the game, their attack patterns, and the best ways to counter them. If you’re tired of getting stomped, grabbed, or blasted into oblivion, this guide will help you fight back (or at least run smarter)!
Entity Danger Tier List
Monsters (or entities) in R.E.P.O. are the primary threats standing between you and your payday. They range from fast and aggressive attackers to subtle and sneaky disruptors. Some kill instantly, others chip away at your health, and a few are more of an annoyance than a danger. But regardless of their strength, every entity has the potential to ruin your run if you underestimate them.
In R.E.P.O., every encounter requires strategy. Some monsters can be stunned, others need to be avoided entirely, and a few can be manipulated into taking each other out. Knowing how to deal with each type is the key to success, and that’s where this tier list comes in.
Ranking the monsters wasn’t easy, but I based my decisions on four key factors:
- How quickly and easily can they kill you?
- How much do they mess with your movement, stamina, or strategy?
- How hard is it to avoid, stun, or kill them?
- Do they become significantly deadlier as the game progresses?
Some entities are absolute nightmares (S-Tier) and demand extreme caution, while others (D-Tier) are more of a joke than a threat. Of course, personal experiences may vary, but this list reflects what I’ve found to be the most consistent dangers in the game.
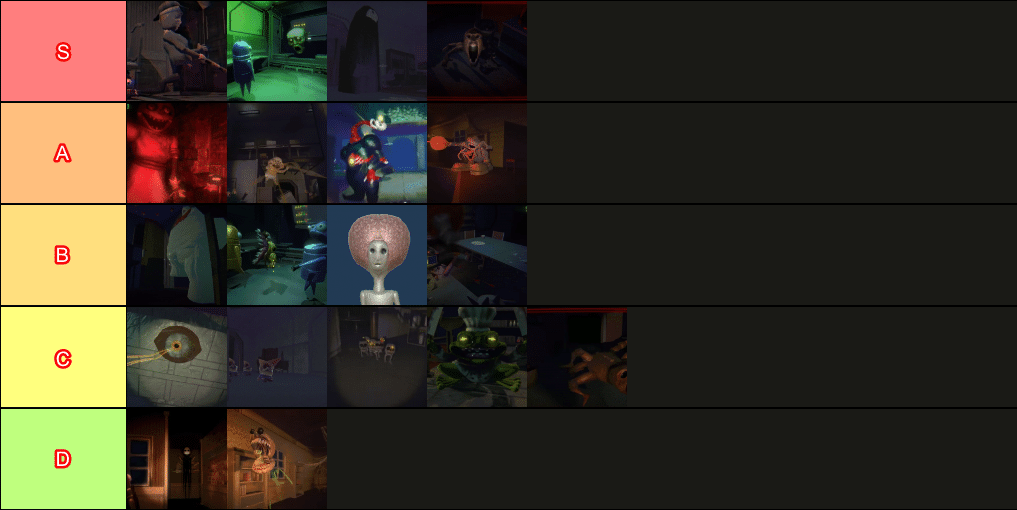
S-Tier
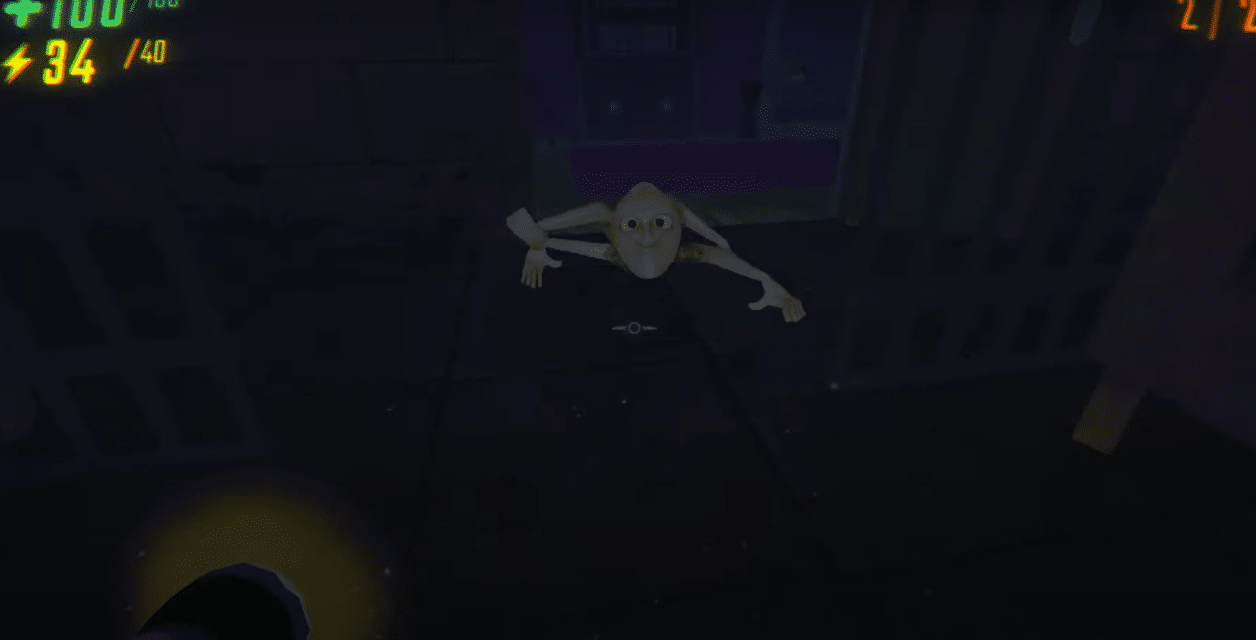
- Huntsman: The Huntsman is a silent, blind enemy that shoots at any sound, including voice chat. If he hears you, he instantly turns and fires, dealing 100 damage, making him one of the most lethal enemies.
- He detects sound from crouching, interacting with items, or touching him, linking noise to you before shooting. Since he’s silent, it’s easy to run into him accidentally. While he can’t hear crouching, he becomes even deadlier when paired with other enemies, for example, a duck’s quack might get you shot.
- Dodging his shot is possible by rolling, but unreliable unless well-practiced. He has 250 health, and without upgrades, a single hit kills instantly. If you can’t kill him, you’ll need to play cautiously. If attacking, your first hit must land, or he’ll link the item to you and fire.
- Ways to kill Huntsman:
- Stun with medium items, but make sure your first hit connects.
- Bait his shot by hitting the ground first for a safer attack.
- No-weapon kill: Bait a shot, grab and rotate him aggressively, then slam his head or feet until he dies.
- With 9 strength, you can pick him up, but bait a shot first or he’ll shoot as soon as you grab him.
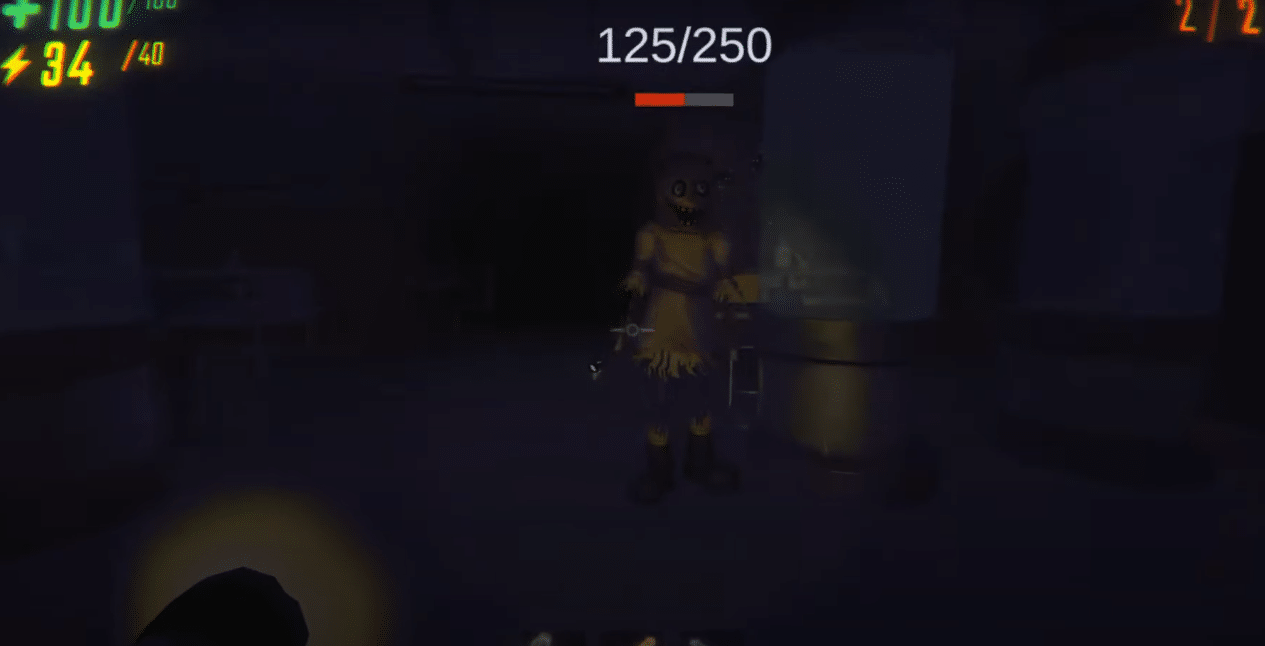
- Headman: The Headman is a deadly enemy with 250 health. Once he spots a player, he charges at full speed, biting for 50 damage per chomp. His proximity awareness means he can aggro even if he’s not looking directly at you.
- If he locks onto you, outrunning him is nearly impossible, he drains your sprint fast. Your best escape is to break line of sight and hide, but if he sees you, he’ll drop down and attack repeatedly. Choose hiding spots with room to back away, or, if desperate, slide under him for a speed boost.
- Spot him before he spots you to stay safe. He’s vulnerable to medium item stuns or can be picked up with 13 strength upgrades (best done from behind). His orb sells for $4,000–$8,000, but his speed, aggression, and damage output make him an S-tier threat.
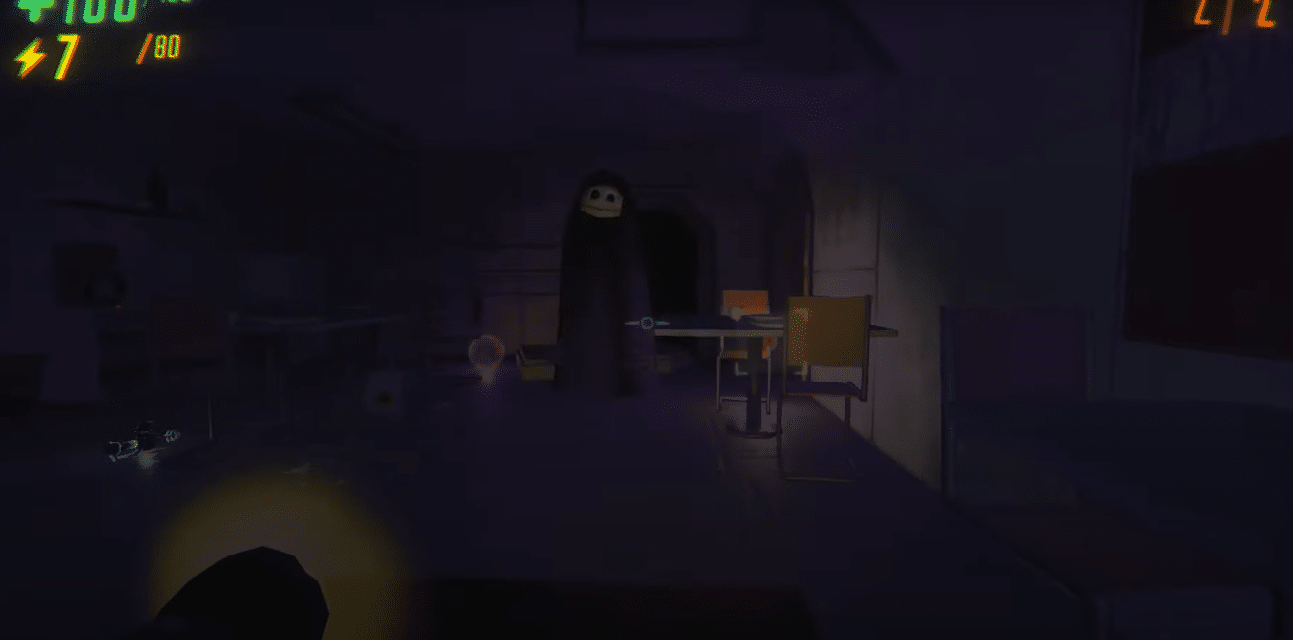
- Robe: Robes are silent but deadly, especially in tight spaces like Headman Manor, where they can sneak up unnoticed if you’re carrying a heavy object. Spotting them too late triggers a movement boost, often leading to instant death.
- They have 250 health and deal 100 standing damage, 50 crouching, with splash damage that can wipe out teammates. Though slow, looking at them triggers a charge attack.
- Their black mist form is their most dangerous trait, turning into a fast, low-crawling smoke that’s nearly invisible. If it touches you, instant death follows, often catching players off guard.
- Paired with enemies like the Hidden, they force slower, more cautious gameplay. They can be stunned with medium items or with 13 strength upgrades, you can pick them up to stun them.
- Upscream: Upscream is fast, relentless, and deadly. Once it spots you, it dashes in, grabs, and screams, dealing 10 damage and launching you backward, often multiple times in a row, trapping you in a loop.
- Early on, they’re just annoying. But in later levels, they become lethal, shoving players into pits or straight into danger. With 50 HP, they’re easy to kill if you can stun them, but their speed makes that tricky. Miss your stun, and you’ll pay for it.
- They may not hit hard, but positioning is everything, and Upscreams exist to ruin yours. Past Quota 6, a single mistake can cost you the run. I’d argue they belong in S-tier for that alone.
A-Tier
- Reaper: The Reaper has 250 health and deals 10 damage per hit and her orb sells for $6,000–$8,000. She’s easy to hide from if you spot her first, but deadly if she sees you first. Once she locks on, she pauses briefly, then charges while slashing. To avoid her, immediately break line of sight and crouch or hide under something.
- If she sees you hide, she can use a crouch attack, similar to the Headman, so always have space to escape. You can also distract her by hiding under furniture while a teammate attacks from behind. She drains stamina quickly, making escape difficult once caught.
- Notes to keep in mind:
- Avoid using carts, she destroys objects in her path.
- Deflects items with her swords and knocks weapons from your hands if too close.
- Best killed with a gun or a sneak attack.
- Stun with medium items or, with 9 strength, pick her up and kill her.
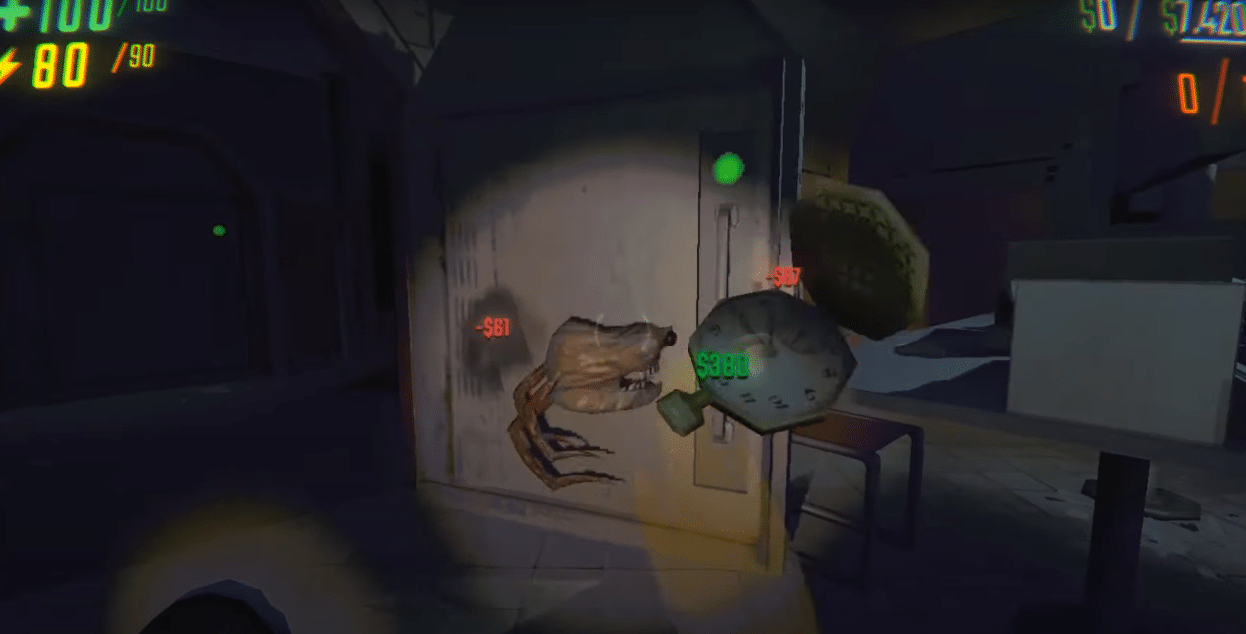
- Rugrats: Rugrats may be small, but they hit hard and fast. The moment one spots you, it grabs a nearby item, or even snatches one from your hands, and throws it with incredible speed and accuracy. Dodging is nearly impossible, and damage depends on the item, ranging from 30 to over 100, plus impact damage.
- With 150 health, they’re easy to kill but must be dealt with immediately. They can be stunned with small items like a pocket watch or crown, and with 4 strength upgrades, you can pick them up and stun them. Killing one drops an orb worth $2,000–$4,000.
- Trudge: With 500 HP, Trudge has the most health of any enemy. His loud stomps make him easy to detect, but if he spots you, he’ll charge up a slam that pulls in everything nearby, dealing 100 damage, or instantly killing if you’re directly under it.
- Despite his strength, he’s slow and predictable. His attacks take time, so dodging or hiding behind objects is easy. If he gets close, screen shakes and heavy footsteps warn you in advance. Bait his attack, sprint past, and you’re safe.
- Though hard to kill, he can be stunned with a medium item or lifted with 13 strength, dropping an orb worth $5,000–$8,000. Few know he has a crouch attack like Headman and Robe, dealing 10 damage every 0.5s if you hide. Luckily, it’s easy to slip away before he starts.
- Trudges have a bizarre knack for spotting hidden players, sometimes even easier than those in plain sight.
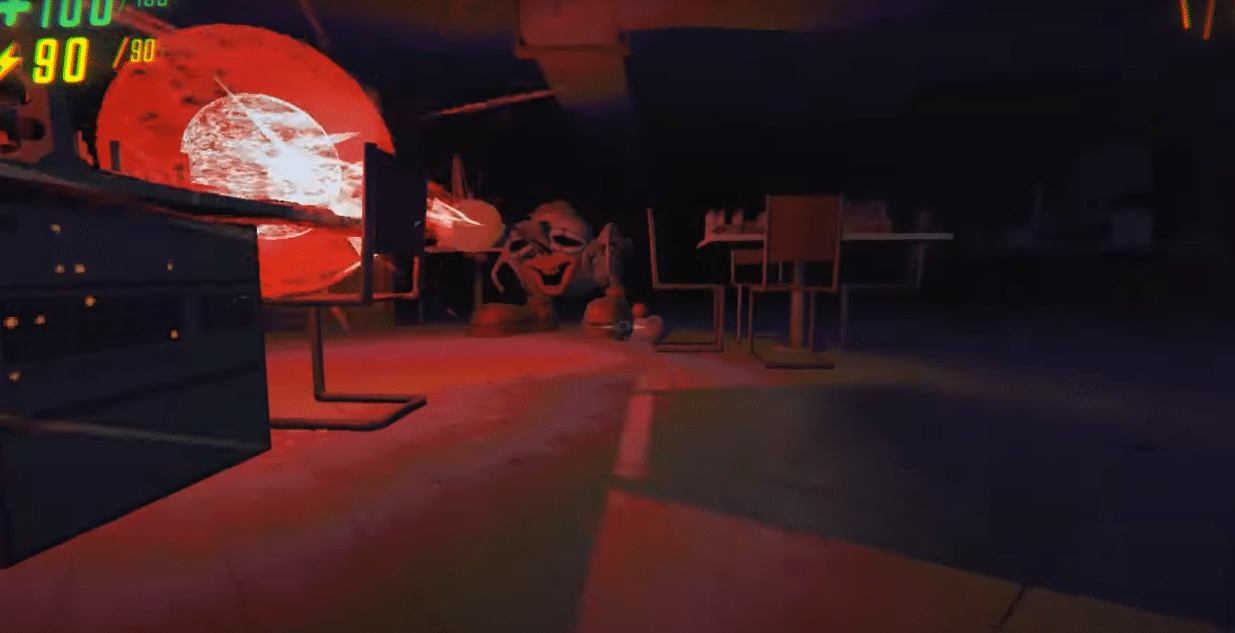
- Clowns: With 250 HP, clowns are high-pressure enemies with two deadly attacks. Their beam attack deals 30 damage, but knockback can add 70 more, totaling 100 damage. Luckily, it’s easy to dodge, just duck or jump depending on your stance.
- If the beam misses, they charge in for a kick (60 total damage). Watch out for their proximity trigger, get too close, and they’ll instantly kick, even from behind.
- To fight them, bait the beam, then escape or counter. Medium-weight items stun them, or with 13 strength upgrades, you can pick them up and slam them.
B-Tier
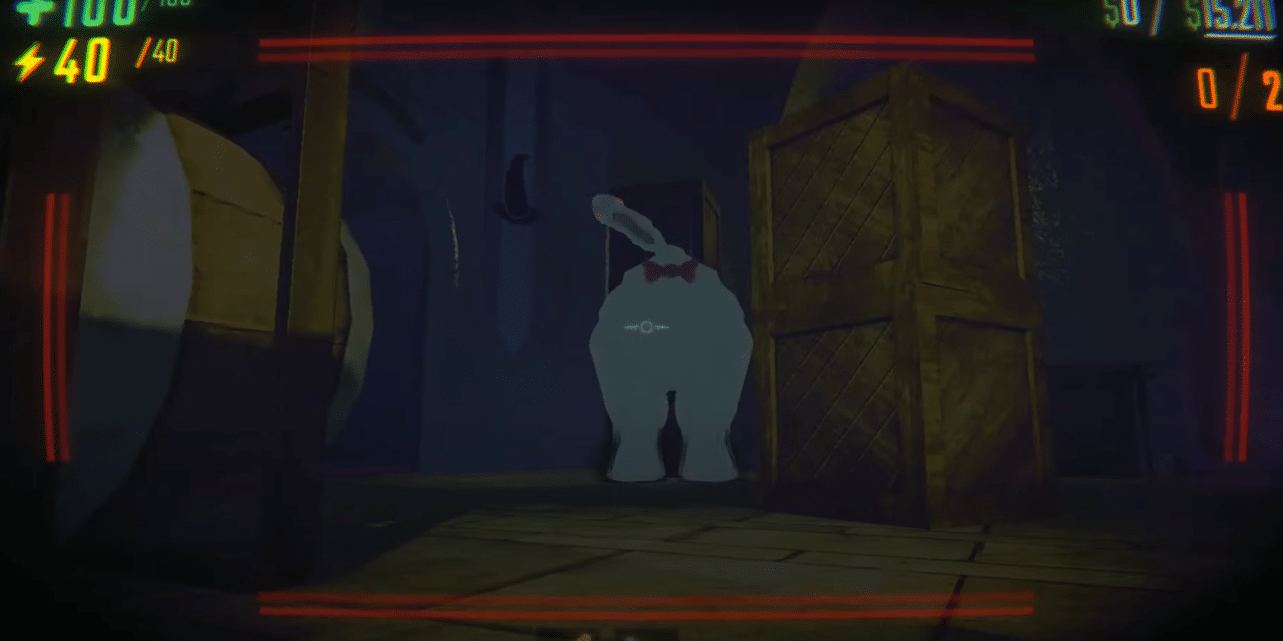
- Bowties: They may be huge, but with only 100 HP, they’re surprisingly weak. When they see you, they drop down and turn into a fan, blowing you, enemies, and items away. Each hit deals 5 damage, and if you’re pinned against a wall, you’re done for.
- They become even deadlier in later levels, where pits make getting blown away a real threat. Thankfully, they’re slow and loud, so spotting them first gives you the advantage.
- A single grenade, landmine, or bullet takes them out instantly. Their orb can be worth up to $7,000, making them a worthy target. Just don’t attack head-on—sneak up instead. You can also stun them with a medium-weight item or, with seven strength upgrades, pick them up and slam them down.
- While deadly in the right conditions, Bowties are predictable.
- Ducks: They start off harmless, following your cursor and jumping for attention. But if they take damage, they aggro, chasing you for 10 seconds at high speed and dealing 10 damage per hit.
- Accidental hits from items or enemies can set them off, making sprint management crucial. To escape, tumble launch, sprint, roll, jump, and enter object mode for a boost.
- With 150 HP, they’re easy to kill using cauldrons, toilets, or extraction points, but items won’t stun them, just make them mad. As a last resort, tumble launching into them repeatedly works, but it’s risky.
- Their $2,000–$3,000 orb makes them valuable, but since they only attack when provoked, s they’re not that dangerous.
- Mentalist: The Mentalist has 150 health and summons an anti-gravity orb when players get too close. Anyone caught in the orb floats helplessly in object mode, and after a few seconds, the Mentalist slams them down for 50 damage.
- To counter it:
- Save teammates by grabbing and pulling them out of the orb.
- Bait the attack. Once the Mentalist turns red, it’s safe to approach.
- Poor eyesight makes it easy to hide and escape.
- Slow movement makes it one of the least threatening enemies.
- With 4 strength upgrades, you can grab and stun the Mentalist. Otherwise, use medium items to kill it. It’s easy to avoid, easy to kill, and deals low damage.
- To counter it:
- Hidden: The Hidden is an invisible enemy that grabs players and carries them to a random location on the map. Though it doesn’t deal damage, it can be a serious hazard, especially at higher levels where pits and enemies make its drops more dangerous. A teammate can rescue you mid-air by grabbing and pulling you out.
- With 100 health, the Hidden isn’t too tough but can be frustrating to kill since it’s invisible. However, you can hear its sounds and see its footsteps. It can be stunned with small items and picked up with four strength upgrades, dropping an orb worth $3,500–$7,000.
- More annoying than deadly, the Hidden earns a low B-tier ranking for its ability to put players in risky situations.
C-Tier
- Peeper: Peeper is one of those enemies that isn’t a big deal, until it is. It spawns randomly on ceilings and forces you to stare at it, zooming in your camera and making escape trickier. After a 3-second grace period, it starts chipping away at your health, dealing 2 damage per second.
- Escaping is simple: just break line of sight by backing up, using objects, or even holding an item. If you’re really stuck, dropping into object mode and having a teammate pull you out works too. It can be killed with a gun, but since it doesn’t drop an orb, it’s usually not worth wasting ammo.
- By itself, Peeper is low threat, but combine it with an aggressive enemy like a Robe or Hidden, and suddenly, you’re in real trouble.
- Gnomes: Gnomes are small but relentless. They spawn in groups of four, each with 20 HP, dealing 10 damage per hit. While easy to dodge, their real threat is to your loot, as they’ll continuously smack valuables, lowering their worth.
- They’re the lightest enemy, easily picked up and thrown without strength upgrades. Though not dangerous alone, they become a major problem after the final extraction, instantly respawning and hunting you down when you’re most vulnerable.
- Bangers: Bangers always spawn in groups of three, each with 50 HP. The moment they see you, they ignite and start chasing. After about 10 seconds, you’ll hear a sound cue, then boom! They explode, dealing 30 damage.
- Luckily, they’re super light and can be picked up without any strength upgrades, making them easy to handle. You can weaponize them against other enemies with good timing, but I usually just yeet them into a pit or slam them into a wall to take them out. Just be careful, they explode on death, so don’t get caught in the blast.
- Not much else to say, Bangers are annoying but manageable.
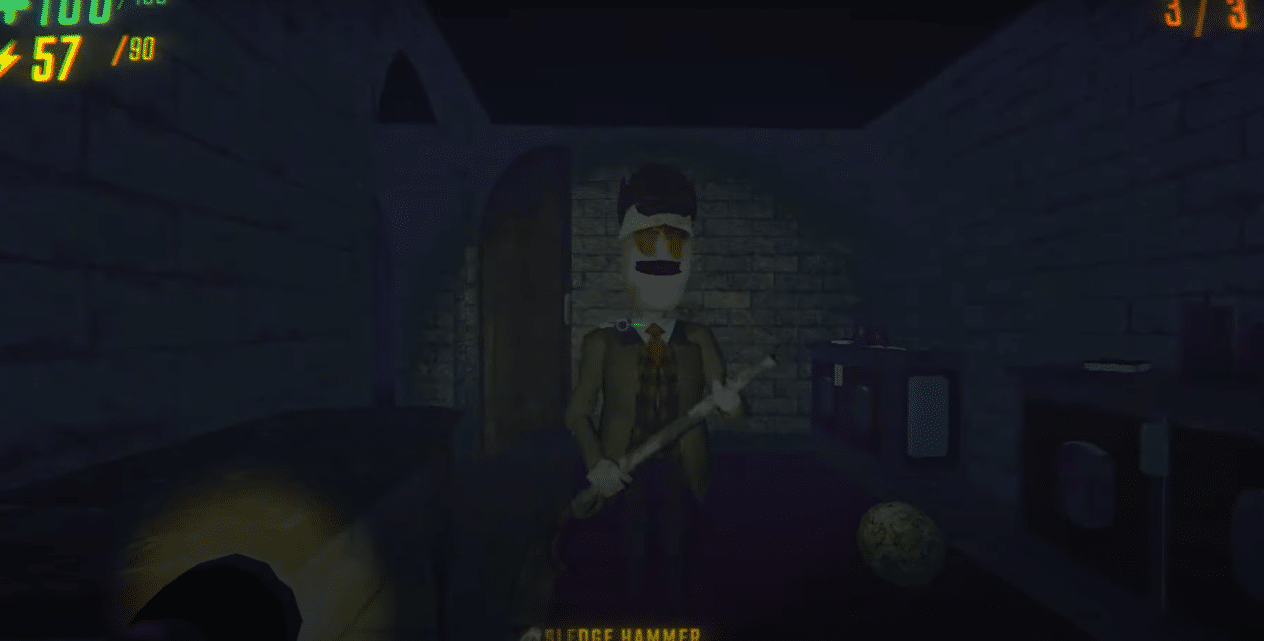
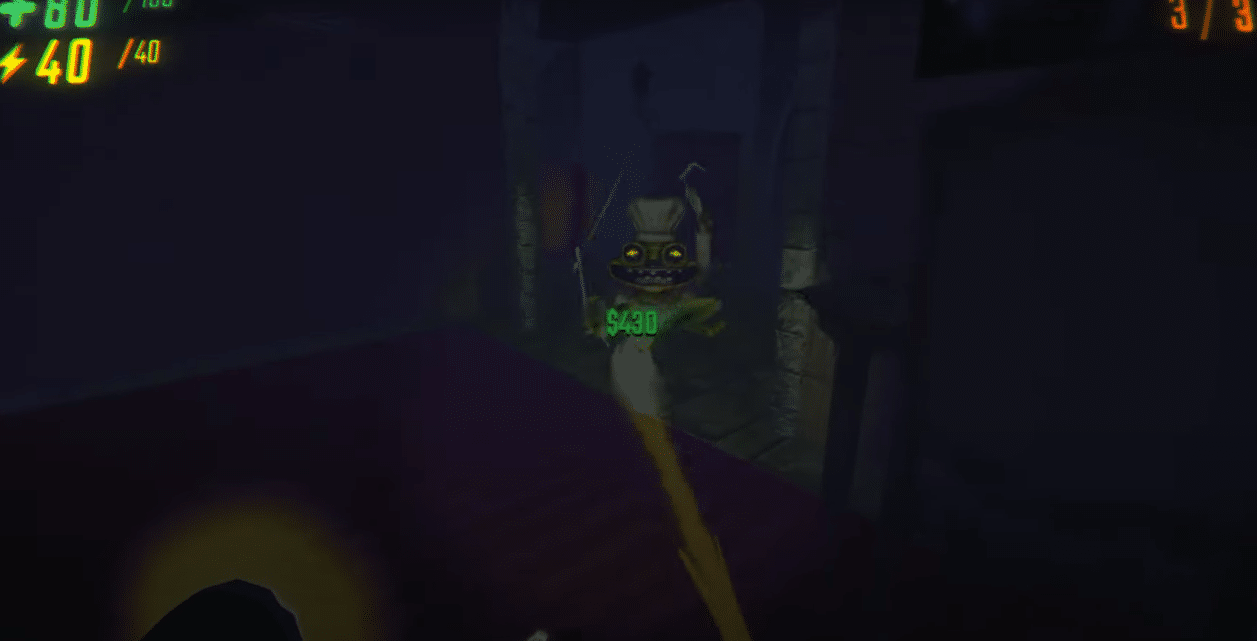
- Chef: The Chef is more of a joke than a threat, with only 150 HP and a predictable attack pattern. It hops around aimlessly until spotting a player, then pulls out its knives, pauses dramatically, and tumbles forward for a weak 10-damage attack. After tumbling, it stuns itself for a few seconds, practically handing you a free kill.
- If you want to take it out, it’s as easy as throwing a small item to stun it or just smacking it with a melee weapon. With nine strength upgrades, you can stun it by picking it up, making it even more of a non-threat. Killing it drops an orb worth $2,000–$5,000, which is probably the most valuable thing about it.
- Animals: They are some of the weirdest enemies in the game. They don’t attack traditionally, just run around wildly. If one sees you, it might charge once, then keep sprinting unpredictably.
- They have 150 health, deal 2 damage, and move fast, making them annoying but not deadly. Their biggest threat? Forcing you to drop items when they hit you. They’re easy to avoid by taking height, but in tight spaces or near pits, they can be a real hazard.
- Killing them isn’t necessary, but they drop orbs worth $2,000–$4,000. Small items stun them, but they might kick your weapon away. If you have 4 strength upgrades, you can stun them just by picking them up, just be sure to reset the grab every few seconds.
- Despite their chaos, they’re low damage and easy to counter.
D-Tier
- Shadow Child: The Shadow Child stands still but extends her arms the longer you look, eventually grabbing you for 30 damage. She’s easy to avoid, just don’t stare. Even brief glances rarely trigger her unless multiple players are looking.
- Since she never moves, she’s one of the easiest enemies to kill. Melee weapons and small items work well, though she often disappears before taking enough damage. At 9 strength, you can pick her up and kill her, dropping an orb worth $2,000–$5,000.
- Spewer: The Spewer is more of an annoyance than a real threat. It floats around and, once it spots a player, tries to latch on. If avoided long enough, it vomits, then either keeps chasing or flies away.
- If it latches onto you, it forces random vomiting, temporarily disabling you. While it can deal 10 damage per tick if it throws up on you, this rarely happens. Surprisingly, a latched Spewer can even be used as a weak weapon.
- With only 65 HP, it’s easily stunned by small items and can be grabbed and smashed with four strength upgrades. Killing it drops an orb worth $1,000–$4,000.
- Since it rarely deals damage and mostly just wastes your time, the Spewer is the least threatening enemy in the game.
Wrap-Up
R.E.P.O. thrives on unpredictability, and while some monsters are obviously more dangerous than others, the real challenge comes from how they interact. A Huntsman alone is scary, but combine it with a Hidden, and suddenly, you’re running blindly into gunfire. Even a weak enemy like a Bowtie can be lethal if it pushes you into a pit. My tier list is meant to help you understand what you’re up against, but the best way to survive is experience. Keep playing, learn from your mistakes, and most importantly, stay quiet when a Huntsman is near.


