In Where Winds Meet, Mystery Arts (also called Mystic Arts) are your ticket to solving puzzles, dominating combat, and exploring every nook and cranny of the game world. Quick heads-up: the names here are from the beta, so they might change slightly in the global release. but the way you acquire them? Totally the same. Whether you’re PvPing in the arena or chasing hidden treasures, mastering these arts will level up your gameplay big time. Let’s jump in!
Tai Chi
- Out-of-combat: Stir fallen leaves, create ripples on water surfaces, and interact with environmental puzzles.
- Combat: Pull and spin enemies, hurl them in a chosen direction. Extra effects trigger against shielded enemies.
- Use: Both damage and puzzle-solving.
- Acquisition: Early, after unlocking the map from a bear encounter.
Pro Tip: Tai Chi is great for clearing small groups and reaching hidden puzzle locations without breaking your stride.
Meridian Touch
- Out-of-combat: Observe meridians to trigger special effects on objects or NPCs.
- Combat: Immobilize enemies and break chi weak points.
- Limitations: Cannot affect mighty enemies.
- Acquisition: Find the petrified NPC at the marked location.
Pro Tip: Use this to reveal hidden weak points in boss fights or freeze tricky targets temporarily.
Heavenly Snatch
- Out-of-combat: Pull distant objects, loot treasure chests, or grab items from NPC backpacks.
- Combat: Disarm enemies and counterattack with their weapon, scaling damage by weapon weight.
- Acquisition: Complete the quest with the NPC at the marked location.
Pro Tip: Perfect for solving puzzles requiring precise object placement and for stealing key items mid-combat.
Cloud Steps
- Out-of-combat: Leap high, crash down, or traverse marked locations with style.
- Combat: Step on enemies’ shoulders to deal AoE damage. Bonus effects on cavalry or unstable units.
- Acquisition: Early main story quest, inside a cave.
Pro Tip: Excellent for vertical exploration and chain combos.
Guardian Palm
- Combat: Smite the ground for AoE damage. From a height of 3–5 meters, it evolves into Lamplight, knocking back enemies in a wide area.
- Acquisition: Complete the monk quest at the marked location, it’s one of the most spiritually themed side stories in the game, so I’ll leave the surprises for you to experience.
Pro Tip: Use in crowded fights to control space and reduce incoming attacks.
Flaming Meteor
- Combat: Leap into the air, charge blazing energy into a spear, then slam the ground for AoE damage. Provides super armor and temporary damage reduction.
- Acquisition: Defeat a boss by filling the eye-shaped bar through timed parries. You’ll need a total of 10 perfect parries to fill it completely. Equip a fan for safer farming. You’ll find it in a murky swamp area crawling with crocodiles, where rickety wooden bridges are your only safe path forward.
Pro Tip: Ideal for taking down tough groups; chain with other AoE skills for maximum effect.
How to Summon Boss to Learn Flaming Meteor
To summon the boss that teaches this art, you’ll first need to complete the local questline in the area. It can be done solo or in co-op, so bring a friend if you want backup. Once the quest begins, enter the swamp and listen carefully, you’ll hear the echo of drums in the distance. Follow these sounds in order; each will lead you to a group of enemies guarding a drum.
Defeat the mobs at every location, but be cautious, even after their HP hits zero, there’s a brief delay before they’re truly down. Once the area is clear, strike the drum to move to the next.
You’ll need to hit four drums in total. After all four are activated, return to the center and pound the main drum to summon the Flaming Meteor boss.
Talon Strike
- PvP-focused: Break enemy defenses with a swift multi-hit strike.
- Acquisition: Jump to the cliff on the bird’s nest shown in the map and complete the mini-game.
Pro Tip: Timing is everything, perfect for countering aggressive players in Arena mode.
Wolflike Frenzy
- Combat: Powerful PvE and PvP skill; knock down enemies and follow up with a rapid barrage of attacks.
- Acquisition: Ghost Market hidden coffin entrance → climb cave → open chest.
Pro Tip: Excellent for crowd control or finishing off weakened enemies.
Blinding Mist
- Combat: Cast a poisonous mist to blind enemies and block vision for 5 seconds, allowing follow-up attacks.
- Acquisition: Complete specific underwater and statue-based puzzles; requires shooting bells in sequence.
Pro Tip: Useful for controlling enemy positioning in both dungeons and PvP encounters.
How to Complete the Quest for Blinding Mist
To begin, speak with the nearby NPC, then dive straight into the lake below. You’ll find three underwater mechanisms, activate all three to trigger the next step. Once they’re done, you’ll notice the water in the lake completely drains, revealing a massive statue at the center.
Head beneath the statue and stand on the largest circular stone platform. Around you are four smaller mechanisms. Activate them one by one in a clockwise order, starting from the north. Doing so will cause a stone gate to open nearby.
Proceed inside carefully, the tunnel is filled with traps. Equip fire arrows and shoot them ahead of you to safely clear the path. When you reach a bridge, look to your right and you’ll spot some blue flowers. Approach and touch them.
The moment you do, your surroundings will turn pitch-black, and only the faint glow of drifting water droplets will guide your way. Follow these droplets closely to escape the darkness. Continue swimming downward, following the quest icon deeper into the area.
Eventually, you’ll reach a puzzle involving bells. The game will ask you to shoot them in a specific order, but the solution isn’t random. Touch another blue flower nearby, and listen carefully to the order in which the bells chime. Return to the puzzle area and use your bow to shoot the glowing stone orbs above the bells (not the bells themselves) in the correct sequence. Once done correctly, another stone gate will open.
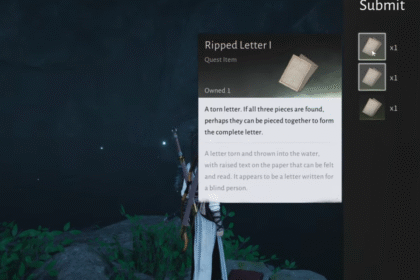
Inside, you’ll be tasked with collecting three quest items for the NPC. All three can be found within this underground section, explore the lower areas carefully, and you’ll spot them easily.
Soaring Spin
- Combat: Spiral thrust combo that damages enemies and reduces their healing effects.
- Acquisition: To unlock it, head to Kaifeng City and start the related quest. You won’t need to complete the entire questline, just progress until you reach the large statue area.
Once there, stand before the statue and use Cloud Steps to jump on top. Then, use Heavenly Snatch to grab the small chest located above. Opening it rewards you with the Soaring Spin skill instantly.
Pro Tip: Works great against bosses with high healing or regeneration abilities.
Serene Breeze
- Combat: Channels chi to purge toxins, break crowd control, and reduce enemy endurance recovery.
- Acquisition: Early through the Talent system.
Pro Tip: Keep it handy for tough status effect encounters.
Golden Body
- Combat: Grants a shield and chi recovery for 8 seconds, increases tenacity and damage reduction.
- Acquisition: Steal the skill book from the youth monk at the upper right corner of the large temple in Kaifeng City (morning only).
Pro Tip: Great for tanking or surviving tricky boss mechanics.
Ghostly Steps
- Combat: Gain Mirage status, reducing dodge endurance cost and slightly increasing invulnerability duration.
- Acquisition: Hidden cave in the right side of the Ghost Market → claim the large reward chest.
Pro Tip: Perfect for long combat rotations and conserving Vitality.
Veil of Stillness
- Stealth: Suppress presence and become less detectable.
- Acquisition: Mini-game with NPC, by heading straight from the marked teleport point in Southeast of Moonveil Peak.
Pro Tip: Useful for sneaking past tough mobs or performing stealth takedowns.
Glow of Fireflies
- Support: Summon a swarm of fireflies to illuminate dark areas.
- Acquisition: Pick flowers near a cat NPC.
Pro Tip: Great for exploring caves or night-time environments.
Lion’s Roar
- Combat: Slam a giant bell, dealing AoE damage and gaining buffs while casting.
- Acquisition: Activate all four large bells scattered across the map.
Pro Tip: Works wonders for clearing clusters of enemies and providing buffs mid-fight.
Leaping Toad
- Combat: Perform backflips to knock back enemies and unleash lunges; third strike transforms into Golden Toad Crash.
- Acquisition: Complete a martial arts mini-game with an NPC.
Pro Tip: Effective in PvP arenas and for controlling multiple targets.
Ghost Bind
- Combat: Immobilize up to six enemies, break vital points, and deal damage.
- Acquisition: Small quest at a marked location southeast of Kaifeng city.
Pro Tip: Excellent for stunning groups before unleashing AoE attacks.
Drunken Poet
- Combat: Drink strong spirit to perform up to 5 drunken attacks, inflicting damage and debuffs.
- Acquisition: Buy 8–10 bottles from NPC and keep drinking until learned.
Pro Tip: Chain with Loong’s Fire-breath for insane combos.
Loong’s Fire-breath
- Combat: Combo with Drunken Poet for two-hit fiery AoE.
- Acquisition: Follow daytime tower quest → steal item with Heavenly Snatch → return to NPC.
Pro Tip: Timing with Drunken Poet maximizes damage.
Loong Head
- Combat: AoE attack by gathering leaves and dust into a mighty strike.
- Acquisition: Unlocks automatically after collecting 35 other Mystery Arts.
Pro Tip: Great for clearing waves of enemies while staying mobile.
Free Morph + Yaksha Rush
- PvP-focused: Free Morph launches airborne flurry; Yaksha Rush lunges forward, breaking defenses.
- Acquisition: Complete long quest chain → defeat final boss → fill eye-shaped gauge.
Pro Tip: Perfect for Arena mode; great for finishing off high-defense enemies.
Quick Tips for Mystic Arts
- Equip up to 8 Mystic Arts at a time (4 per row) and swap rows for combat vs puzzle-solving.
- Vitality fuels your arts; hitting enemies or reaching Boundary Stones restores it.
- Most Offensive Mystic Arts can be upgraded with collected materials.
- General and Movement Mystic Arts mostly unlock naturally, explore everything for full benefits.
Final Thoughts
Unlocking these 23 Mystery Arts isn’t just about reaching locations, it’s about exploration, puzzle-solving, and immersing yourself in the world. Mastery of these arts elevates both PvE and PvP gameplay, letting you express your personal combat style and strategy.
Keep an eye on your Vitality, equip arts smartly, and experiment with different combos. The world of Where Winds Meet rewards curiosity, skill, and creativity. Want to take your combat even further? Check out our guide on Which Are the Best Weapons in Where Winds Meet? to pair your Mystic Arts with the perfect arsenal.


