Grounded 2 has a vast map that is full of secrets and mysteries to uncover. Since it’s a survival game, most of your time will be spent trying to gather up resources so you can survive. But unlocking additional recipes, upgrades and sets is also essential so you have a better chance of survival while still progressing. This is where optical disks can help as they allow you to pretty much get to the end game of upgrades. So, your goal will be to get all of them gradually as you progress through the game. In this guide, we’ll show you the locations of all 6 optical disks in Grounded 2. Let’s get into it!
- All Missing Optical Disk Locations
- Optical Disk Location #1 – Snackbar Turbo Optical Disk
- Optical Disk Location #2 – TURBO Stolen Optical Disk
- Optical Disk Location #3 – Ice Cream Cart Optical Disk
- Optical Disk Location #4 – Toxic Anthill Optical Disk
- Optical Disk Location #5 – Spider Den Optical Disk
- Optical Disk Location #6 – Network Central Optical Disk (Major Spoilers Ahead!)
- Wrap Up
All Missing Optical Disk Locations
There are a total of 6 optical disks in Grounded 2 – which includes the Missing Optical Disks. They are scattered in various locations – some of which are tied to quests and main story progression. As a result, some of the locations may not be available for you immediately.
If you ever do get stuck at a location or can’t access it, it simply means that you need to progress with the story.
So, we will be referring to key story points – including those related to the final boss. As a result, there will be spoilers, especially related to the final location.
When you get an Optical Disk, it causes you to unlock all sorts of recipes, upgrades and sets. You can go to the Science Shop to see everything new you unlocked. Keep in mind that you will still need to spend Raw Science to get them.
While you’re at it, you might also want to consider our best base locations guide. It will show you all the ideal locations from early to late game.

Optical Disk Location #1 – Snackbar Turbo Optical Disk
Starting off, we’ll be heading to the Snackbar Anthill situated in the Snackbar Front region. There is also a quest objective called Search The Body – so you will more than likely come across here.
Once you reach the entrance of the anthill, head inside.


Once you enter the anthill, make your way to the dead body. Near the dead body, you should see a buried treasure poking out of the ground. Use your shovel to dig it up.
Loot the storage box and you should find the Snackbar Turbo Optical Disk inside, among some other valuable loot.

Optical Disk Location #2 – TURBO Stolen Optical Disk
The next optical disk can also be found in the Snackbar Front region. Specifically, it is near the wooden platform that you can find near the Snackbar.
You will also come here as part of the story progression.

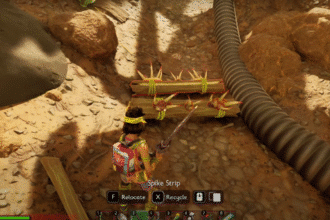
Under the wooden platform, you should come across a hole that leads underground. Enter the hole and go all the way to the end, where you’ll see a light shining om some loot.
The TURBO Stolen Optical Disk will be here too. It’s pretty easy to miss with the light shining in your eyes so it’s possible you might’ve missed it already.
Optical Disk Location #3 – Ice Cream Cart Optical Disk
As the name suggests, we’ll be heading to the Ice Cream Cart region all the way in the bottom right of the map. Specifically, you want to head towards the marker shown below.
But be careful though as the ice cream cart is cold and has the Chilling effect that will slowly kill you if you stay there too long. So, you’ll need to come prepared with the Fuzzy Gear Set – as it gives Chill reduction.

Once you’re ready, make your way inside the ice cream cart. Keep in mind that the moment you touch the ice, the Chilling effect will set in. So, you will need to be quick.
Deep inside the ice cream cart, near one of the ice cream cones, you’ll find a dead body. The Ice Cream Cart Optical Disk will be next to the body. Be sure to pick it up quick as there are Northern Scorpion enemies here.

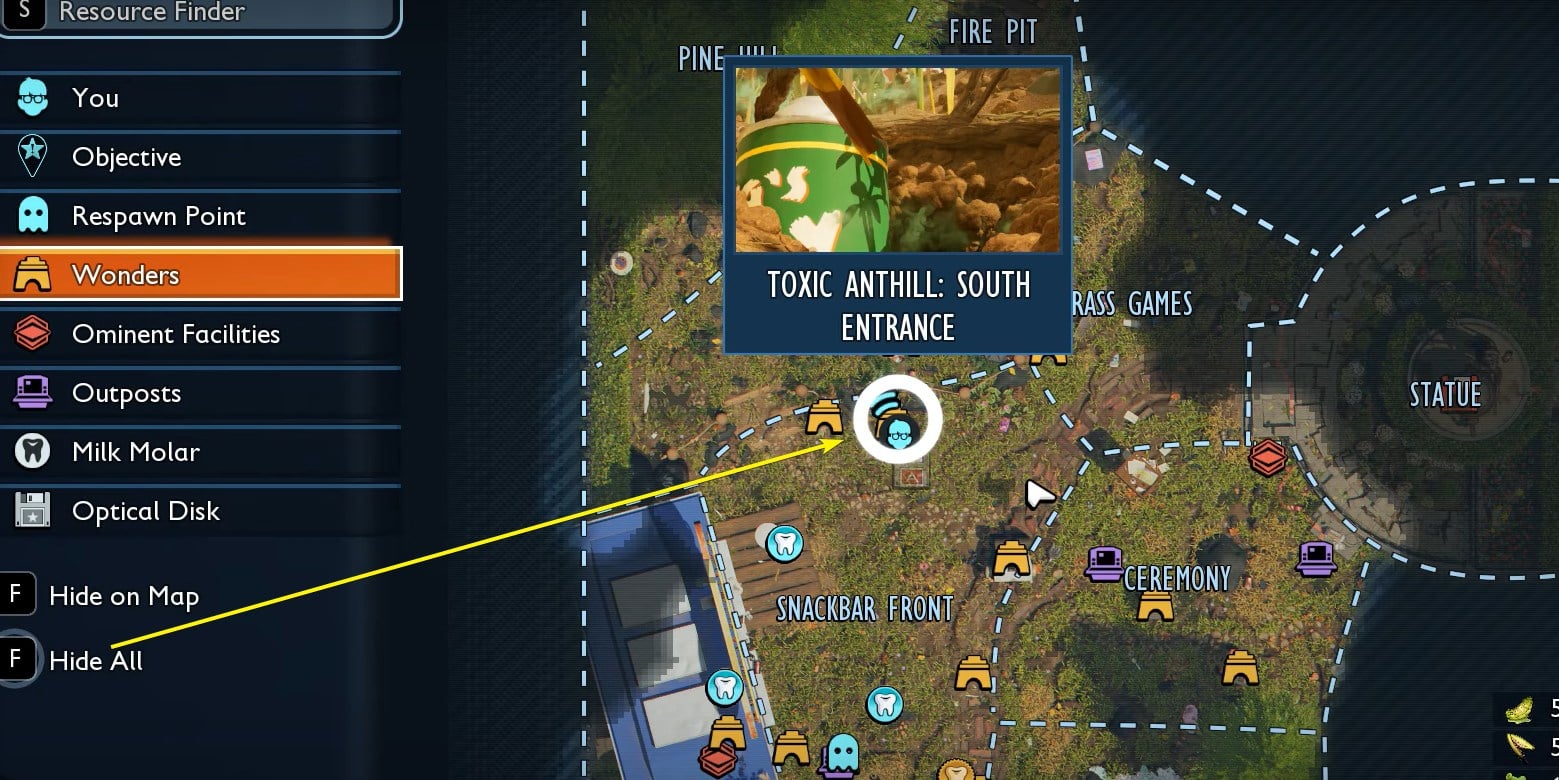
Optical Disk Location #4 – Toxic Anthill Optical Disk
For the next Optical Disk, we’ll be returning to the Snackbar Front. This time your goal is to navigate deep into the Toxic Anthill. You can do this via the Southern Entrance marked below on the map.
Be careful though as this is the area that is full of cockroaches.

After entering the south entrance, your goal is to take the first left and enter the tunnel. Eventually, you’ll come across a spray can, after which you’ll need to take a right.
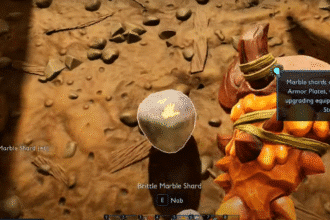
Keep following the tunnel until you reach a large room. Towards the right, at the end of the room, you should spot a corpse. The Toxic Anthill Optical Disk is right next to it.
However, this area is also where the Cockroach Queen boss is so be ready as she’ll immediately try to attack you.
Optical Disk Location #5 – Spider Den Optical Disk
Next up, we’ll be making our way to the Pine Hill region all the way in the top right. Here, you’ll be entering the Spider Den Anthill from the North Entrance. Make sure you are at the correct height as this entrance is on the second level.
Be careful as there are many spider enemies in this area (no surprises there).


Once you enter the anthill, you’ll want to head straight first followed by a right at the next intersection. From here, you’ll mostly want to stick to the right until you come to a room with a bunch of roots.
On the right side of the room, you should find a corpse. The Spider Den Optical Disk will be right next to it so be sure to pick it up.

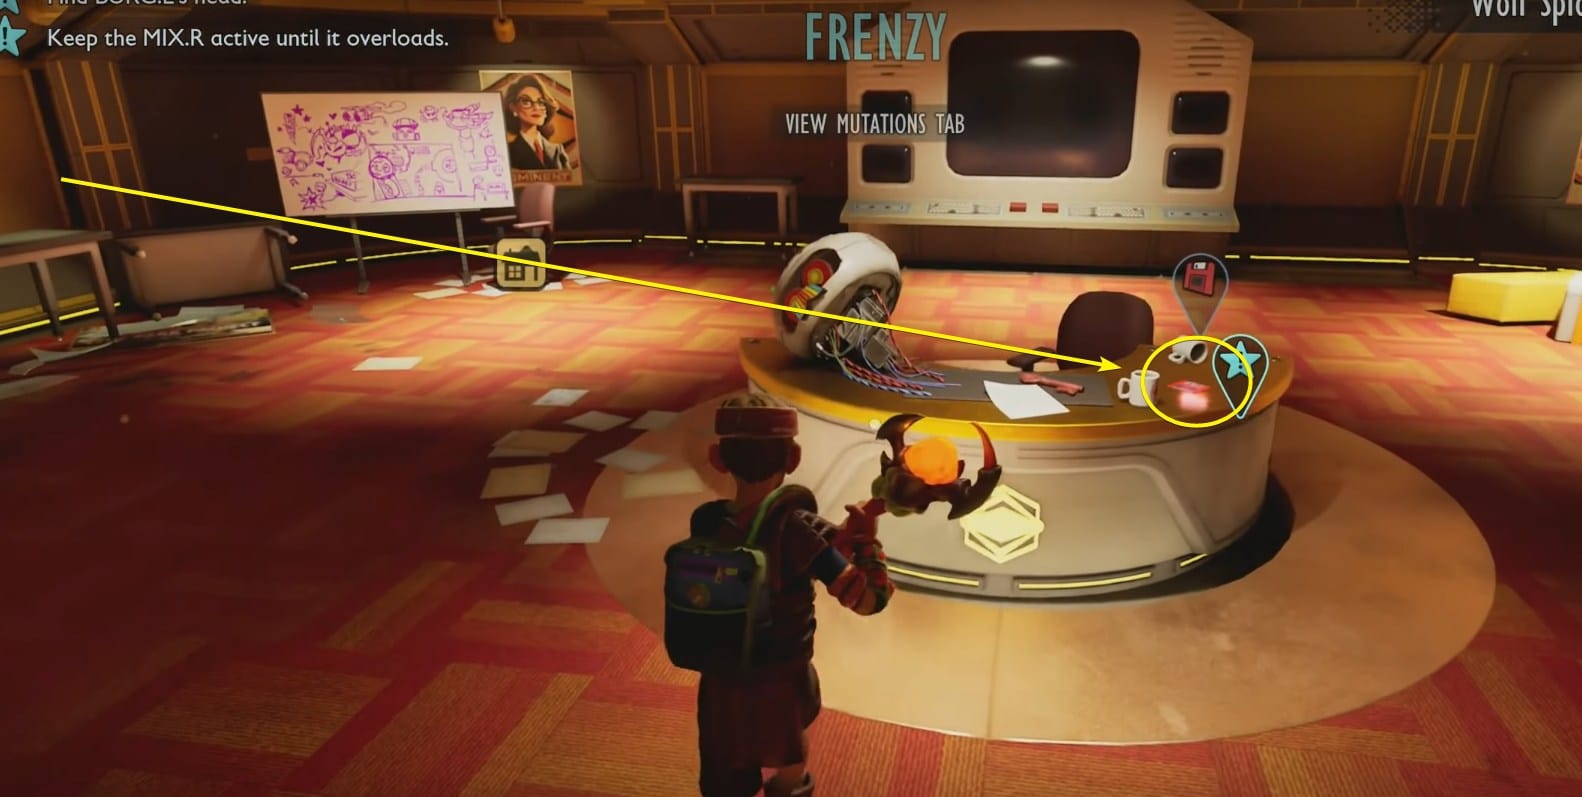
Optical Disk Location #6 – Network Central Optical Disk (Major Spoilers Ahead!)
The final optical disk can be found right after the final boss fight against the Mysterious Stranger. After the fight, enter the room and you should see a desk in front of an office.
The Network Central Optical Disk can be picked up from the right side of the desk, next to the BURG-L’s head.
Wrap Up
That’s everything you need to know for all the missing optical disk locations in Grounded 2. Be sure to grab all of these as you progress through the game so that you can get the best possible recipes and upgrades. They will help guide you from the early game to the end game after you’ve defeated the boss. Remember, you will not be able to get all of them at once as some are linked to quests or just general progression. After all, some of the enemies in these areas are dangerous and could easily kill you at lower levels.