Limveld is the shifting map you get to explore while on Expeditions in Elden Ring: Nightreign. The land has a unique layout that remains the same every time, but a lot of its points of interest change every run. While that adds an element of randomization, it’s still possible to learn about the key areas you want to visit. In this guide, we’ll tell you all about them!
Consistent Locations

First of all, let’s talk about the key locations that remain the same in every Expedition. Limveld itself always maintains its exact same landmass, for one. That means that cliffs, hills, lakes, and such remain the same every time.
Additionally, these are other key elements that remain the same on every Expedition:
- Sites of Grace – Represented by a golden circle, they appear as golden rays of light on the ground. Getting close to them will heal you and refill your Flask of Crimson Tears. Interacting with them also lets you spend Runes you’ve earned to increase your character’s Level for the Expedition.
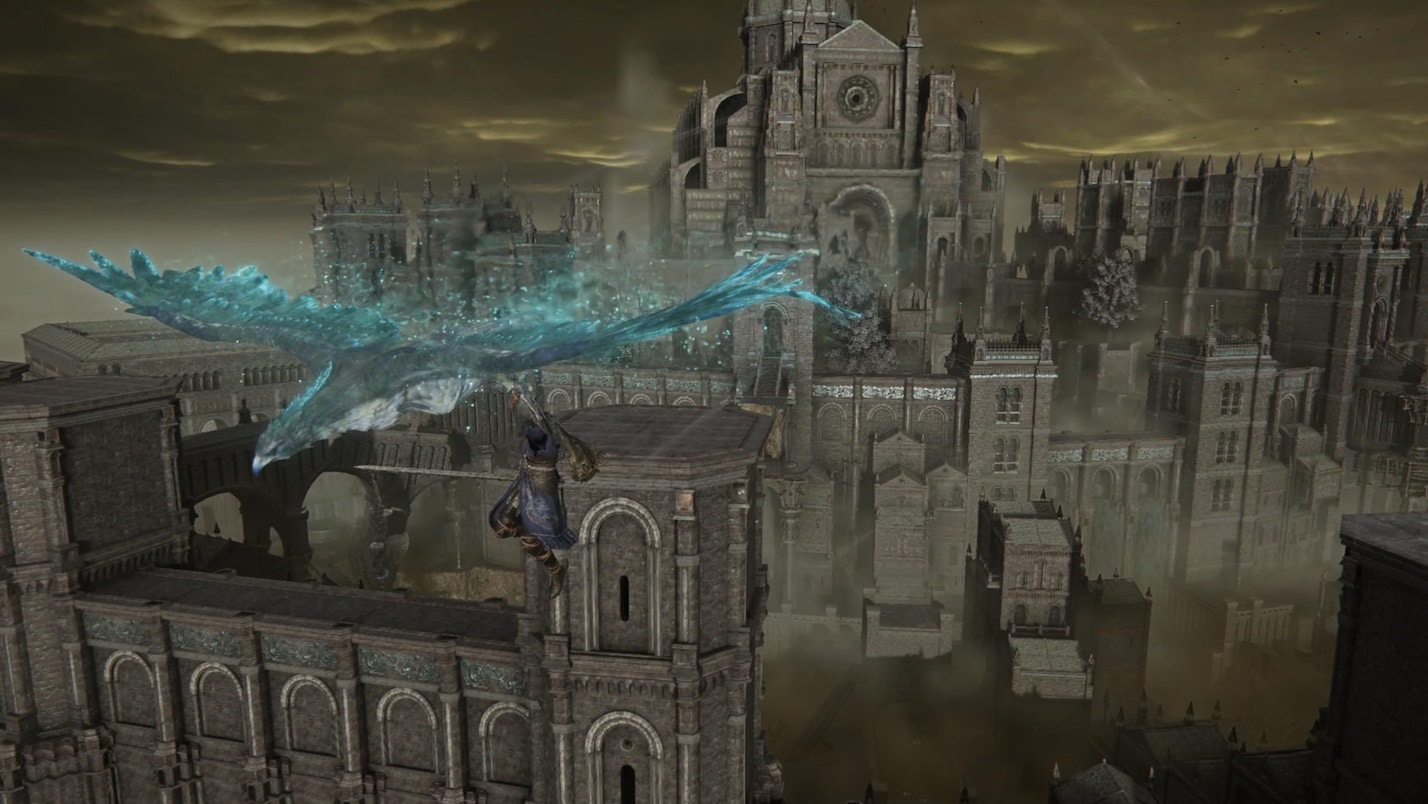
- Spiritstreams – Represented on the map by blue tendrils emerging from the earth. You can use these tall shadowy streams of energy to make a massive jump, allowing you to reach higher areas.
- Spectral Hawk Trees – Represented on the map by a tree with blue leaves. Interact with these trees to summon a hawk, which you can ride to quickly cross Limveld. The hawk’s path is shown on the map as white lines.
- Evergaols – These appear on the map as a dull green circle. Approach these contraptions and spend a Stonesword Key to summon a miniboss. Defeat them to get a choice of rewards!
- Castle – Appears as a massive building in the middle of Limveld. Full of strong enemies and bosses, but also lots of loot.
- Caves – Underground areas represented on the map by a rocky archway. Great for Smithing Stones to upgrade weapons with. Fairly risky, though, since they’re on the edges of Limveld. You can display the cave system by pressing up or down on the d-pad (controller) or 3 and 4 (keyboard and mouse).
Note that the enemies and loot at these spots can change, even if the spots themselves are static. Keep that in mind!
Randomized Locations
On top of the previously listed locations, there are also a bunch of locations across Limveld that change for every Expedition you take on in Elden Ring: Nightreign. Let’s go over all of them now!
Churches
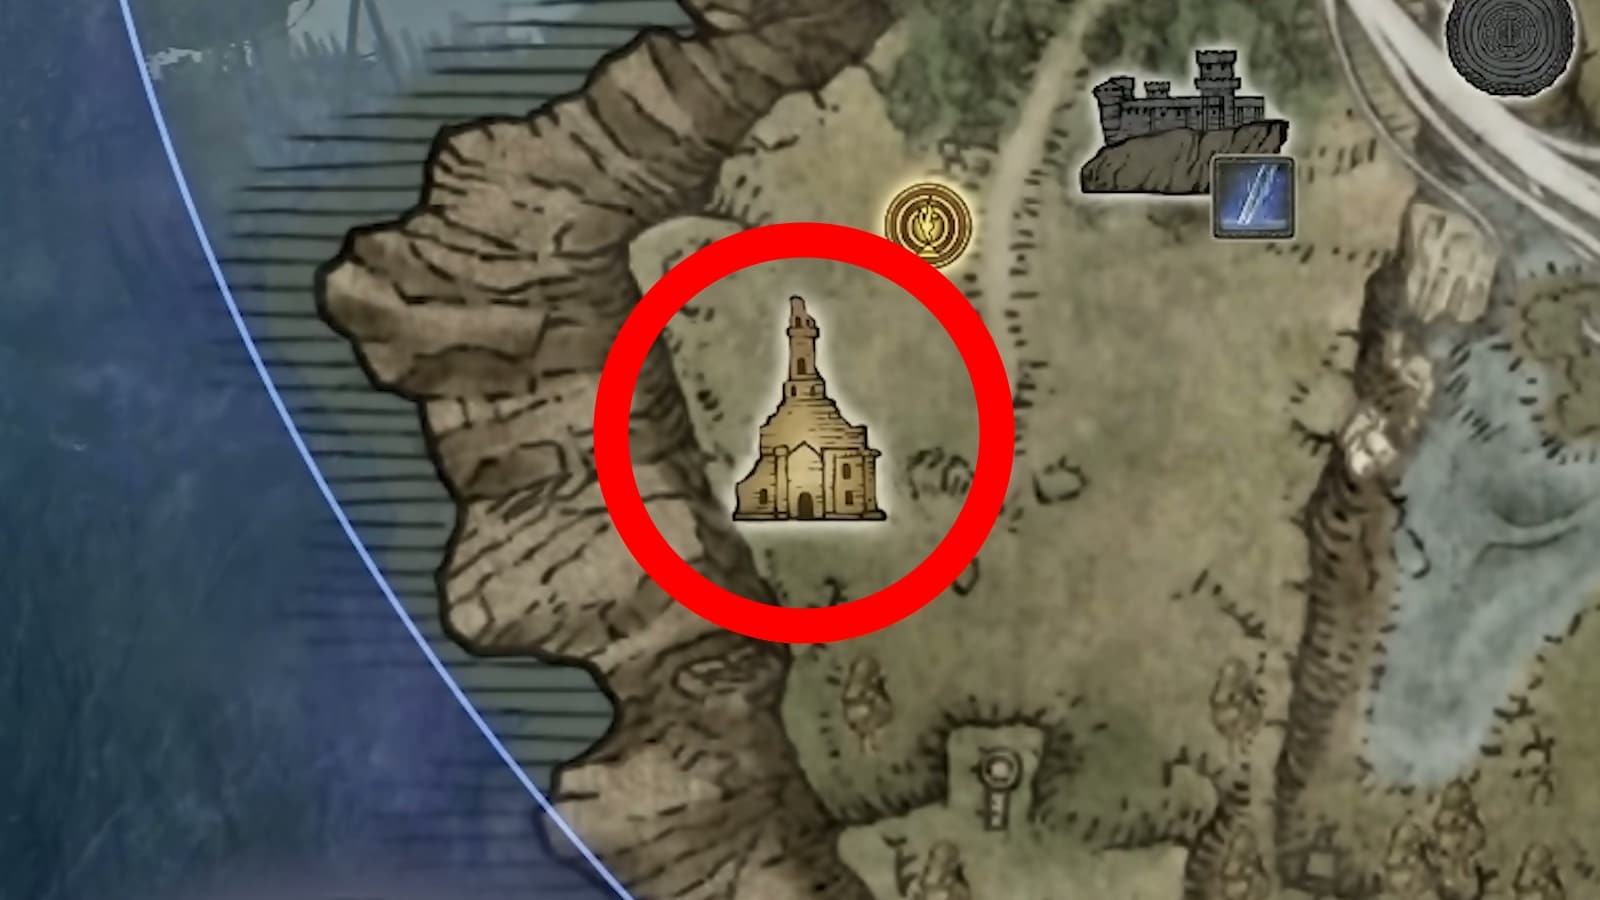
Appear on the map as tall golden buildings. These ruined churches of Marika should be one of the first spots you visit on every Expedition. Interact with the altar at a church to fully heal yourself and gain 1 more maximum charge for your Flask of Crimson Tears. This also refills the flask! Make these your main priority on day 1.
Forts

These appear on the map as a castle atop a cliff. They always contain a map at the top of one of the fort’s towers. Reading these maps will reveal useful things, such as the location of hidden loot and Scarabs.
Great Churches

Large places of worship that always contain a variety of enemies, they’re shown on the map as bulky dull green buildings. There are different layouts, with some of them having holes in the ground that allow you to enter a basement. Either way, they almost always contain an easy miniboss that provides a choice of rewards. They also have Sacred Seals pretty frequently. No Flask charges here, though!
Main Encampment
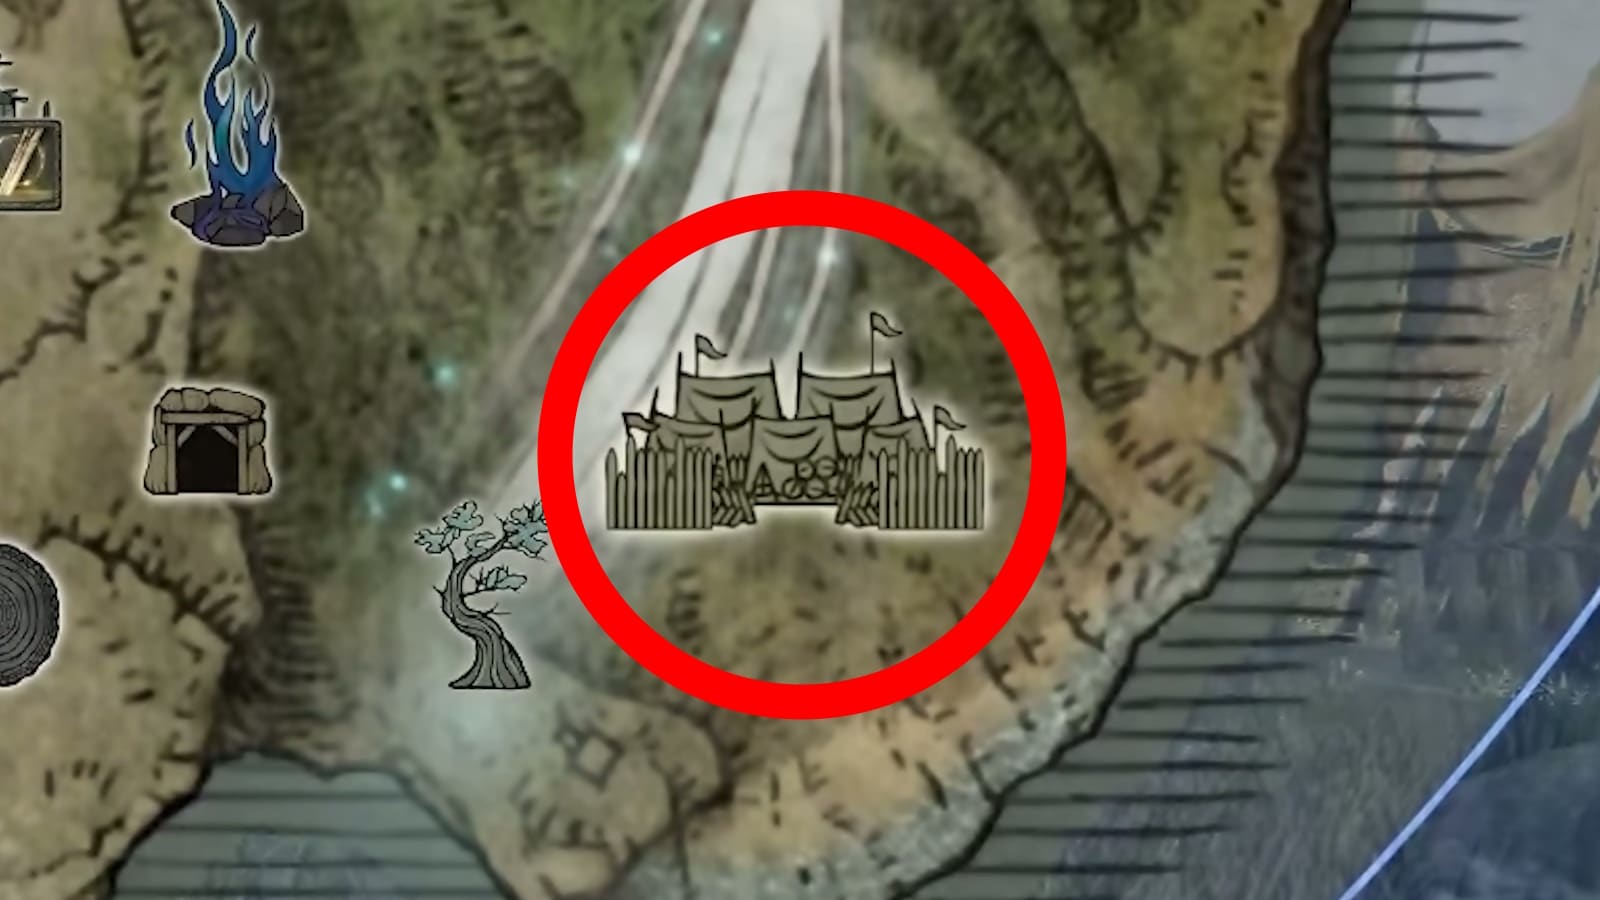
A camp full of enemies, represented on your map by large tents. These vary a lot but seem to always contain a group miniboss encounter. They also have a lot of chests, so they make for some good looting!
Ruins

Appear on your map as some downtrodden pillars. They mostly contain a bunch of enemies, with some elite enemies counting as a group miniboss encounter. More importantly, they also have stairways that lead to basements full of chests.
Township

Shown on the map as a group of houses. These are home to merchants with much larger stocks than the ones found in other areas. You can also find an anvil to upgrade your weapons with. The smoke from the merchants’ bonfire makes these easy to spot, as well.
Sorcerer’s Rise
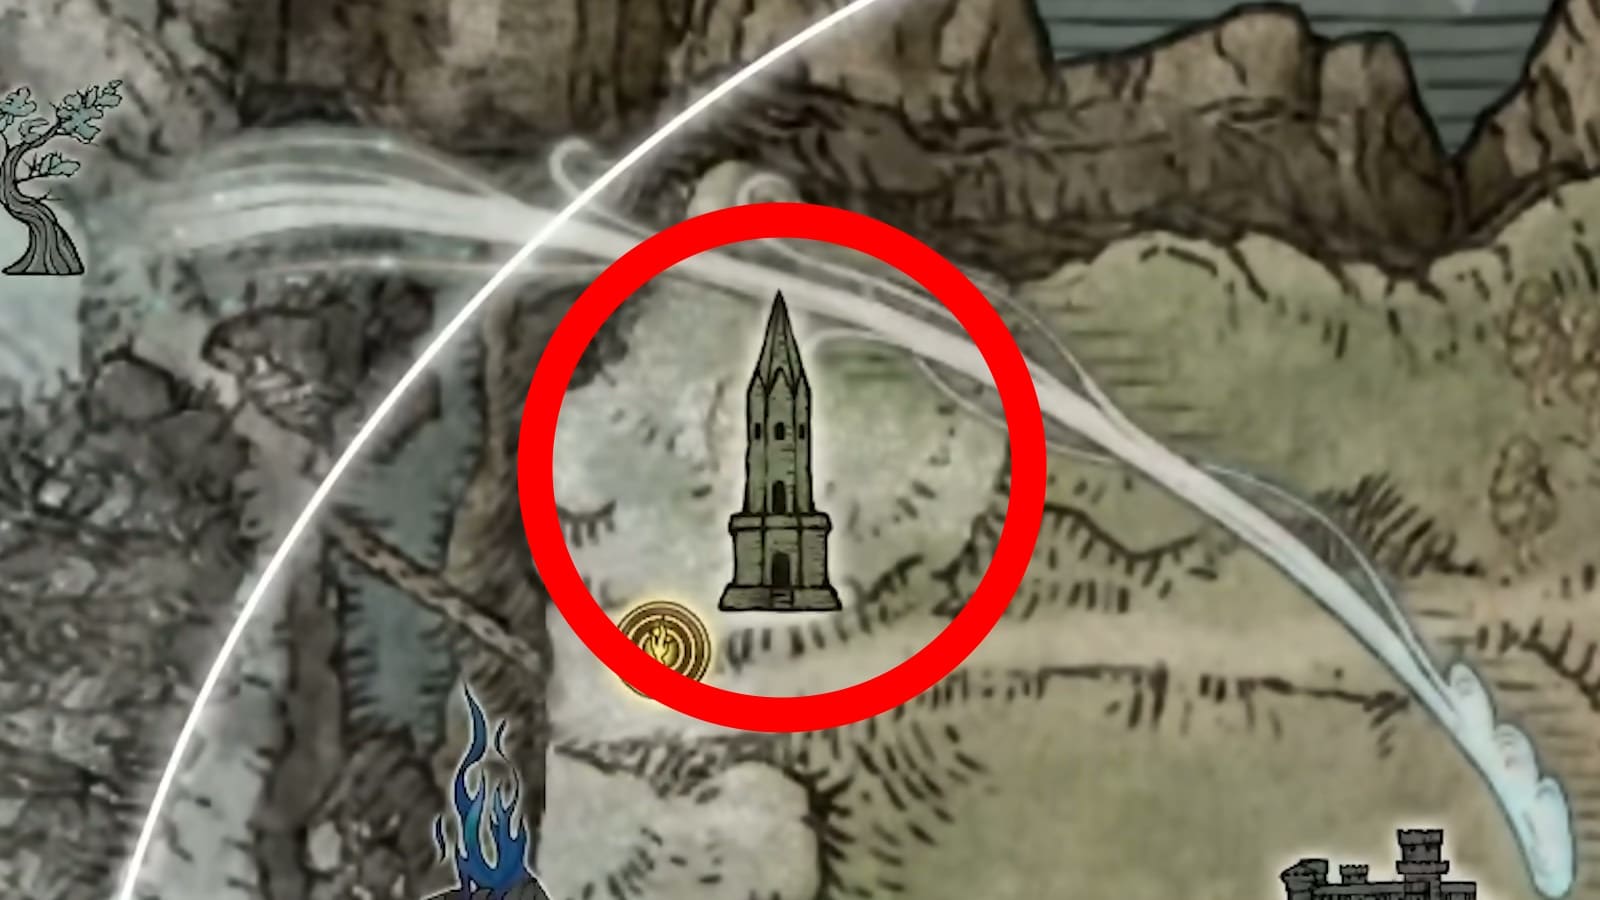
These show up on the map as tall dull green towers. You can find a reward cache with a selection of magic-oriented rewards at the very top. However, reaching the top will require you to find a large blue magic seal hidden somewhere nearby. Visiting these is a must for the Recluse!
Field Bosses
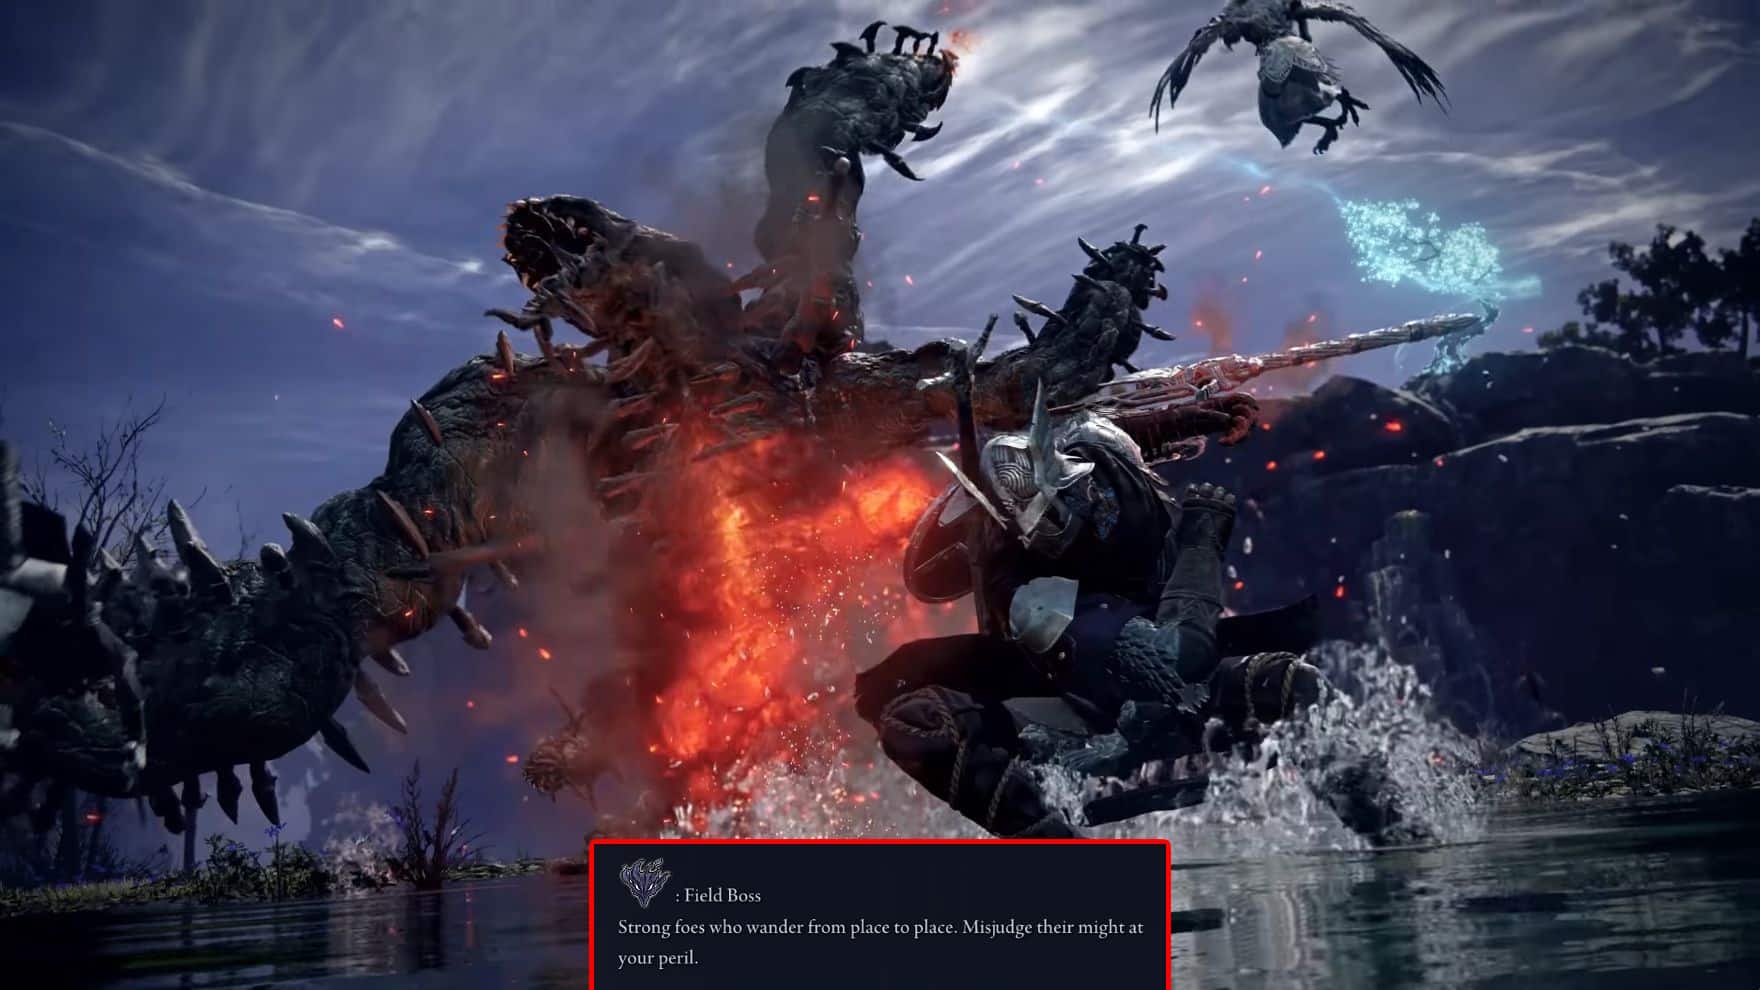
These don’t appear on your in-game map until you’ve already encountered them. When you have, they show up as purple dragon-like faces with red eyes. They are tougher bosses than the ones you usually find in other points of interests, so we recommend only tackling them on day 2. Nonetheless, they let you get great rewards and a pretty substantial number of Runes!
Finding the Equipment You Want While Exploring Limveld in Elden Ring: Nightreign
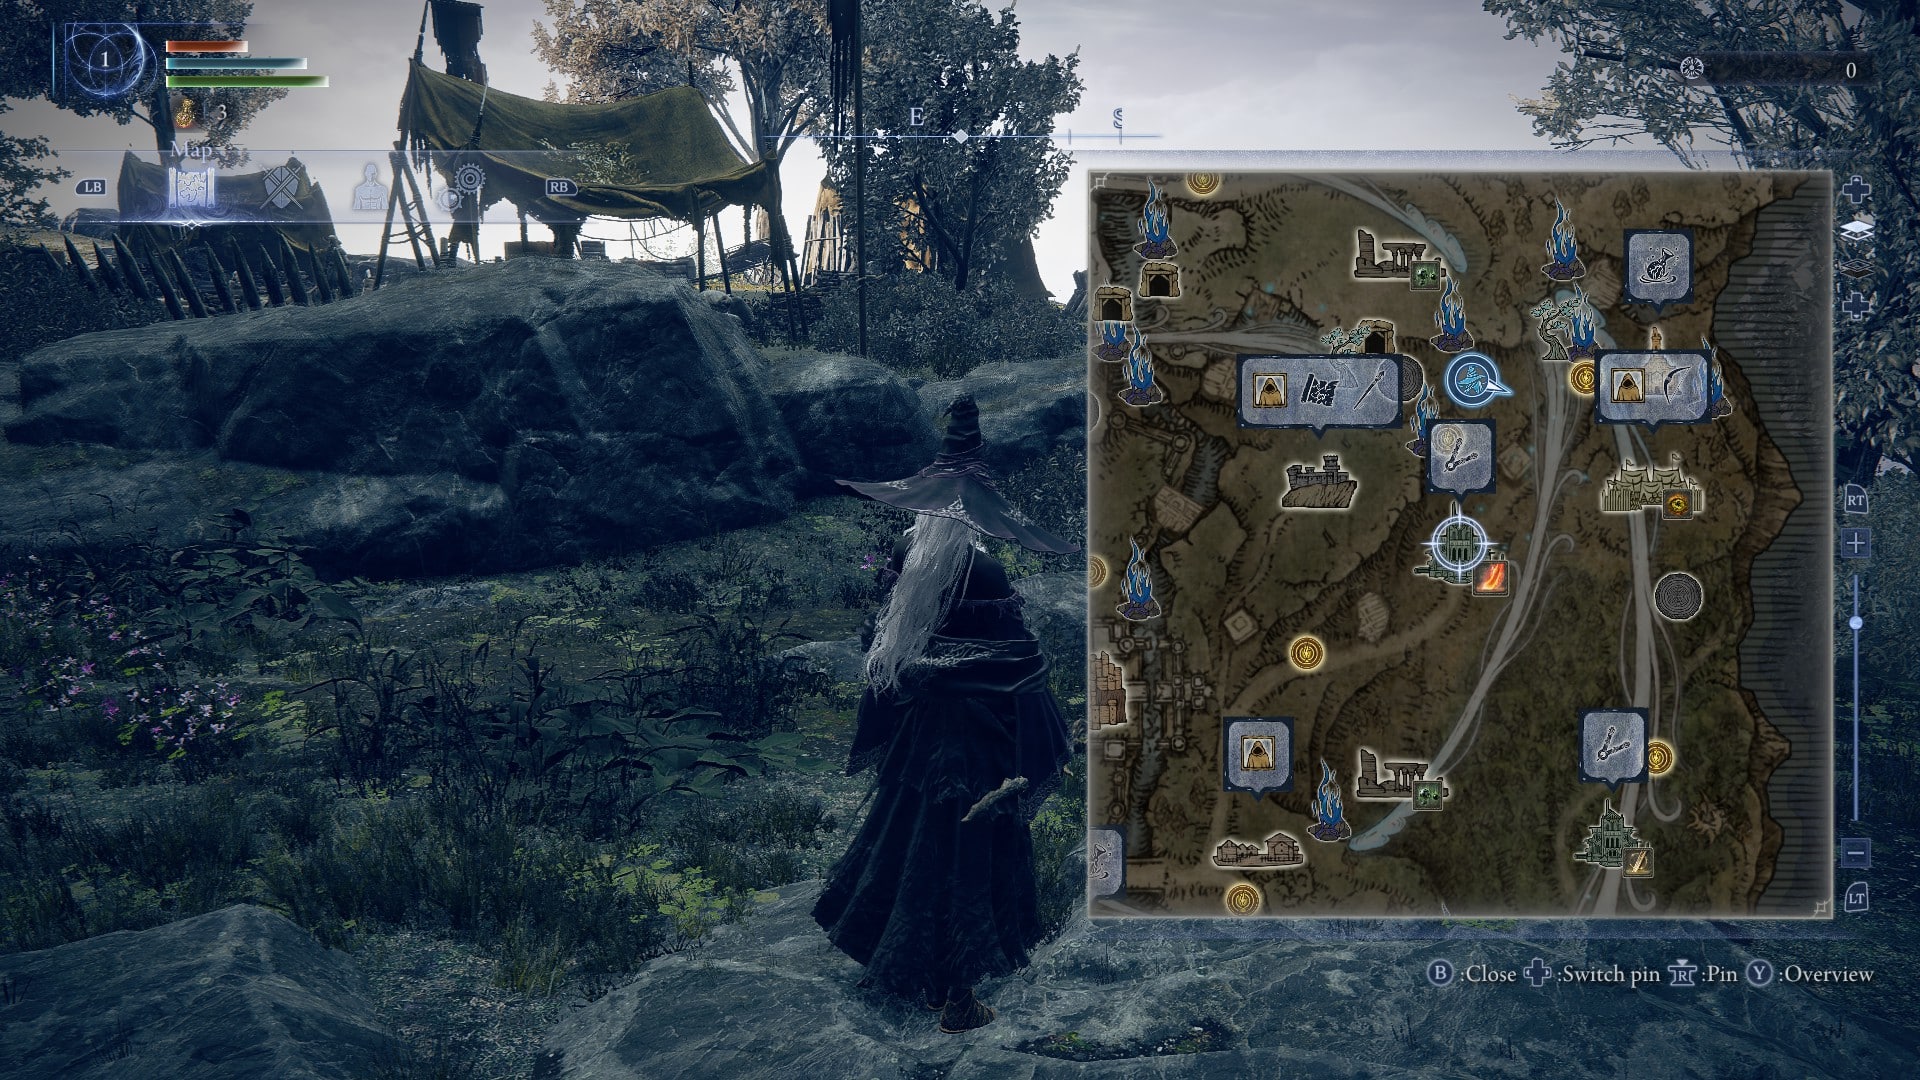
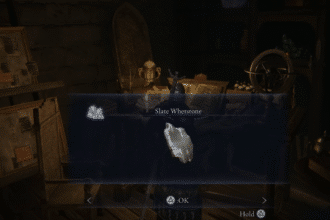
With so many places to visit and so little time, you might find it hard to find the equipment you want during each Expedition. So, you should know that you can press Y (Xbox), Triangle (PlayStation), or V (PC) to display a detailed view of the map. This will show a pop-up box above each point of interest, letting you know what items are within.

If you have trouble figuring out what each icon means, you can use the screenshot above as a guide. It’s from the in-game Visual Codex, which you can find within the western wing of the Roundtable Hold.
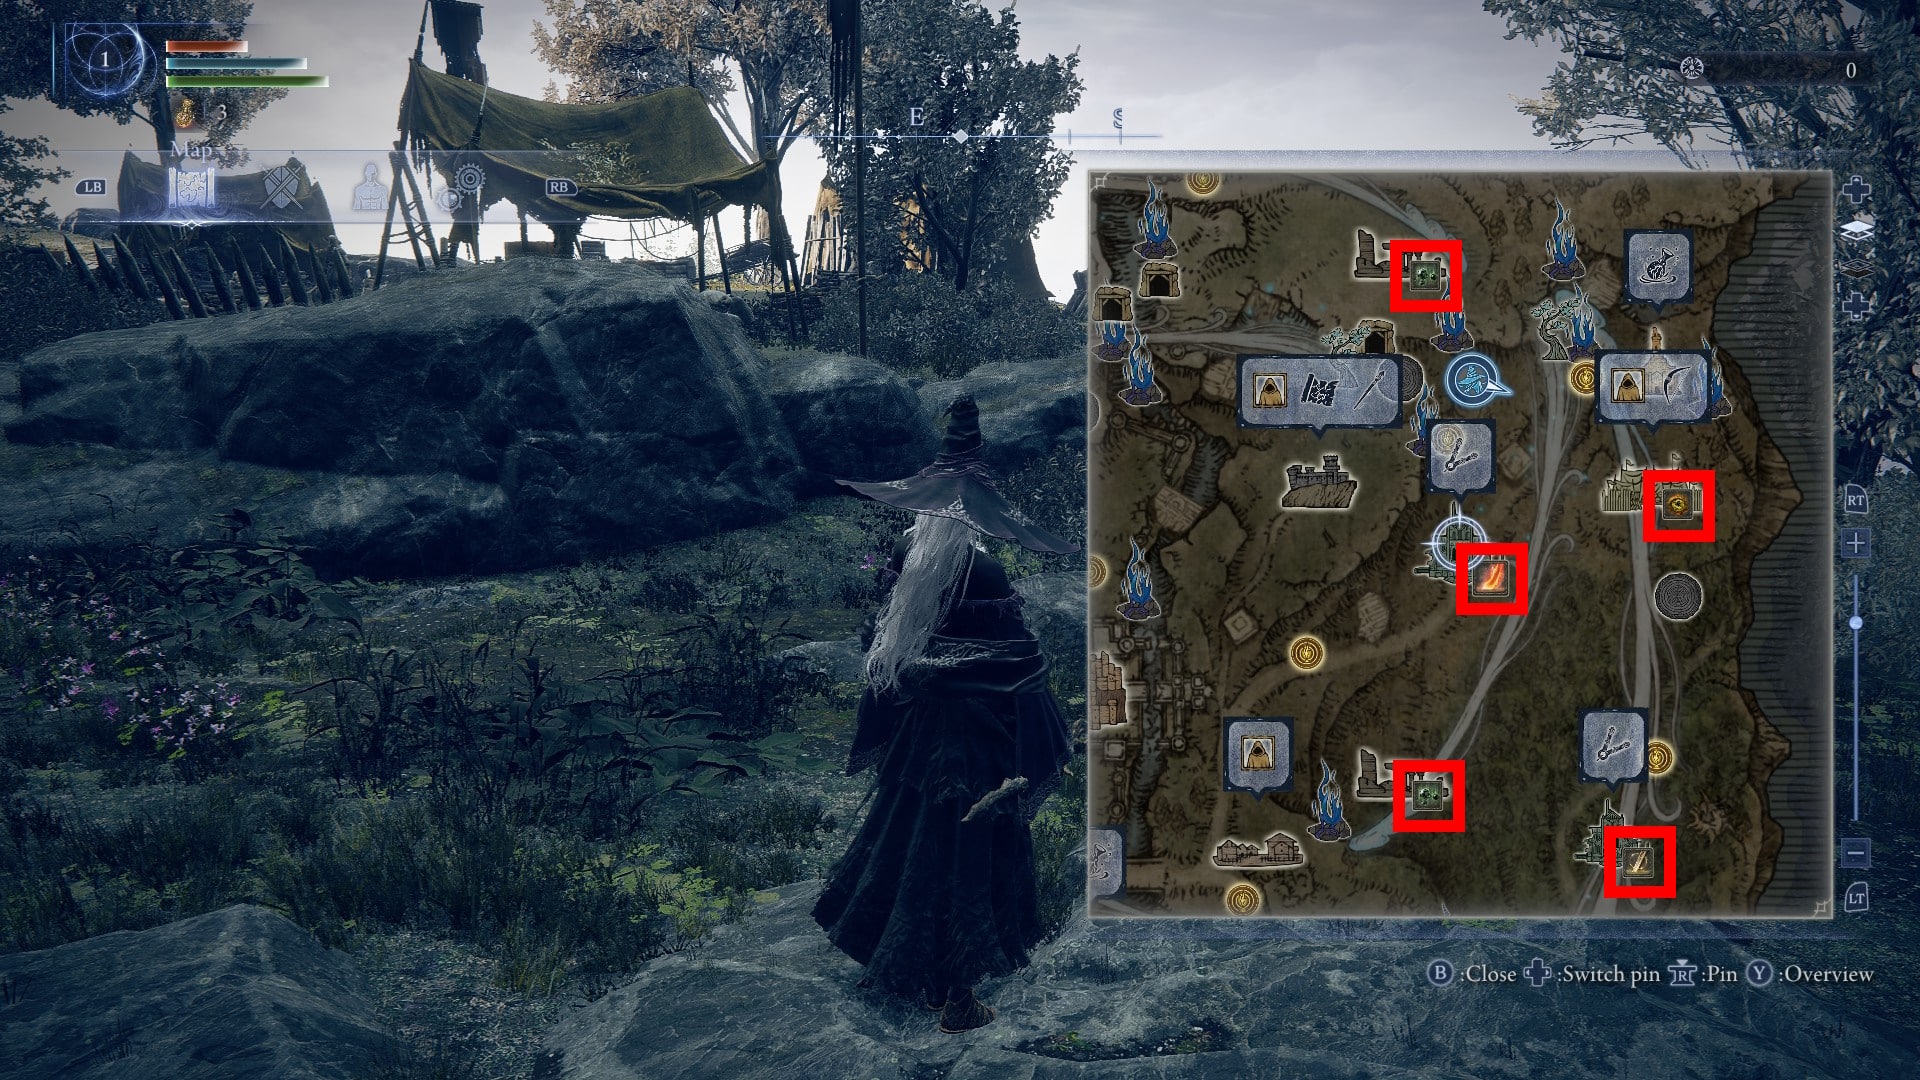
Aside from that, sometimes points of interest will have a little extra icon on their bottom right corner. These always represent an affinity, such as Fire or Poison. That means that equipment matching the affinity’s icon is much more likely to drop in the area, both from enemies and any loot containers.
Shifting Earth Events
Last but not least, there’s one last thing that can greatly change the layout of Limveld in Elden Ring: Nightreign! These Shifting Earth events start appearing as you progress through the game and they last through several Expeditions. You should get your first such event upon defeating Gladius, Beast of Night for the first time.
You can also sleep at a bed on the eastern wing of the Roundtable Hold if you wish to skip the Shifting Earth event. However, they are very fun and rewarding, so we advise against it.
Conveniently, the game will always let you know when such an event is active. You’ll see a notification saying “Earth is Shifting” and the type of event while you’re at the Roundtable Hold. Let’s go over all the types of Shifting Earth events in the game!
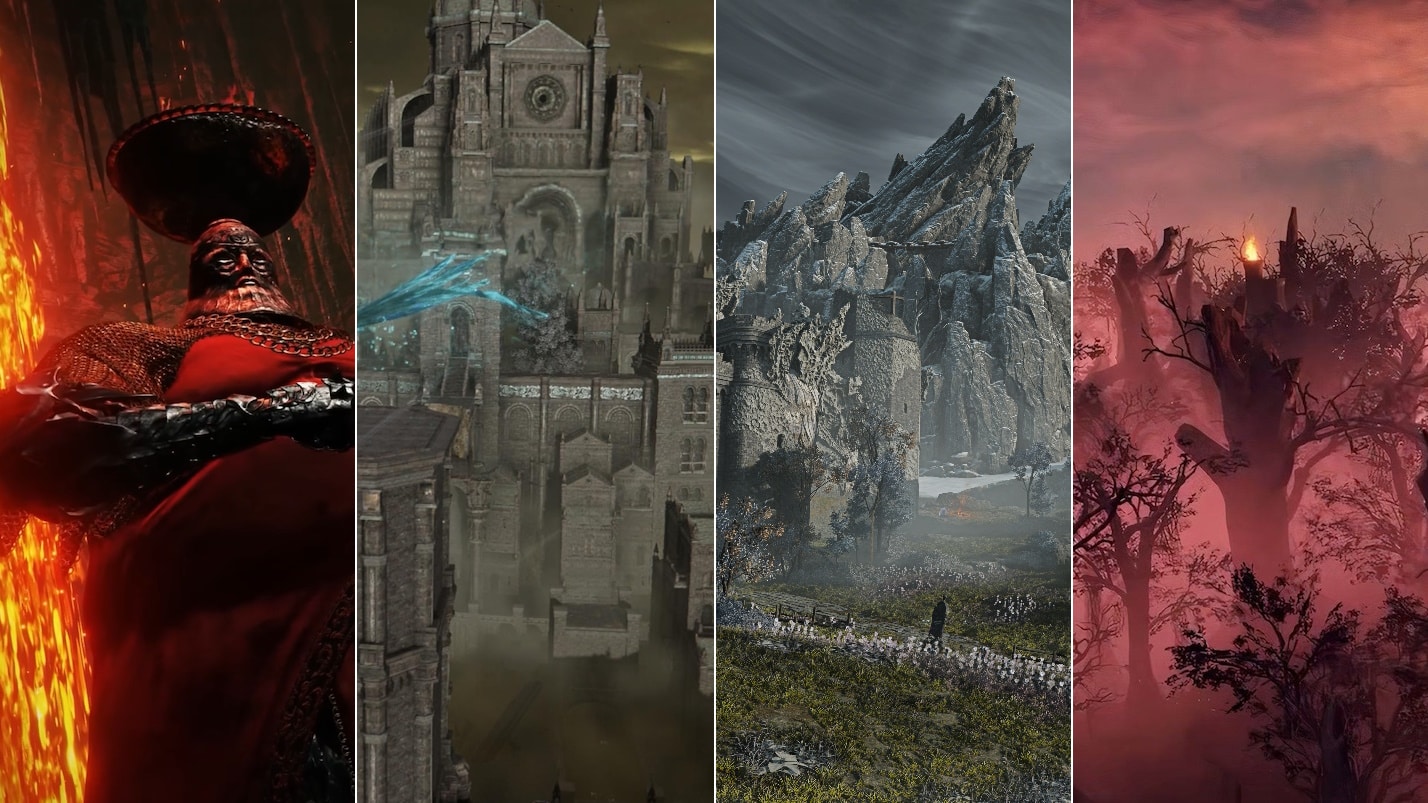
The Crater

A massive volcanic crater emerges in Limveld. It’s pretty dangerous to traverse, thanks to the lava all over the place. Reaching the bottom of it and defeating its main boss will allow you to ascend any weapon of your choosing to Legendary quality.
The Mountaintop

A chilling mountain emerges in Limveld, similar to the Mountaintops of the Giants. Climb to its peak to claim the Favor of the Mountain perk. It reduces Frostbite build-up and Frost damage you take. Additionally, you’ll get an Attack boost when someone gets Frostbitten near you.
The Rotted Woods

Of course, there’s a poison swamp! Or forest, as it may be. This forest is full of Scarlet Rot, so being in it will constantly build up the status effect. Manage to find the blessing in the center to get the Favor of the Rotted Woods. It increases your Max HP and nullifies Scarlet Rot. It also allows you to recover a portion of your Health when attacking after you take damage.
Noklateo, The Shrouded City
Last but not least, this is a vast city overrun by curses and undead. It can be extremely tricky to traverse, even compared to the other Shifting Earth events. Manage to defeat the main boss within to get the Favor of Noklateo perk. It allows you to revive once without aid from teammates, also giving you a buff when you get back on your feet.
That’s all there is to know about all of the points of interest you can find while exploring Limveld in Elden Ring: Nightreign. Deciding which places to visit and when will be key to success on your Expeditions, so use this knowledge to plan ahead!