Genshin Impact 5.8 features a whole new range of quests that you can complete in the new set of islands. Completing the world quests will give you more rewards, while also slowly expanding on the lore. Eventually, you’ll come across the Last Survivor of Tenochtzitoc world quest, which features many objectives. Doing this quest can also give you access to the Mare Jivari area that some NPCs had been hinting at. If you’re trying to unlock this area and complete the quest, we got you covered. In this guide, we’ll show you all the steps you need to follow to complete the world quest. Let’s get into it!
- How To Unlock Mare Jivari
- Interact With Pipilpan Idol
- Defeat The Pipilpan Idol
- Talk To Pucli
- Talk To Leyla
- Talk To Pucli Again
- Fast Forward Time
- Locate Pucli At Reception
- Color All 3 Invisible Asha
- Defeat The Enemies
- Return To Pucli’s Hut
- Investigate Three Glowing Spots
- Investigate Waterfall & Nearby Cave
- Place Relic On Empty Chair
- Defeat Enemies & Enter Portals
- Progress Through Mare Jivari
- Defeat Bakunawa Boss (Strategy)
- Conclude Quest
- Wrap Up
How To Unlock Mare Jivari
After you complete the Last Survivor of Tenochtzitoc World Quest, you will be able to access Mare Jivari as a permanent area in Genshin Impact. Additionally, completing the quest also gives you a bunch of cool rewards.
This includes the “Until the Day That the Fires Turn Me Into Ashes” achievement and a new avatar of Enjou.
If you’re struggling to see any of the NPCs, you need to ensure that you complete all the Summer Quests first. Also, you’ll need access to the easybreeze holiday resort.
Interact With Pipilpan Idol
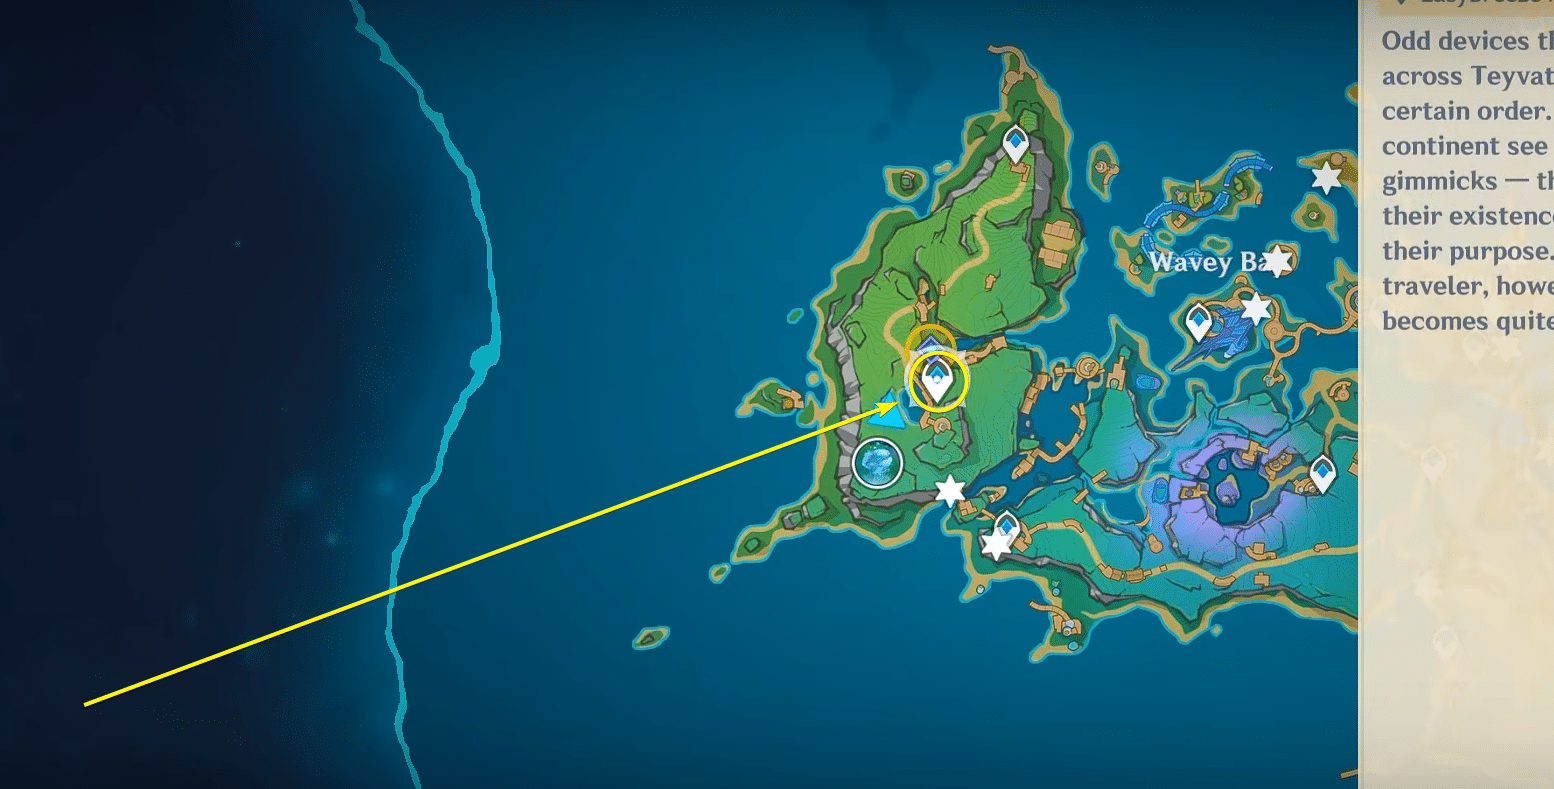
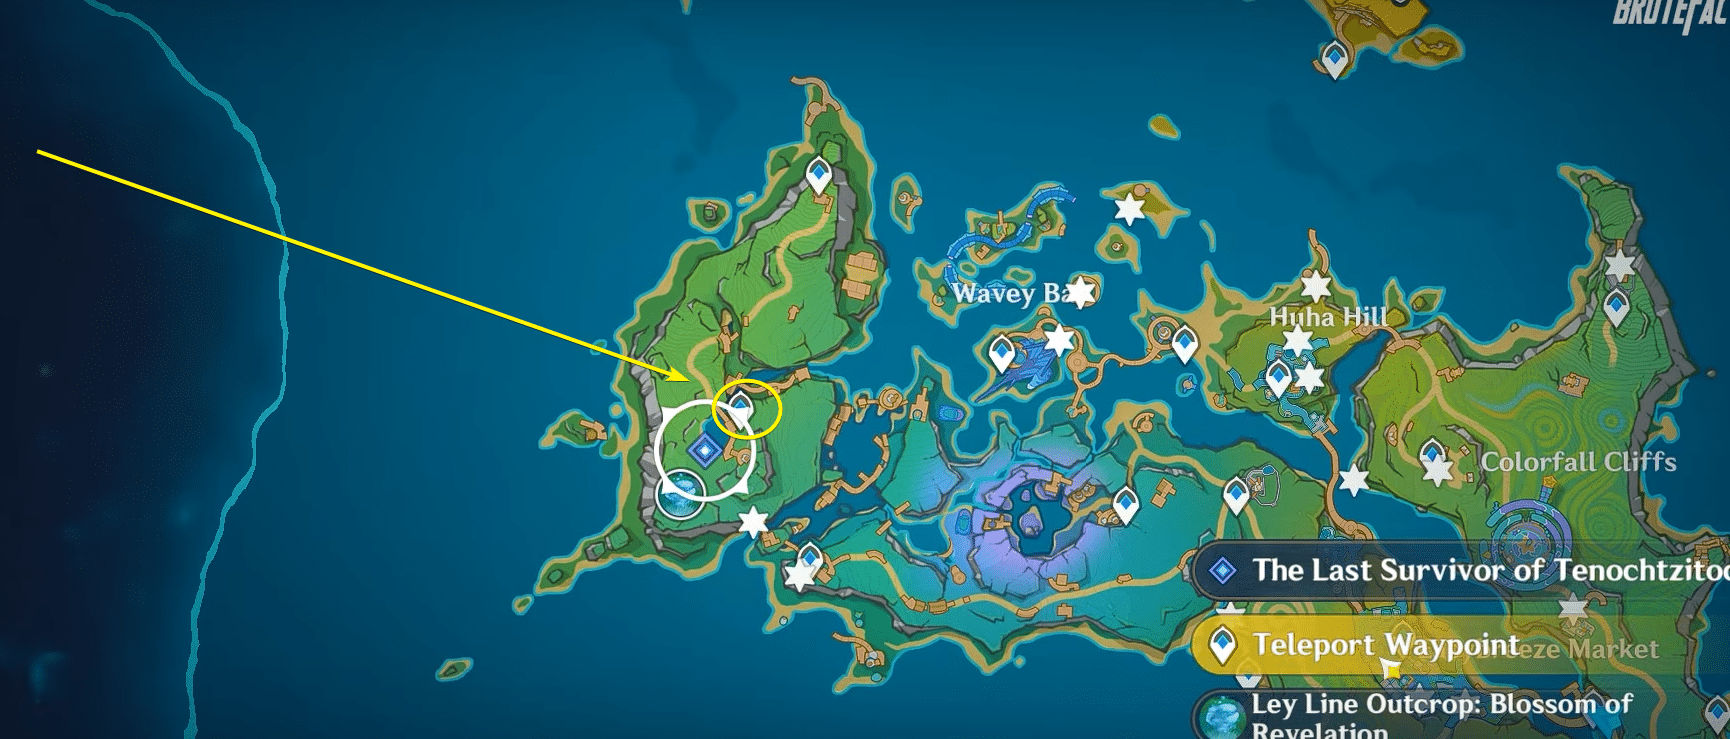
Starting off, to start the quest, you will need to the left side teleport waypoint of Wavey Bay. We’ll be visiting this teleport waypoint a lot for the duration of this quest.

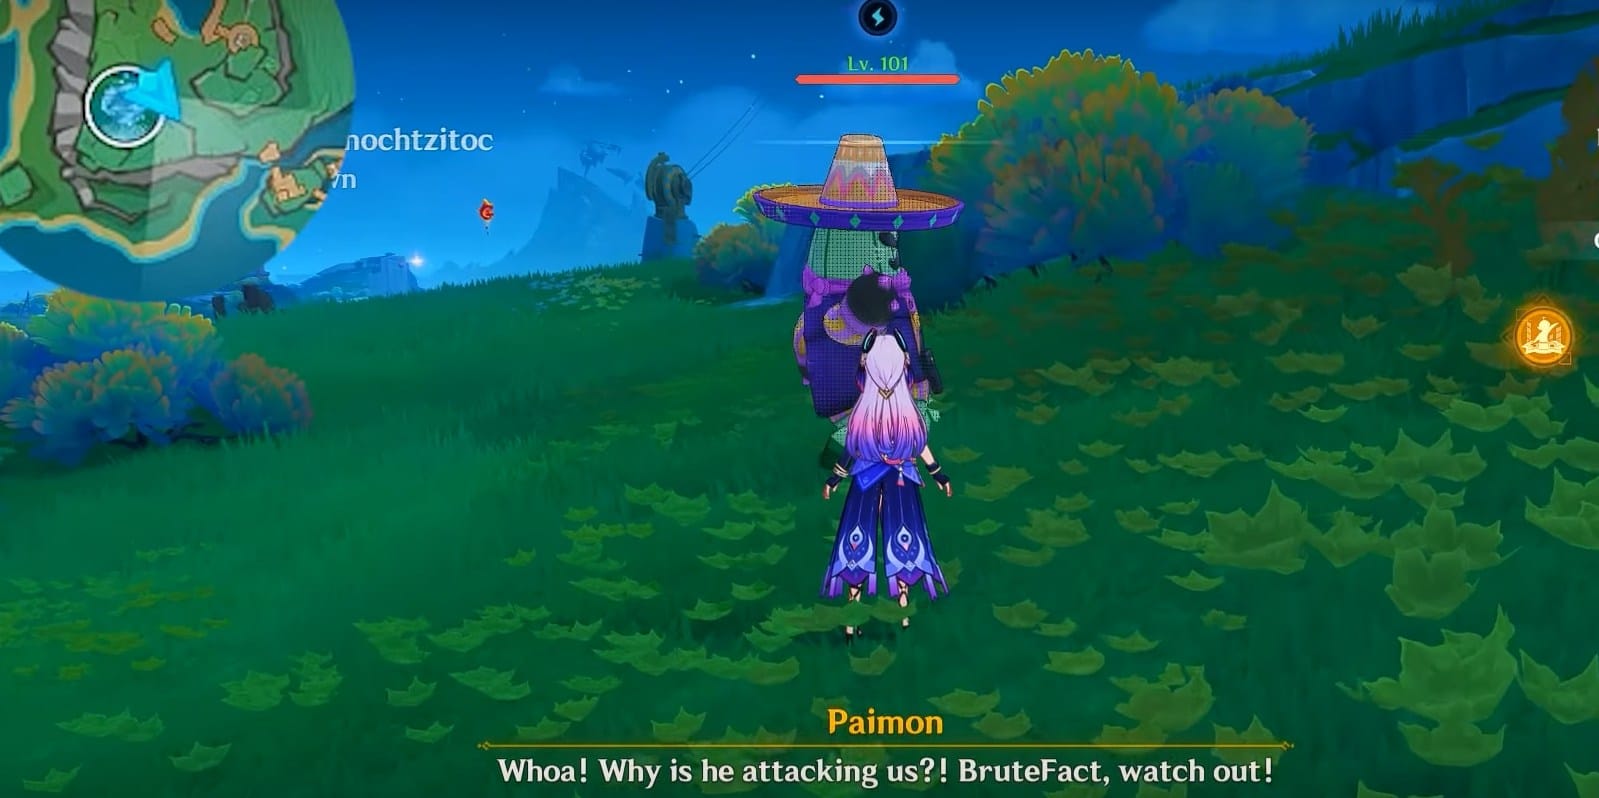
Across the water, you should be able to see a uniquely dressed Pipilpan in purple clothing. This unique Pipilpan will have the name Tenoyollotzin. This NPC will have an exclamation mark on it signalling that it’s a quest giver. You should also be able to see the marker on the map.
Approach the Pipilpan and interact with him


Defeat The Pipilpan Idol
Next, you will need to fight the Pipilpan and defeat it. Once that’s done, a cutscene will play allowing you to progress with the quest.
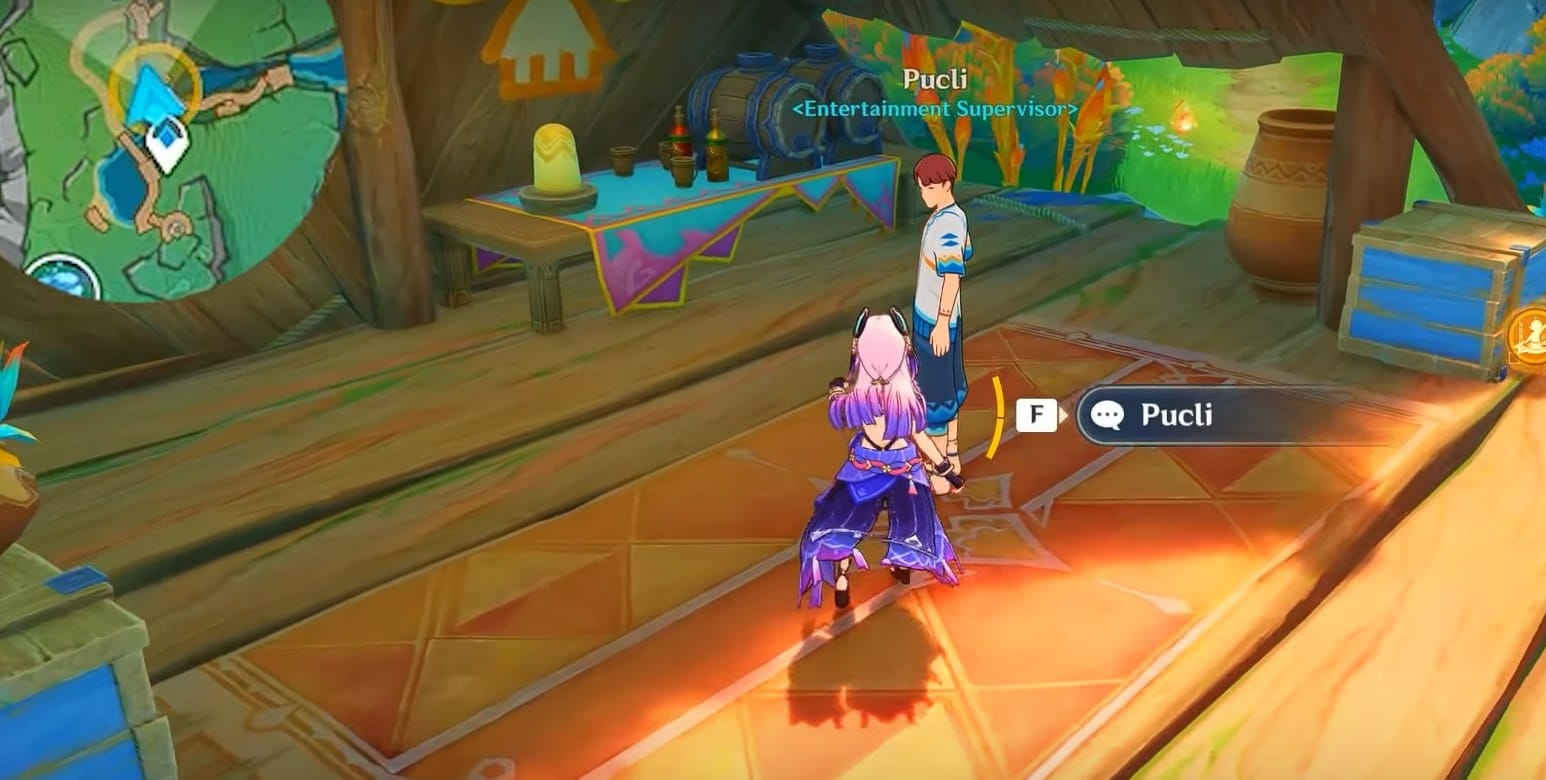
Talk To Pucli
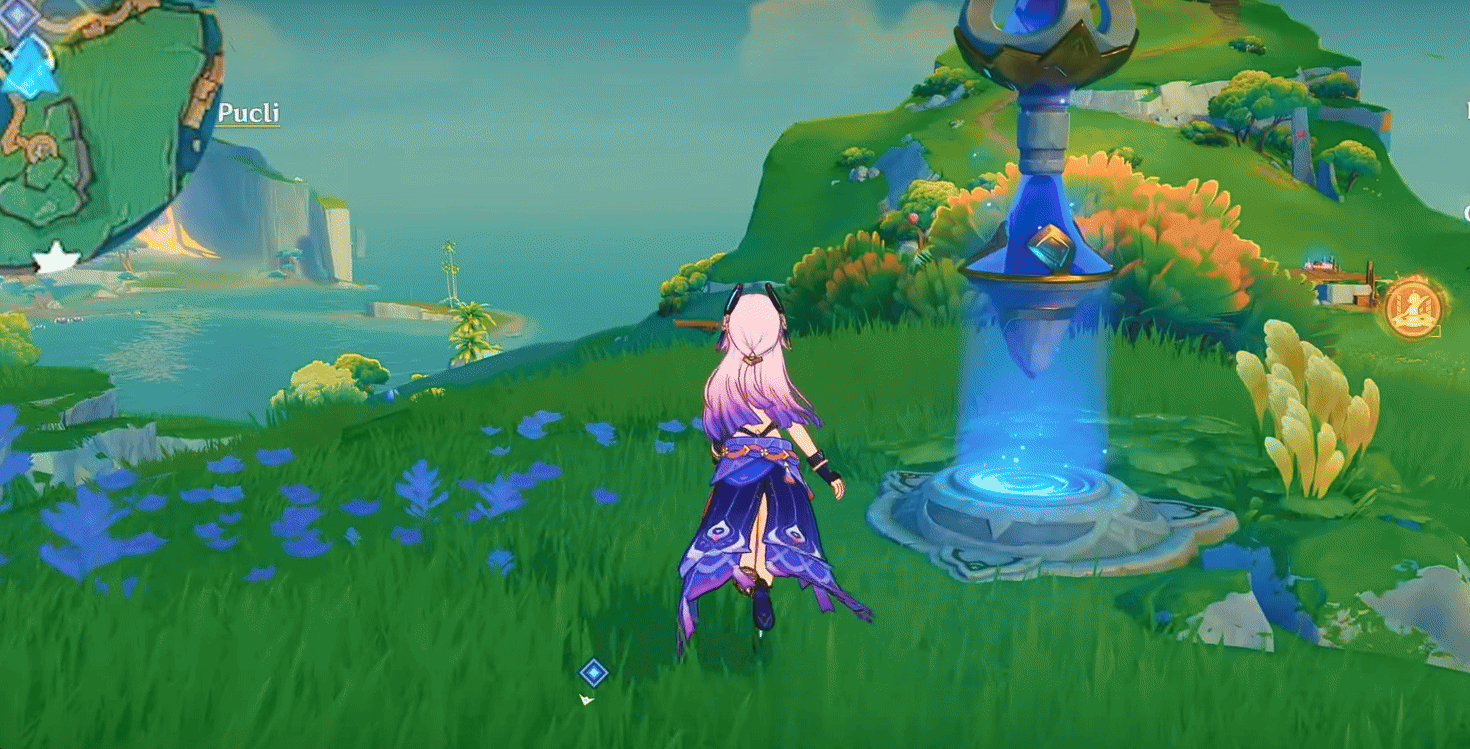
Next, you’ll be heading to the same left side waypoint of Wavey Bay that you navigated to before. Alternatively, you can just walk here as you won’t be too far from it.

From the teleport waypoint, turn right and jump over the cliff. Down below, you should see a hut where you’ll find both the Pipilpan and Pucli.
Go to Pucli and interact with him for another cutscene.
Talk To Leyla
After you’re done talking to Pucli, you will need to find the Hotshot Shaman. This is Leyla and you’ll be heading to the top left teleport waypoint of Wavey Bay. It is northwestern most waypoint on the map.
Once you’re here, turn around and simply go to the stairs near the wooden platform – a few feet away from the teleport waypoint. Interact with Leyla and go through her cutscene.

Talk To Pucli Again
As before, you will be heading back to the left side teleport waypoint of Wavey Bay. When you arrive here, jump back down to the hut and talk to Pucli again.
This will trigger another cutscene.
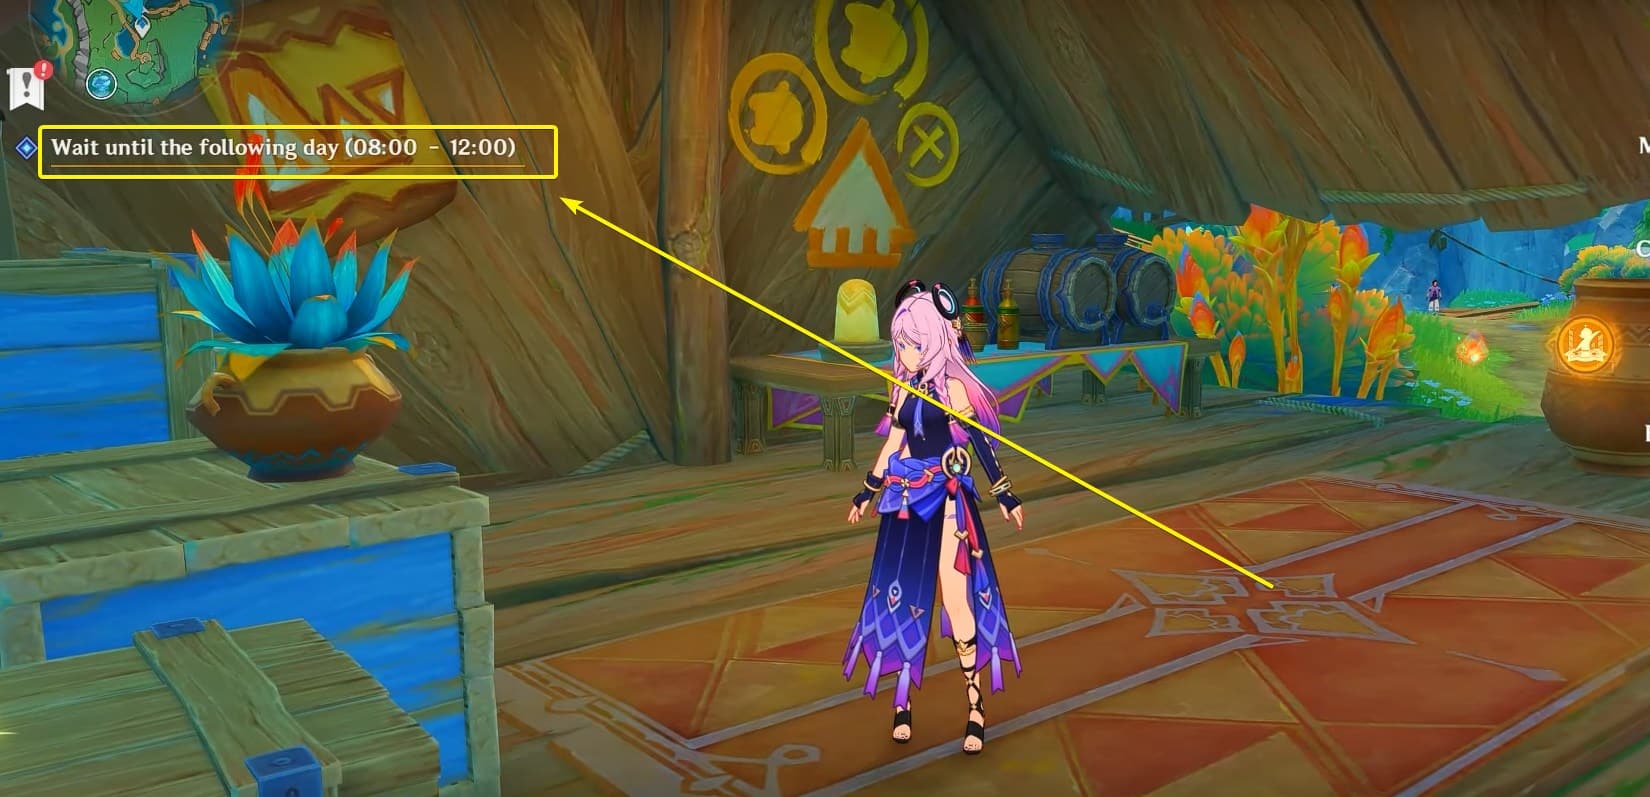
Fast Forward Time
After the cutscene, you will need to wait for a specific time period the next day. To do this, simply click on the objective in the top left.
Doing so will automatically set the timer for 8:00 am the next day in game.
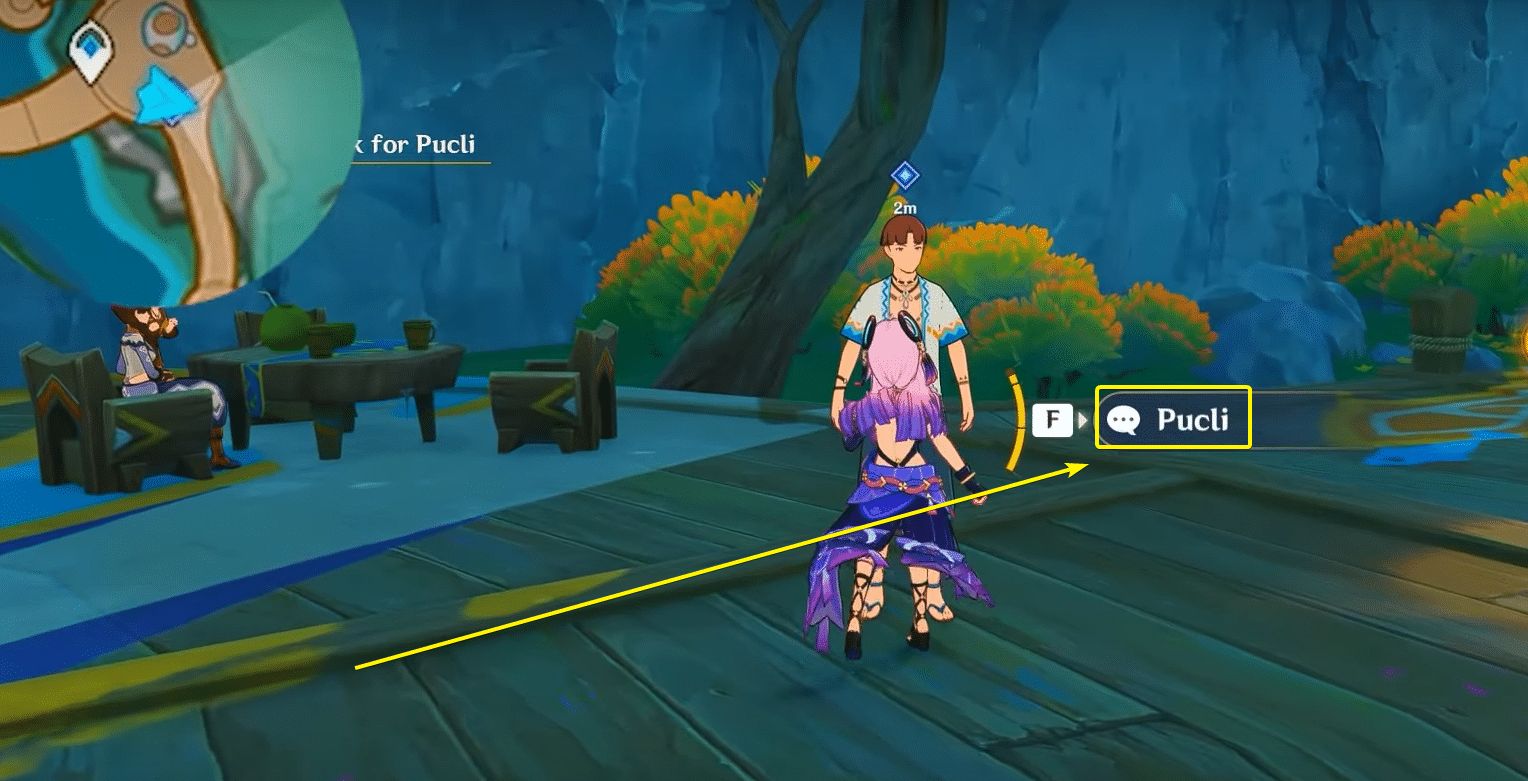
Locate Pucli At Reception
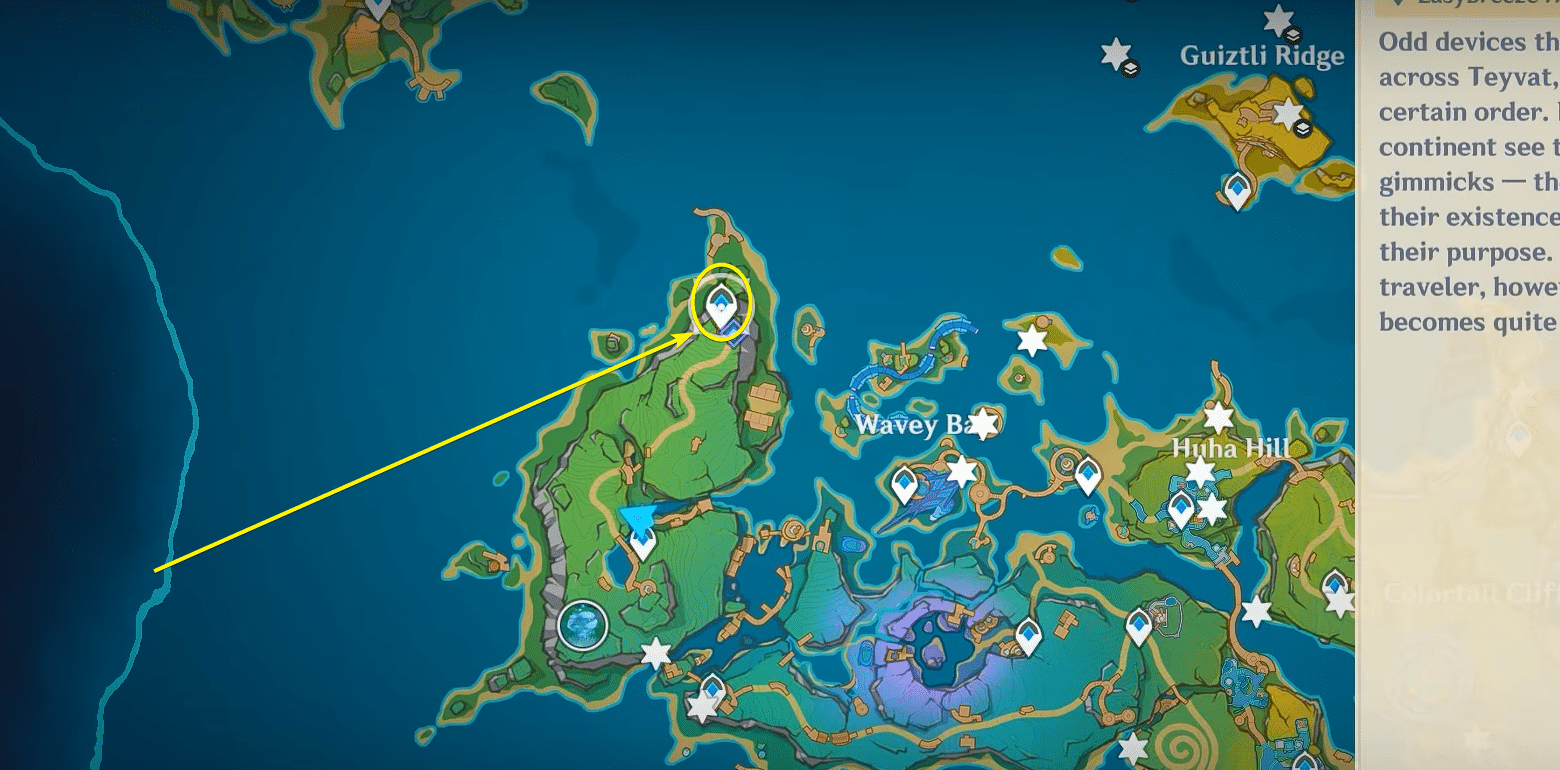
Once the timer has been set, you will be making your way to the bottom waypoint of Easybreeze Market. The location is shown below.

Once you’re at the reception, turn around and you should see Pucli standing next to some tables and chairs. Go ahead and talk to him, which will lead to another cutscene.
Color All 3 Invisible Asha
Yet again, you’ll be heading to the left teleport waypoint of Wavey Bay.
Across the water, you should see the marker that you need to head to. This is the same place where you found the Pipilpan at the start of the world quest. Going to the spot will trigger a cutscene.
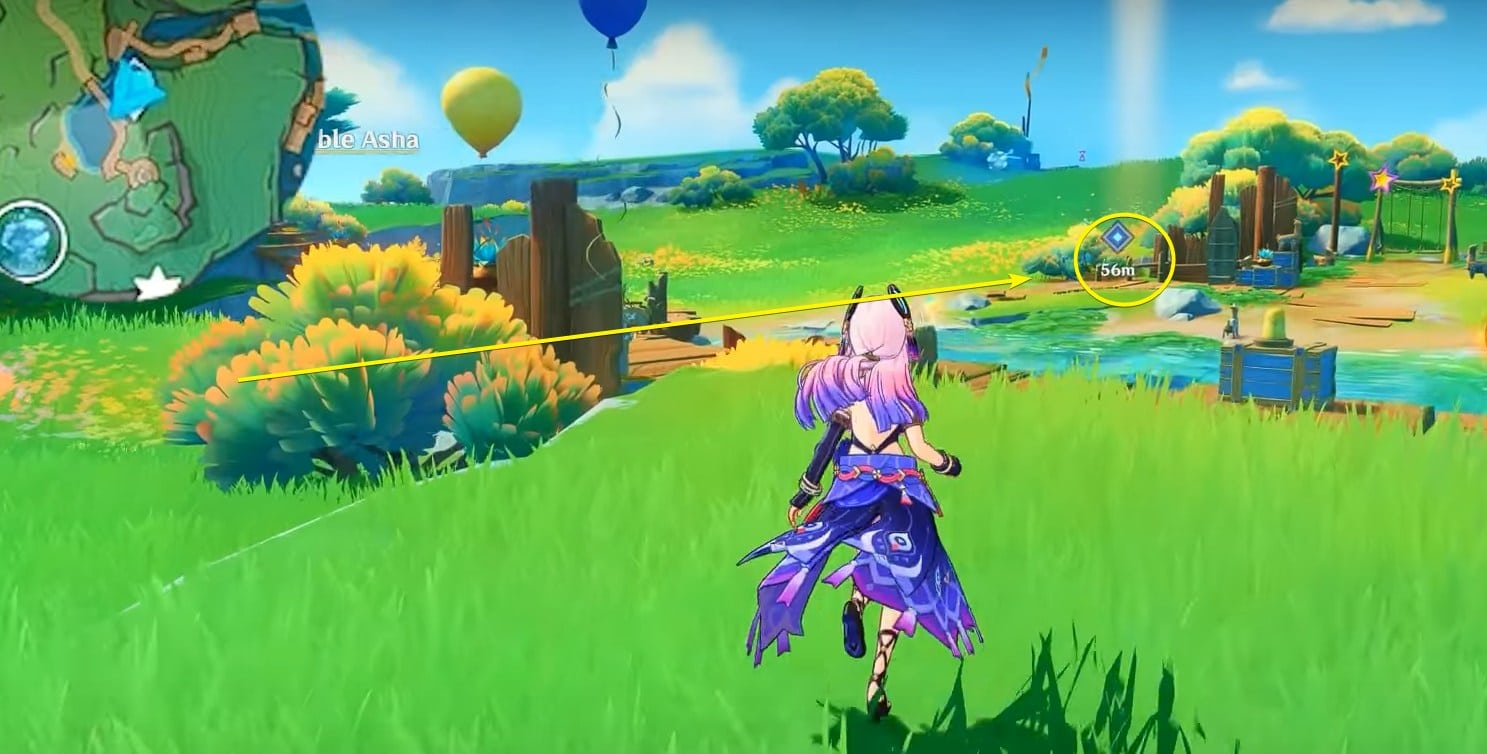
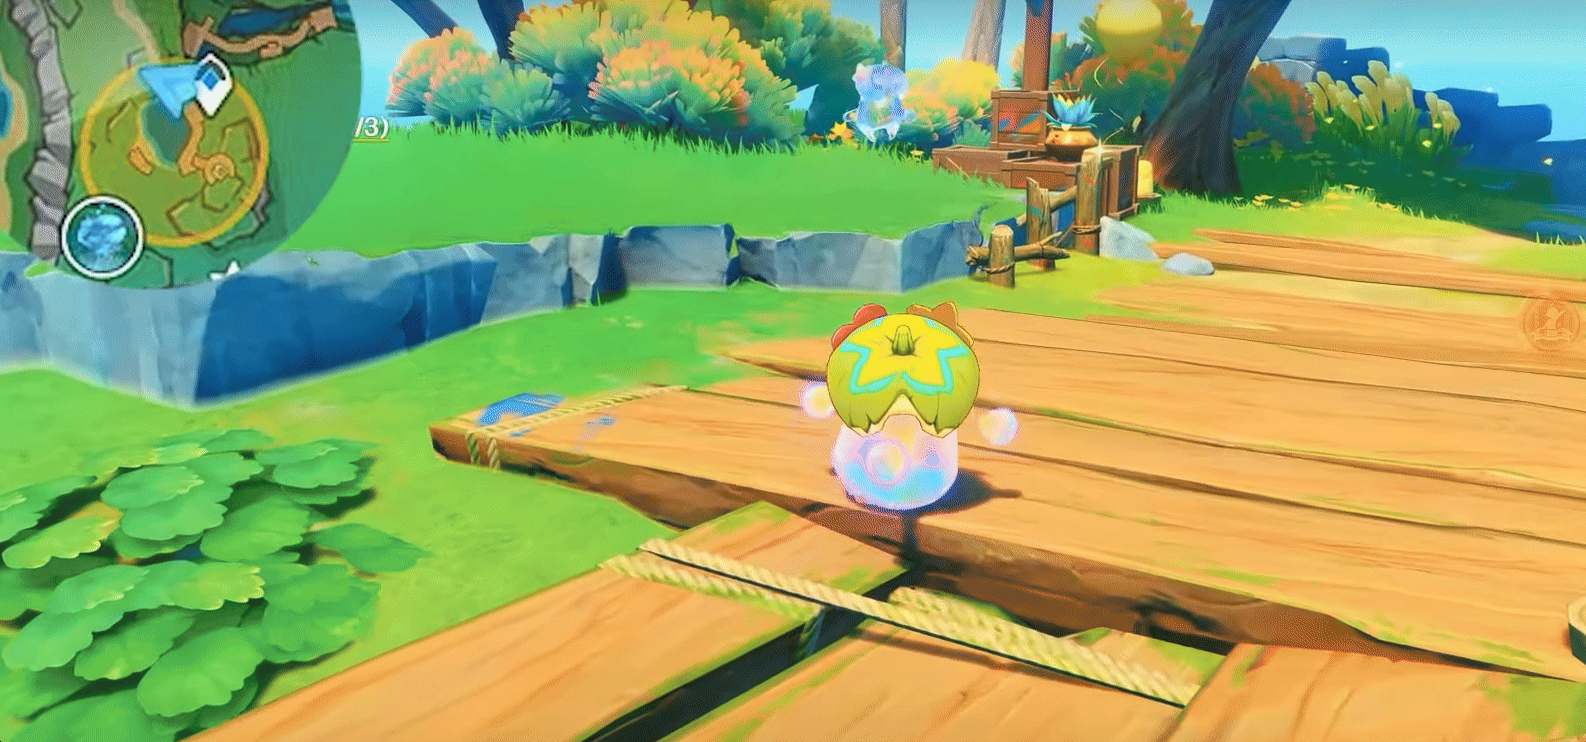
After the cutscene, your goal is to find the three invisible Asha in the area and color them. Starting off, you will need to press T nearby to turn into an Asha.
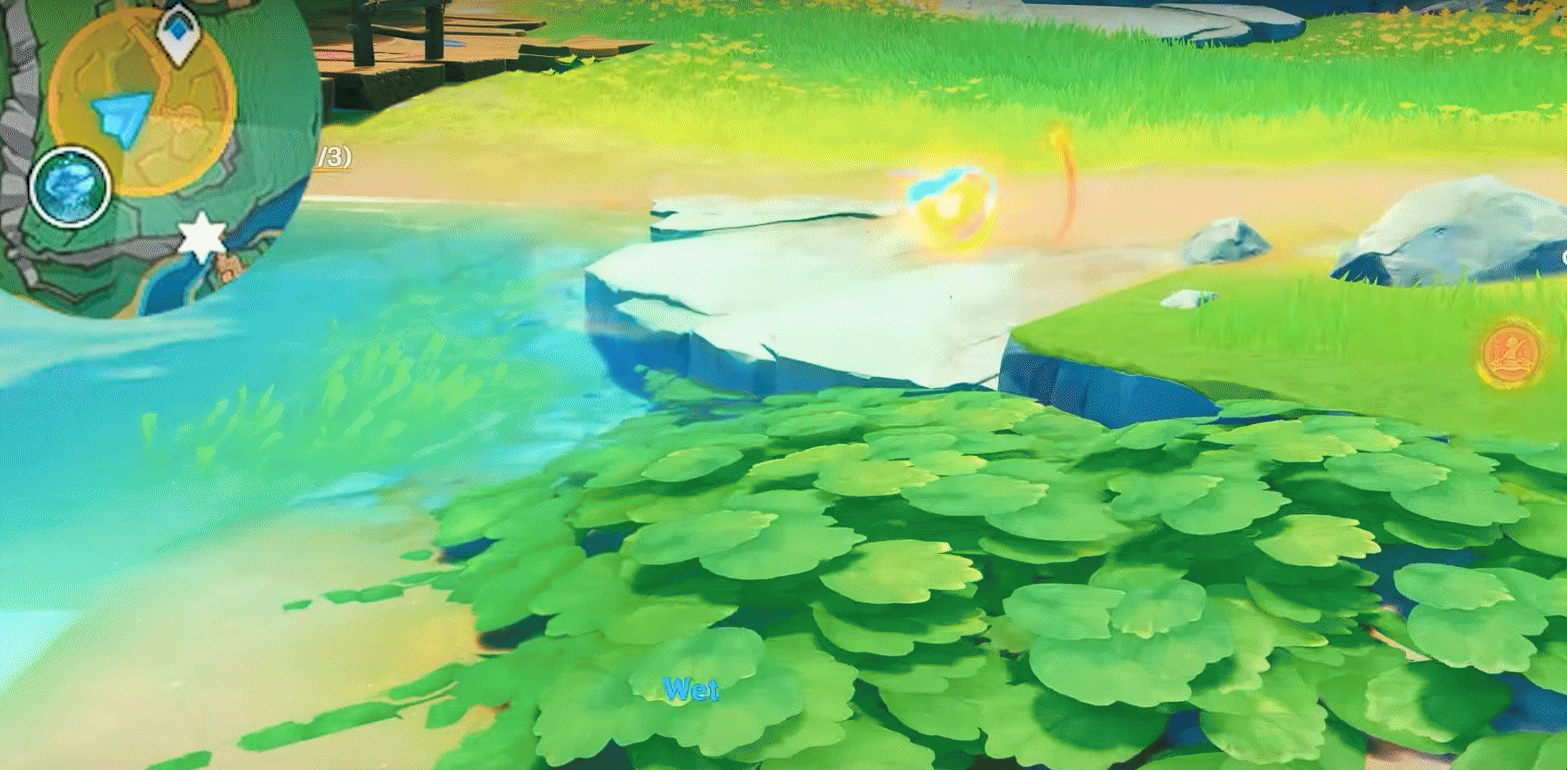
Once that’s done, you will now be able to shoot paint. The first Invisible Asha can be found nearby in the water. He will try to run so try to predict the direction he’s going to ensure you get the ink to splash on it.
You’ll know you got it when it changes color.
Next, head across the water onto the nearby docks. The second Asha can be found hiding behind some boxes. Simply go up to it and shoot it with paint to color it as well!
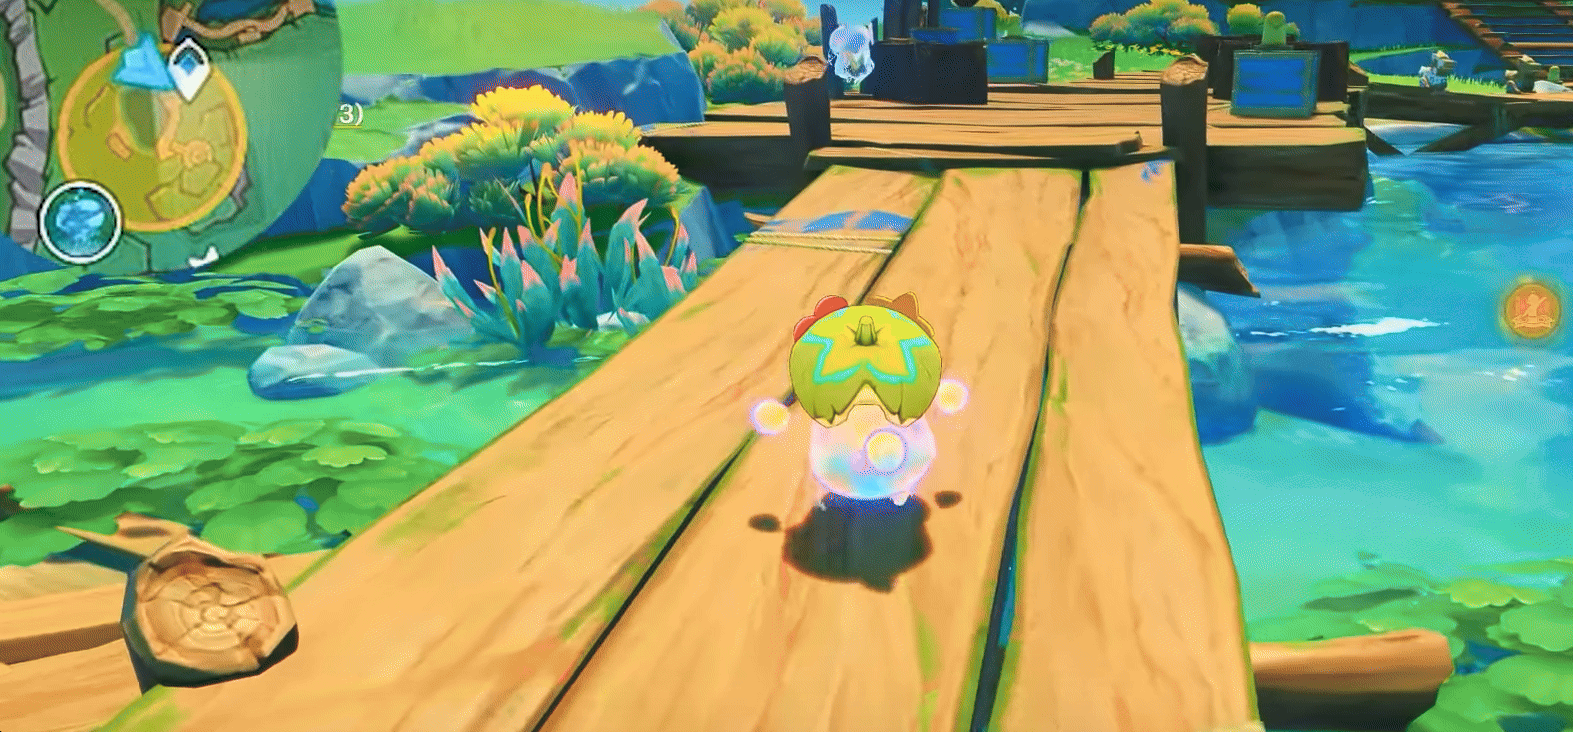
Turn around from the second Asha and go to the nearby bushes. You should find the third invisible Asha hiding behind some bushes. Shoot it with paint and you’ll have gotten all three Ashas.
However, this third Asha will still run away. So, you will need to go catch it!
Defeat The Enemies
After you catch up to the Asha, enemies will pop up nearby. You will need to defeat all the enemies to proceed.
Once you get them all, another cutscene will play. Make sure to open the nearby chest for some rewards before you proceed with the rest of the Last Survivor of Tenochtzitoc World Quest.

Return To Pucli’s Hut
Next, you’ll be going back to Pucli’s Hut situated near the left waypoint marker at Wavey Bay. Don’t worry, this is the last time you’ll be visiting it for the quest!
When you get near, a cutscene will automatically trigger.

Investigate Three Glowing Spots
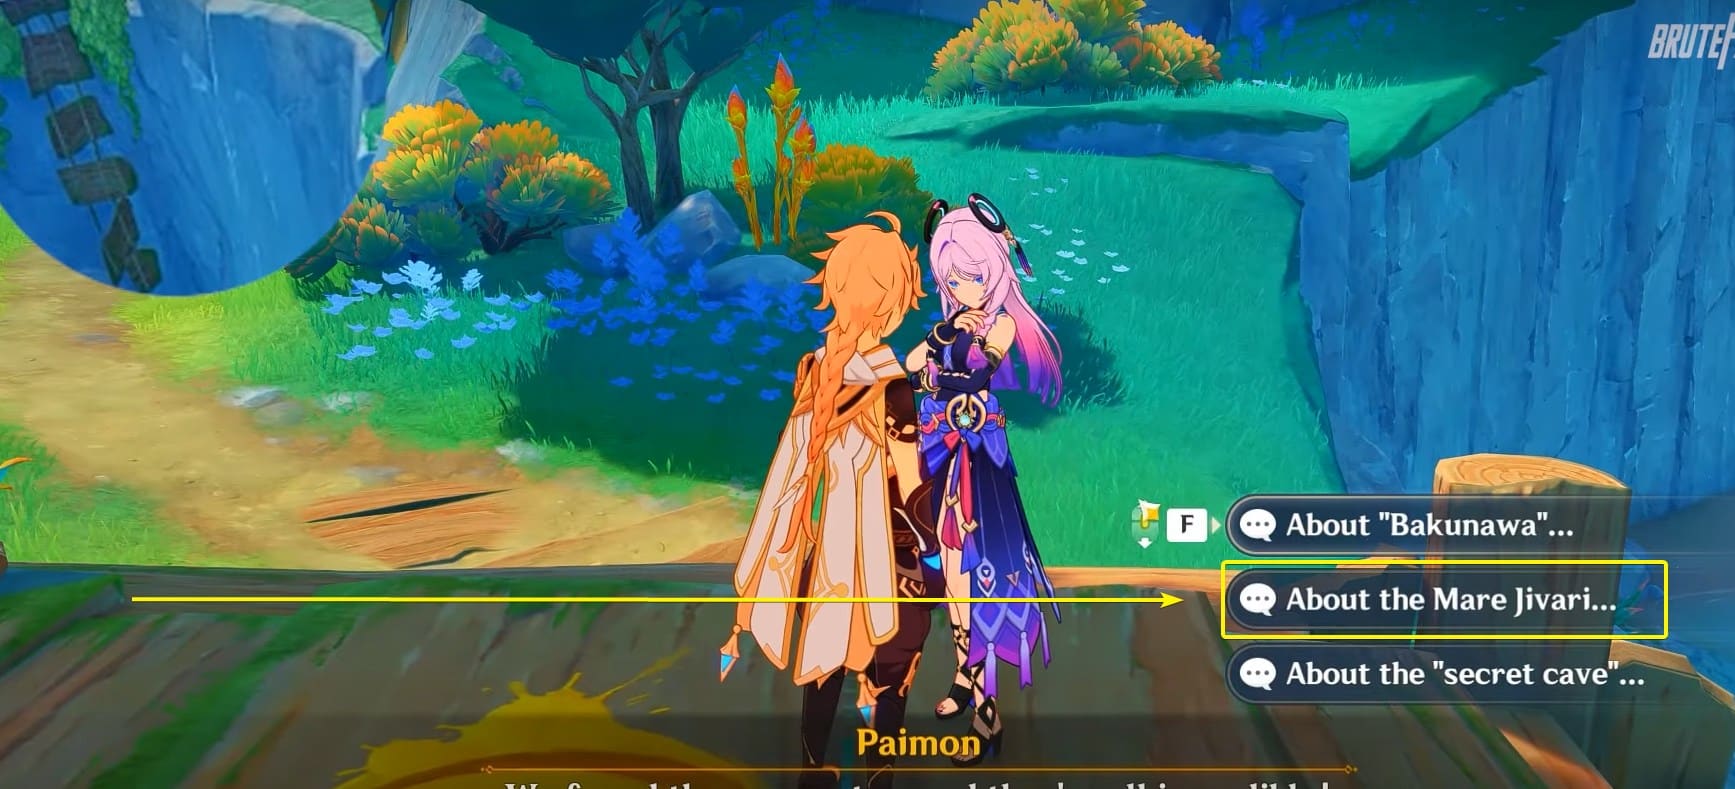
After the cutscene, your task is to investigate the three glowing spots near the hut. Two of them are on left while the third one is on the right of the hut. These are all the investigative reports related to Mare Jivari.
Once you’re done investigating, be sure to talk to Citlali nearby to report your findings.

Investigate Waterfall & Nearby Cave
Once you’re done talking to Citlali, it’s time to proceed to Mare Jivari. To do this, you need to first go to the nearby waterfall. Behind the waterfall, you should find a blocked cave.
Break the rocks blocking it by hitting them and proceed further inside. At the end, you will find an odd structure that will lead you to a cutscene. After the cutscene, talk to Citlali and she will transport you to the next area.

Place Relic On Empty Chair
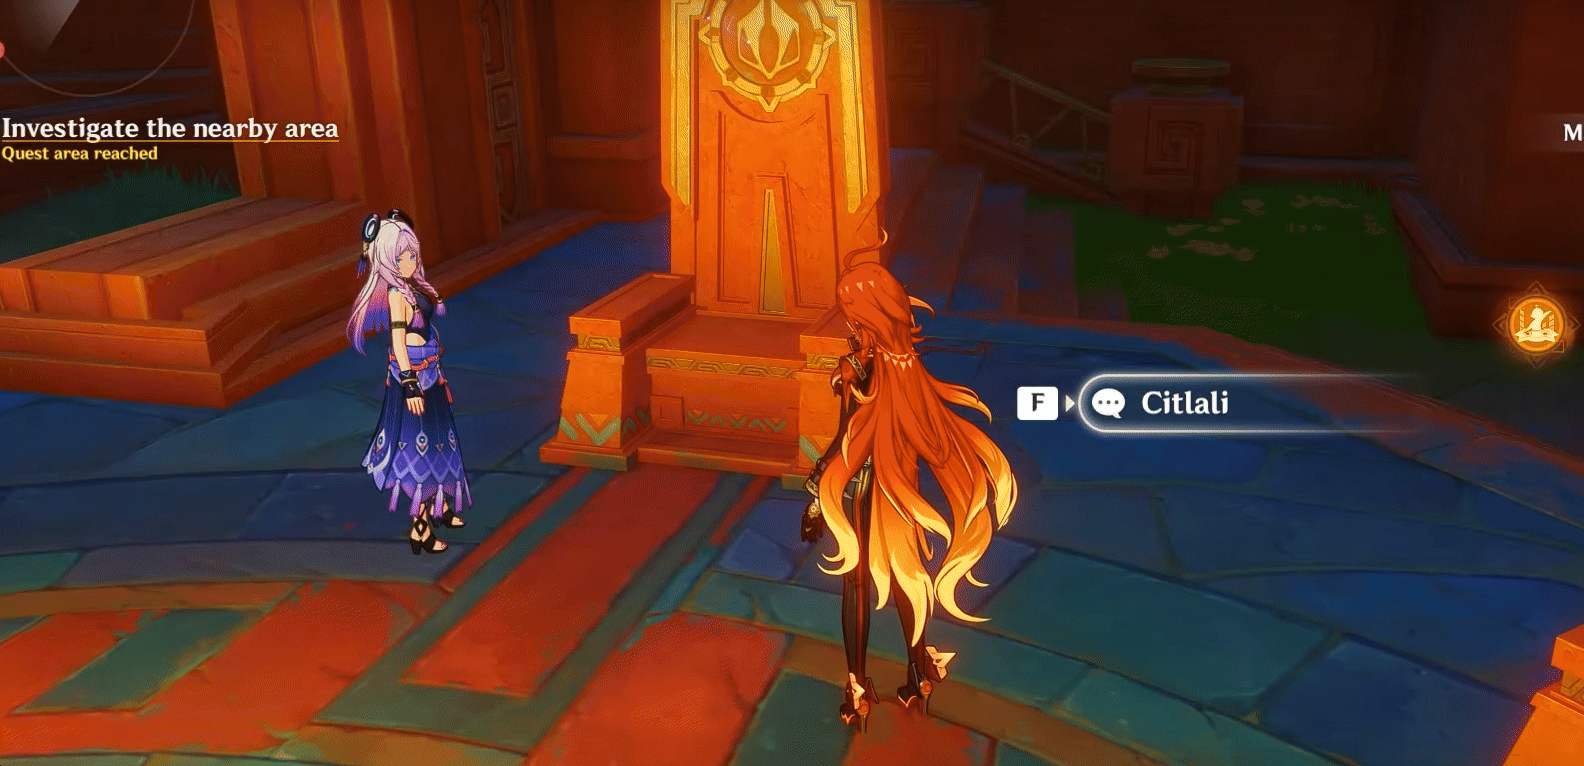
In the new area, your goal it to head to the marker that leads to the throne. This will prompt yet another cutscene.

After the cutscene, go to the chair on the right where Citlali is standing. Interact with the chair and Place the Mysterious Weapon Fragment: Arrow Rest.
This will lead to yet another cutscene.
Defeat Enemies & Enter Portals
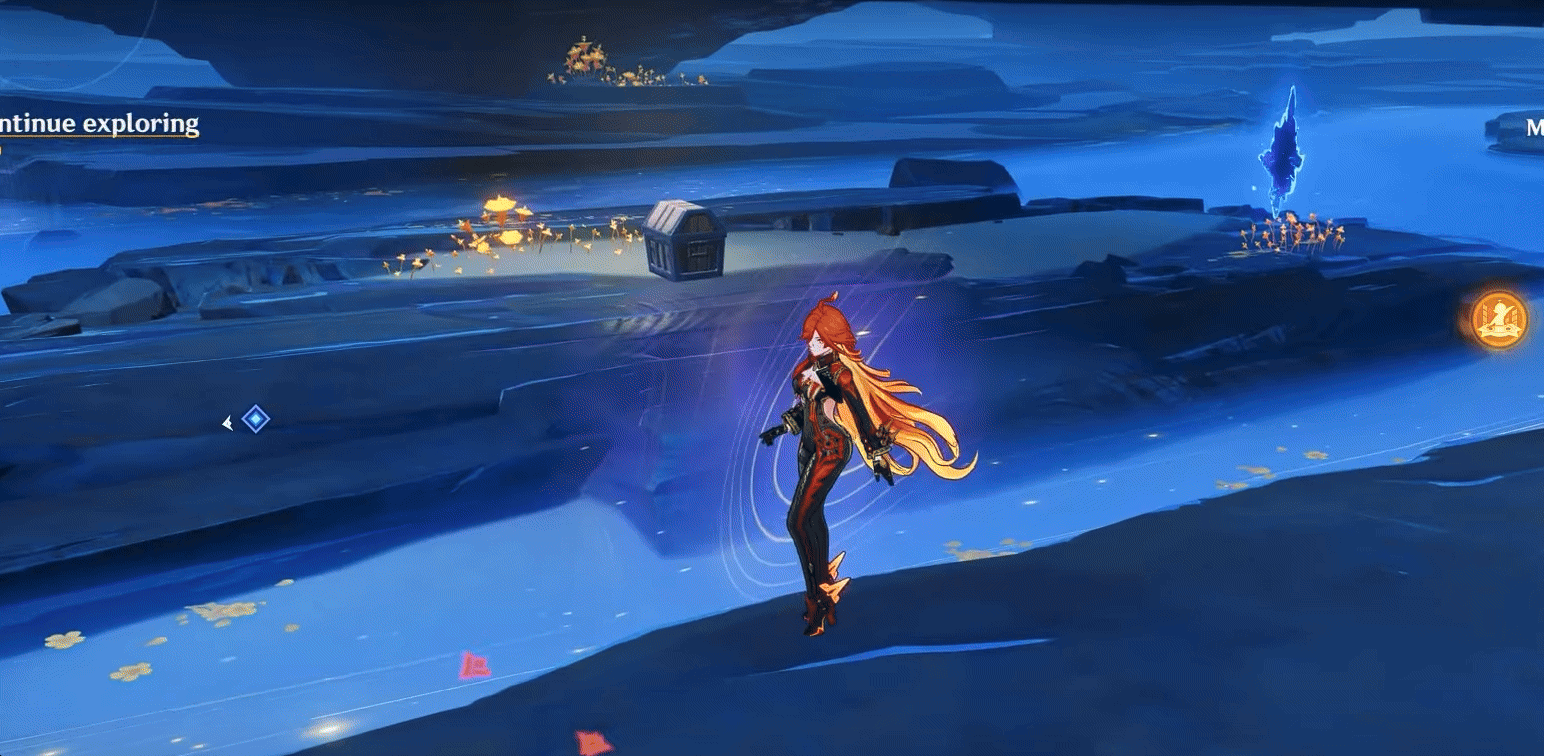
Once the cutscene ends, you will be transported to the Night Kingdom. Nearby, you will be able to see a variety of chests. However, you can always visit them later as this area is permanent and you can always explore later.
Your goal right now is to head to the portal straight ahead. Once you get near it, some enemies will pop up. You will need to defeat these enemies before you can go into the first portal.
After teleporting, your goal is to head to the marker. Straight ahead, you should be able to see the second portal you need to enter. However, more enemies will pop up and you’ll need to defeat them.
Enter the second portal and you’ll now be able to reach the marker. Doing so will transport you to Mare Jivari!
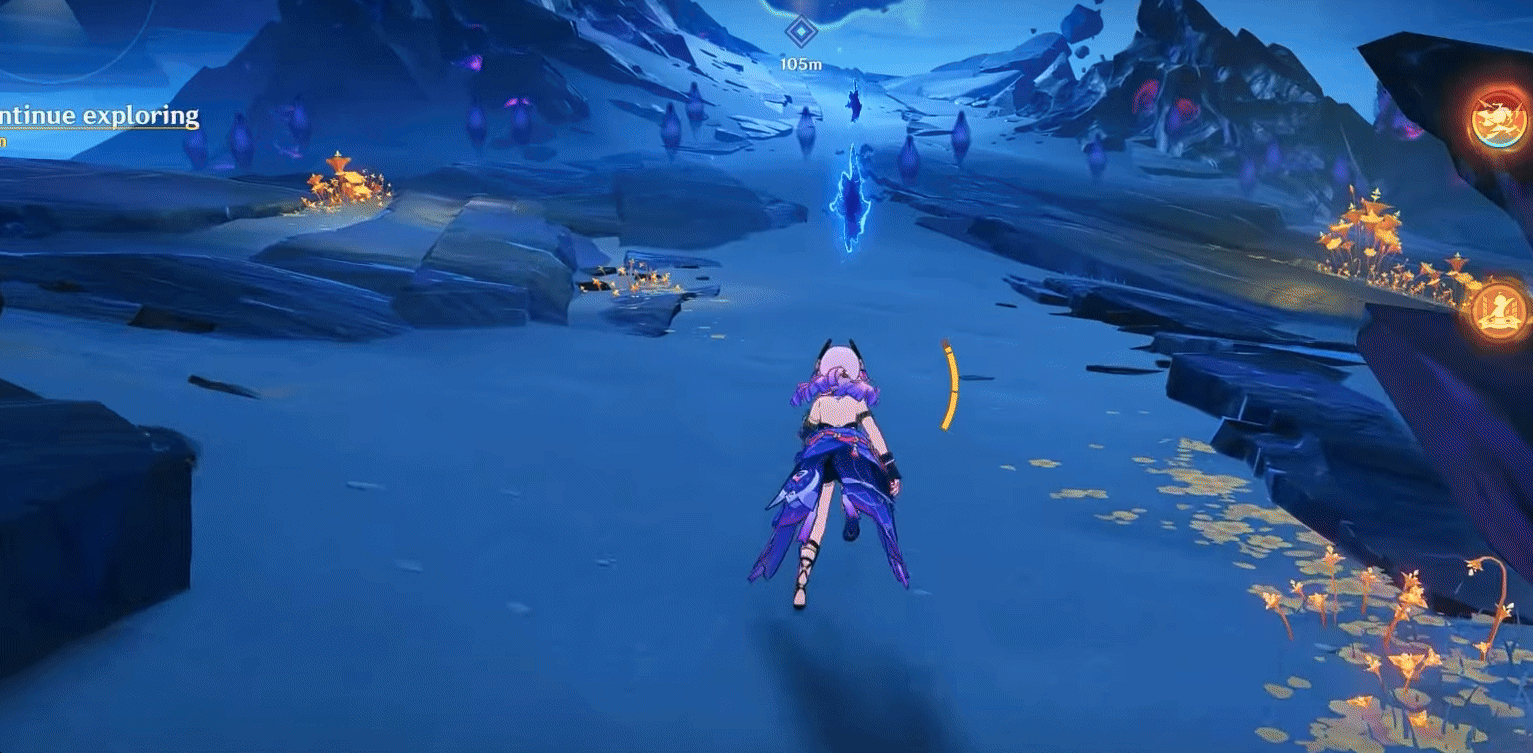
Progress Through Mare Jivari
After you reach Mare Jivari, progress ahead while going towards the marker. You can admire the view inside this new area, which you’ll be able to unlock shortly.
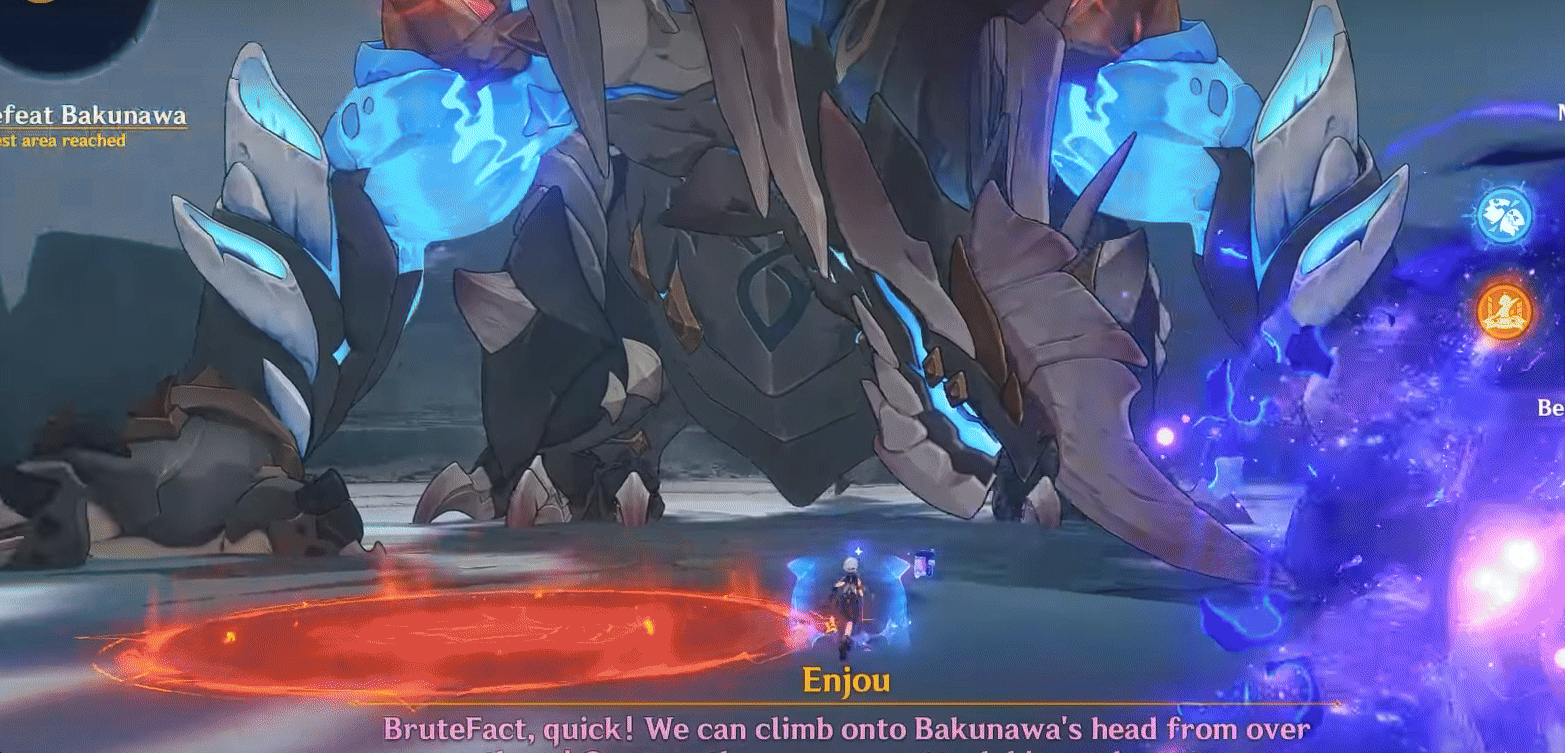
Reaching the marker will trigger another cutscene with Enjou. After this cutscene, you will also get access to the Calamity of Eshu power.

You’ll be using this power for the boss fight that will occur once you progress further through Mare Jivari. At the end, there is an arena where you will need to fight the Bakunawa boss.

Defeat Bakunawa Boss (Strategy)
Bakunawa is a tough boss that has some really strong hard hitting attacks. To defeat him, you will need to rely on using the Calamity of Eshu power – since it’s a gimmick boss battle. So, you can’t defeat him by simply doing damage.
When he’s about to hit you with his special attack, he’ll start charging up a green orb. Once he fires the green orb at you, press T and you’ll be able to activate the Calamity of Eshu shield. This will block you from taking the damage from his special power.
Do not try to tank the hit without the shield!

Keep blocking his attacks with the shield until an abyssal portal appears. Once it does, enter the portal immediately. As you go up in the air, press T to charge up an energy blast and fire it at the Bakunawa’s arm.
Doing so will break off his arm. You will need to do this twice in a row so that you remove all its arms. So, keep blocking the hits again and use the power until the second arm is off.
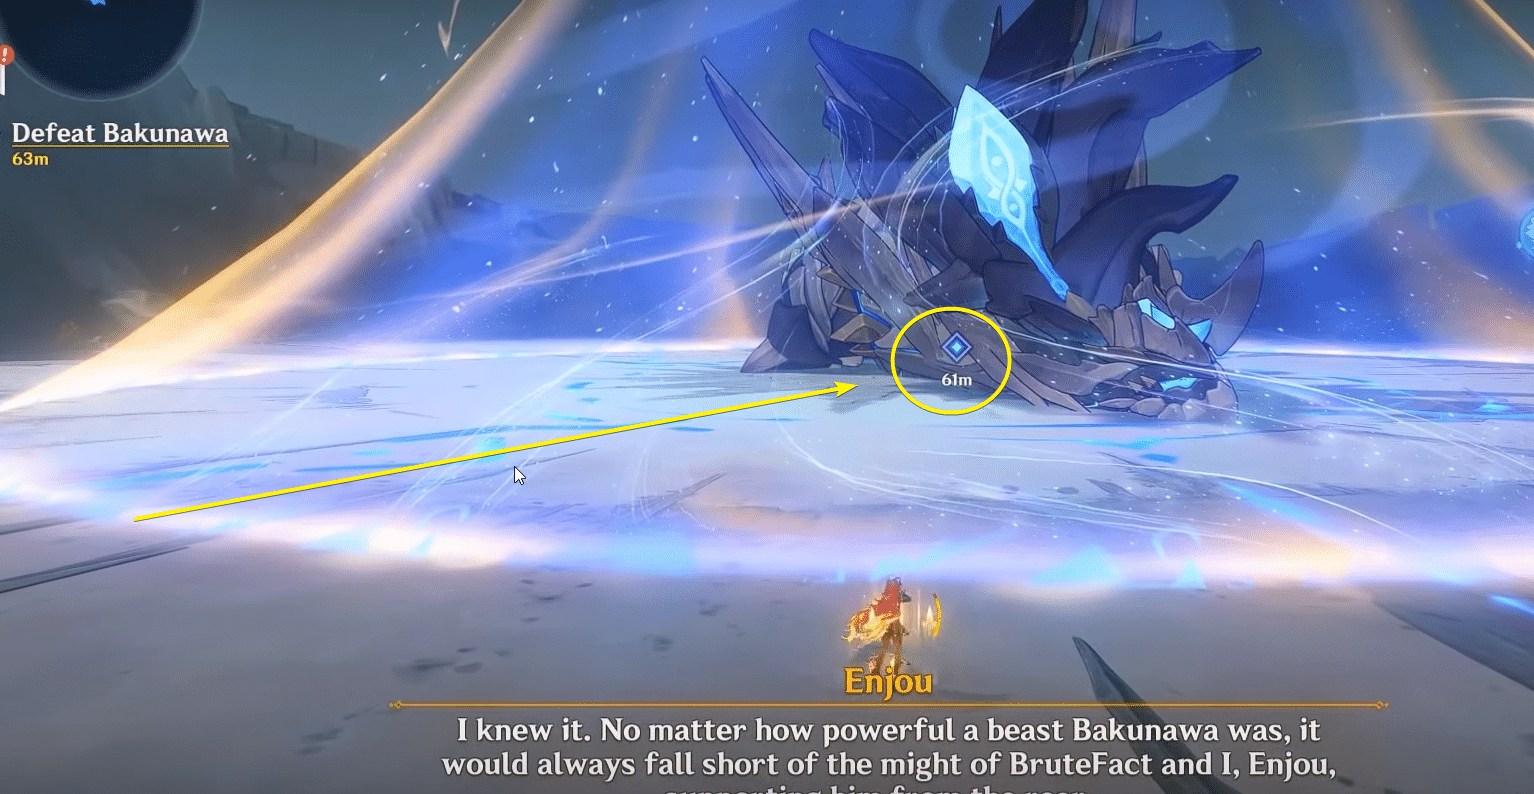
Once both the Bakunawa’s arms are off, the Bakunawa will start charging a powerful attack where it reveals its blue torso. Immediately press T and then hold E to charge up the Soulshard Rain attack.
Once fully charged, attack the blue revealed torso and you’ll disable the Bakunawa.
Another abyssal portal will appear and you need to immediately enter it. In the air, press T to fire another energy blast directly at it. Doing so will defeat the Bakunawa for good and it will fall to the ground.
Congratulations, you defeated the boss in Mare Jivari!

Conclude Quest
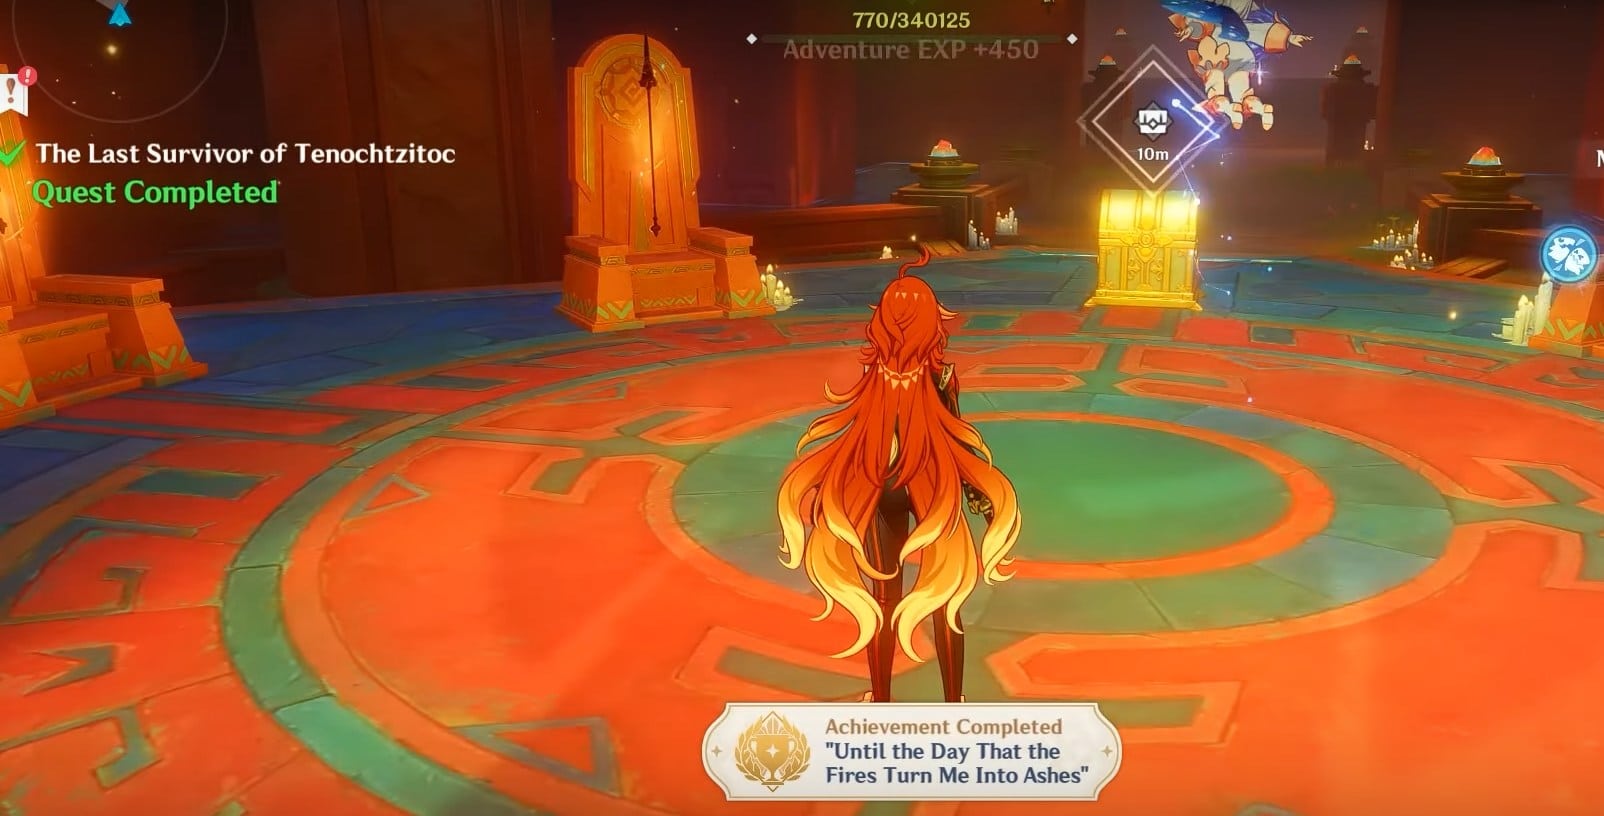
Once the Bakunawa is dead, you’re almost done with the quest. Simply go up to the marker next to its body. Doing so will transport you back to the throne room.
After you arrive at the throne room, the Last Survivor of Tenochtzitoc World Quest will officially conclude. You will get a chest that contains all sorts of rewards, including:
- x50 Primogems
- x4 Mystic Enhancement Ore
- x54,500 More
- x5 Hero’s Wit
Additionally, you will also get one Lavawalker’s Resolution and Someone’s Tattered Notes (I).
Besides that, you will also unlock the “Until the Day That the Fires Turn Me Into Ashes” achievement. From this point on, you can also use the new avatar of Enjou.
You have also official unlocked Mare Jivari and will be able to freely explore the area. Just interact with the throne and you’ll be able to go back. Alternatively, you can also return to Natlan by interacting with the Night Wind contraption.
Wrap Up
That’s everything you need to know about how you can unlock the Mare Jivari area in Genshin Impact. Now you know how to complete the Last Survivor of Tenochtzitoc World Quest, which really builds on the lore of the new area. While the quest is quite long, the rewards that you can get along the way are certainly worth it. Be sure to also go to the Night Kingdom, especially if you haven’t looted the chests there.