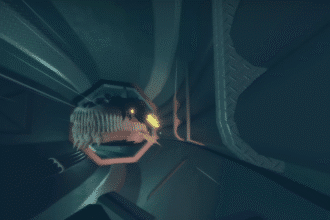
With the latest update of Honkai Star Rail, many new features were added to the game, including characters, light cones, events, and more.
One notable new addition is the Seclusion Zone, which is a part of the space station that was previously closed off due to unknown reasons.
Here is a quick guide on how you can get all of the chests and the warp trotter in this area!
Seclusion Zone All Chest Locations & Warp Trotter Location | Herta Space Station
There is a total of ten chests scattered throughout the Seclusion Zone. To start this guide, we will first be traveling to the Distribution Center anchor.
Chest #1
The first chest can be found just slightly northwest of the aforementioned anchor. It is out in the open, so you can’t miss it once you reach the highlighted part of the map below.

Chest #2
The next chest is inside the elevator at the westernmost part of this floor. Again, you can’t miss it, as it is out in the open and is sitting parallel to the elevator panel.

Chest #3
In the next floor, F2, the next chest will be right in front of you upon leaving the elevator from where the previous one was. Simply run forward and pick it up once you enter the floor.

Chest #4
The next chest is on the southern part of this floor, close to the space anchor in the highlighted part of the map below. It can be found right in front of a set of stairs going down.

Chest #5
After getting the previous chest, go down the stairs right behind you. Then, enter through the door to the west. The chest is at the end of the long hallway here.

Chest #6
For this one, circle around to the northeastern part of this floor. Keep going until you reach the space anchor up in that part of the map. The chest will be on the opposite end of the room from the anchor.

Chest #7
The next chest is in the room right beside the space anchor. Simply go through the door and turn right. The chest should be right there in the corner.

Optional: Formidable Foe Chest
Before you leave this room, go down the stairs and turn to your left. At the end will be a hallway that has a formidable group of enemies guarding an optional chest.
Beat them for some bonus rewards and stellar jade!

Chest #8
The eighth chest can be found on the northwestern part of this floor. After climbing the flight of stairs, just turn left into the next room.
The chest should be visible behind the glass door, which you can enter through.

Chest #9
After leaving the room where the previous chest was, climb up the stairs. Once you’re on the floor above, simply turn right and the chest should be right there, beside the door panel.

Warp Trotter
For the Warp Trotter to appear, you must first progress through the When the Stars of Ingenuity Shine quest.
Once that prerequisite has been met, the warp trotter can be found on the northern part of this floor.

Chest #10
The tenth and final chest can be found just north of where the Warp Trotter was (as shown above). You must first finish the Mundane Troubles quest first before it will show up. Simply turn right upon entering the room.

Optional: Unearthly Marvel Chest
In the easternmost part of this floor, you can find a bountiful treasure chest behind a rather simple platforming puzzle. Upon activating the first platform, face forward and follow this order:
- One step right
- Two steps forward
- One step left
- One step backward
- One step left
- One step backward
- One step left
- Two steps forward
- One step right (final platform)

After that, you’re done with this new Seclusion Zone in Honkai: Star Rail. Now, get out there and start collecting all of these chests for some free stellar jade and other resources!
ALSO READ: Honkai: Star Rail – Complete Xueyi Build Guide | Lightcone & Relics