VR isn’t really that big of a platform yet but it’s slowly becoming less of a niche for most people. That’s because more and more affordable VR Headsets are coming to the market, like the Quest 2. Not only that but there’s a high chance you can get a VR Headset second hand for people that never got their VR legs. Still, since it’s a fairly new platform there can be some quirks and problems that arise. In this guide we’ll show you how to re-enable the Quest Link USB PC-Access dialogue pop-up if you accidentally disabled it.
Quest: How To Re-enable Link USB PC-Access If Pop-up Is Missing
When you first connect your Quest to your PC you’ll get a pop-up that says something along the lines of “Allow Connected Device to access files?” and you’ll have a choice to pick Deny, Allow or Deny, and don’t show again. If you pick the last option by mistake you might wonder how to fix that.

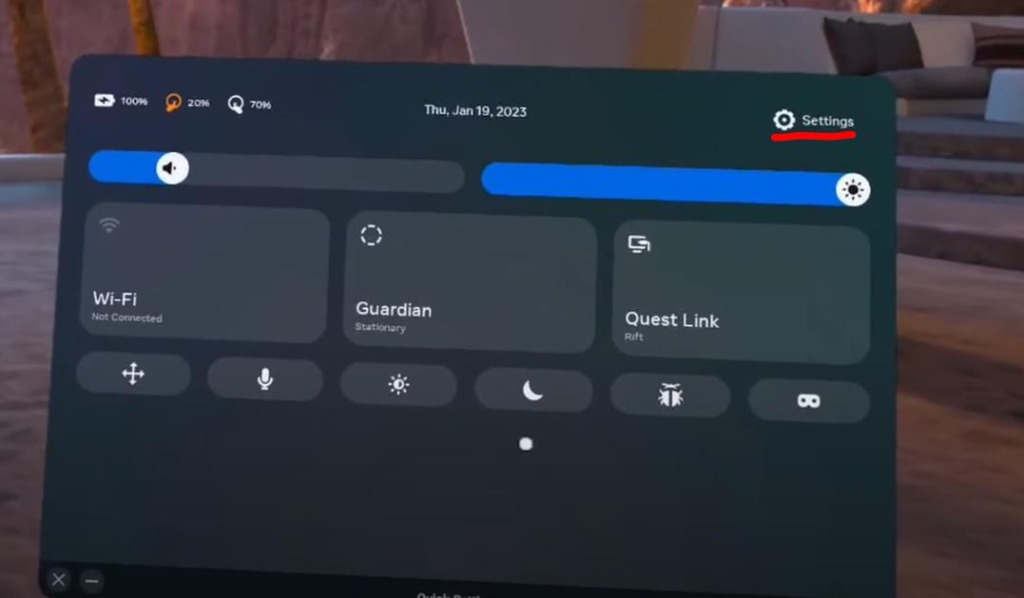
To fix it you’ll need to go to your quick settings and go to the settings at the upper right.

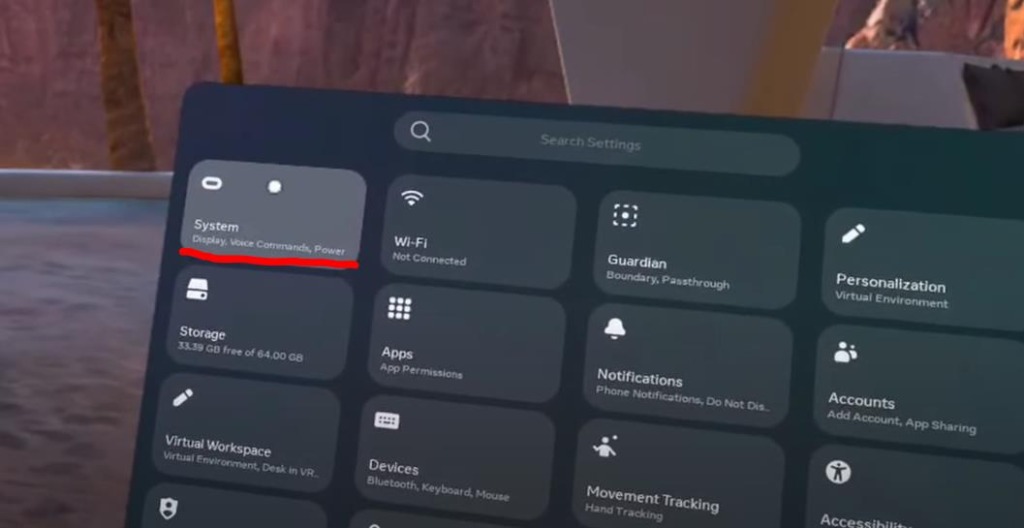
From there select “System.”

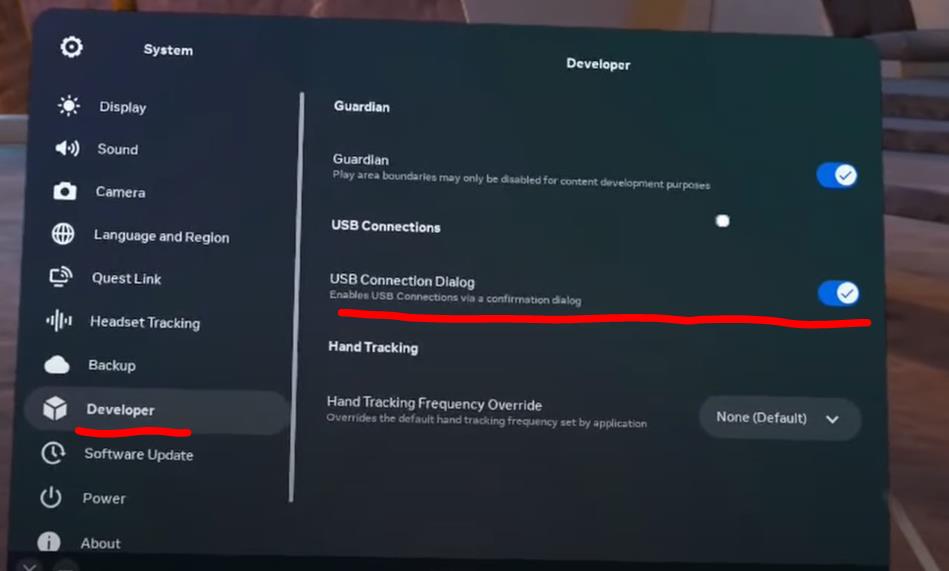
And under System you can then select Developer and in that tab you’ll see the option for “USB Connection Dialog.” If you denied and disabled it then it’ll be off, turn it back on and reconnect your device to your PC to show that dialog box again. Congratulations you now know how to Re-enable your Quest Link USB PC-Access dialog box. Now go out there and try to do it yourself! Many thanks to SpookyFairy for showing everyone how to do this, if you need more information on the subject then go check their video out here: How to Re-enable Quest Link USB PC-Access if Pop-up is Missing (GUIDE) – YouTube
ALSO READ: Quest 2/Pro: How To Do A Factory Reset Using The Meta Mobile App


