
Master Pirates is a Roblox game based on the legendary anime and manga series that is One Piece. The game is an RPG with numerous weapons and bosses to take on. The latest update to the game has increased the level cap to 1250 and added a new island to explore. With that said, you might be having a hard time leveling up. This article will serve as a complete leveling guide all the way up to level 1250.
Complete Leveling Guide
This guide will be divided into multiple sections; with each one focusing on a particular location and ideal levels to farm as well as the quests and bosses that can be farmed there. Let’s jump right into it!
Starter Island
The Starter Island is where the journey of every aspiring pirate begins. Here, we will stay until we reach level 30. Go towards the center square of the island, where at the entrance, you will find the first quest giver.

After the first quest, the next quest can be found towards the left of the square. This requires level 10 or above. The final quest for this island is the Boss Quest, and for this, you must be at least level 25. If you have amassed enough Beli, head to the spawn, and there should be a LogPose seller. The LogPose is essentially a compass which is very important to have since it guides you to other islands.

Shell Town
The next destination after Spawn Island is Shell Town. To get there, head to the port of Spawn Island and purchase the Boat from the BoatSpawner NPC. There are different boats, but we recommend purchasing the free one to save your Beli. Once the boat is spawned, jump inside it and head for the Island directly North, as shown in the image below.

At the port of Shell Town, jump out of the boat, and in front of you, there should be the next quest giver. You should be at least level 30 to attempt this quest.

From level 30 NPC, head straight ahead and take the stairs. At the top, you should be able to spot the next quest giver. This will require you to be at least level 50 and above.
There is no boss quest on Shell Town, so stay here and grind until you reach level 75 or above. Once the above requirement has been satisfied, you can proceed to the next island, which is Orange Town.

Orange Town
At Orange Town, you can find the first quest giver just next to the Spawn Point NPC. This quest requires you to be at least level 75.

From the previous quest giver, head straight and take the first right. The next quest NPC should be standing on your right. For this quest, you must be at least level 90 or above. In front of the NPC, there should be a blue house. On the balcony of this house, you can fight Buggy. He is a level 90 boss, so make sure that you are prepared.
Grind on this island until you reach Level 105. After this, you can move on to the next island, which is Snow Island.

Snow Island
At Snow Island, the first NPC requires you to be at least level 105 or above to take on his quest. After this NPC, the next NPC that you can talk you provides you with the boss quest. To find him head up the stairs and past the Snow Bandit spawn. From here, keep going up until you reach the castle gate.

Climb the cliff surrounding the Castle Gate, and at the top, you should find the boss and the quest giver. To defeat the boss and complete the quest, you must be at least level 115. The boss that you need to defeat is a giant Yeti.
Lastly, you can also purchase the Enhancement Haki on this island, as shown in the image above. This is very good to have in your arsenal. The vendor can be found on the same cliff where the Castle Gate was. Simply wrap around the cliff and walk straight ahead. The NPC will be in this rock-like structure with very small windows. The Haki can be bought for 2.5k Beli, which is relatively cheap. Grind on this island until you reach level 150.

Desert Island
At Desert Island, you can accept the quest from the first NPC if you are level 150 or above. The next quest requires you to be at least level 200 so grind the previous quest until you reach this checkpoint. The next quest NPC can be found behind the previous one.

The final quest NPC can be found at the highest point of the island, and you must be at least level 225 or above to complete the quest. This is a boss quest and you will have to defeat the Allgiator boss to complete this quest. Grind on this island until you reach level 250.

Shark Park
At the Shark Park, you can find the first quest-giving NPC towards the right of the Spawn Point NPC. You must be level 250 or above to take on this quest.

The next two quest givers are also in the same area, and you should spot them easily. First, take on the right, where you have to defeat the ProShark Pirates. You must be above level 300. Then, talk to the NPC on the left once you reach level 325 to take on the Arling Boss.
Grind on this island until you reach level 350 and proceed to Sky Park Island.

Sky Park
On the island, the first NPC quest giver will require you to be at least level 350. The enemies required to complete this quest will be right next to the NPC. Once you reach level 400, go to the floating island that will be above you. Here you will find the next NPC, and you will need to farm the ProSky Bandits to complete this quest.

Once you reach level 450 head to the other floating island that is opposite the first one. Grind this quest until you reach level 475, and then head to the island that is shown in the image below.

Grind the quest on this island through the SkyAssaulter enemies until you reach level 500. Then head to the final island shown in the image below to fight the boss. Make sure that you are level 500 since the boss will be of this level. Grind on this island until you reach level 525.

Baratie
At the Baratie, all the quest NPCs are quite close to each other. First, complete the quest for level 525 and grind it until you reach level 575. Then, head inside the Dining Hall and accept the quest to defeat the Chefs until you reach level 600. Lastly, head to the floor above where the final NPC will be and accept his level 600 quest.
Enies Lobby
At the Enies Lobby, you will need to grind a lot so we recommend using a boost if you have one. First, you will have level 625 NPC which you need to grind for at least 50 levels until you reach level 675. Then, talk to the second NPC and grind his quest until you reach level 725.

Afterwards, talk to the NPC with the level 725 quest. He will be standing next to a very large gate. Grind his quest until you reach level 750. This is sort of like a boss quest since you will need to defeat Spandam.
The final NPC will be next to the arena where Spandam spawns. However, you can only attempt this quest if Jabra spawns in the huge tower behind the arena when Spandam is defeated. He doesn’t spawn always so keep trying and grind level on this island until you reach level 775.

Thriller Bark
At Thriller Bark, complete the quest of the first NPC. You will need to be at least level 775 or above. Grind this quest until you reach level 825.

Once you reach level 825, follow the road and you should eventually reach the next NPC. Next to this NPC, will be the enemies that need to be defeated to complete the quest.

Once you reach level 875, head back on the road you came from and there should be a giant gate towards the left. Inside it will be the Yuma boss that you can fight. The quest giver for this this boss can be found just outside the gate next to the house.
Make sure that you are at least level 850 before taking on the boss. Grind this boss quest until you hit level 875.

Sabaody
The next island is known as Sabaody and for the first quest you must be at least level 875. The enemies that need to be defeated will be right beside the quest NPC.

Head to the opposite side now and the next NPC will be waiting for you. Grind this quest until you reach level 950.

The final quest giver will be between the previous two NPCs. This is the boss quest, so make sure that you are prepared before attempting it. Grind the last quest until you reach level 1000 since the next island is right next to this one, we recommend using the one-hour code here to speed things up.

Amazon Lily Island
The first NPC will require you to be at least level 1000 or above to complete it. The enemies required to grind will be right beside it. Grind 25 levels using this quest and then fly over the mountain on the other side of the town. At the other entrance of the town, you will find the next NPC for which you need to be level 1025.

Grind this quest until you reach level 1050 and then head for the next NPC which can be found by following the path through the town. Complete this NPC’s quest until you reach level 1100.

After reaching level 1100 follow the path from the last NPC, and then you should see two houses on a cliff. Climb this cliff and you should spot the level 1100 NPC. The enemies for this quest can be found on the cliff above.

On the same mountain, you can find the next NPC at the very top. Grind the previous quest until you reach level 1125, and then go for the next NPC.

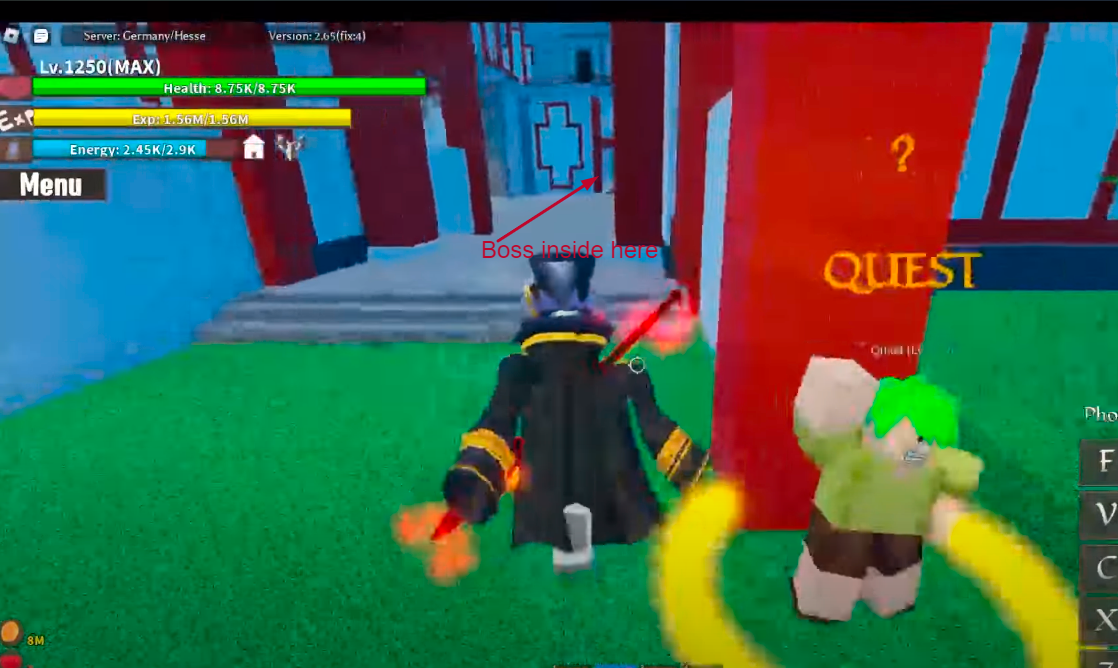
Grind the previous quest until you reach level 1175, and then go down to the red building. Outside it should be the final NPC with the boss quest. The boss can be found in the building ahead. Grind this quest until you reach level 1200 and then you can proceed to the final island.
Monkey Island
The first NPC can be found on top of a wooden structure. Make sure that you are at least level 1200 before trying to attempt his quest.

Behind the previous NPC will be the next NPC and for this make sure that you are at least level 1215. The enemies can be found directly down below these NPCs.

Repeat the previous quest until you reach level 1230 and then cross the bridge in front of you. You should see the next NPC in front of you.

Above this NPC will be the final NPC that will require you to be at least level 1240 since this is the boss NPC.

We hope that this guide to leveling up in Master Pirates was helpful to you. Let us know in the comments below if you have any questions or suggestions.
ALSO NEXT: Master Pirates: How To Get Gems Fast Guide


