Mods are what make PC gaming worth it more than gaming. Just the sheer number and versatility of mods and how you can customize a game is great! The only problem is if a big patch comes up all the mods need to update.
In Ready Or Not, the 1.0 update was released and with it, a bunch of mods have broken and need some updating. If you want to play Vanilla in the meantime, you’ll need to clear those mods!
In this guide, we’ll show you how you can clear your mods in the game and go back to the vanilla version. Now, let’s see what we’ll need to do to get there.
How To Fix Modded Game Issue on 1.0
Modding can be fun in Ready Or Not. You can have all sorts of mods from AI adjustment mods to new weapons.
All of the mods in Ready Or Not, be it from the in-game mod menu to manual installation from Nexus Mods are in one folder.
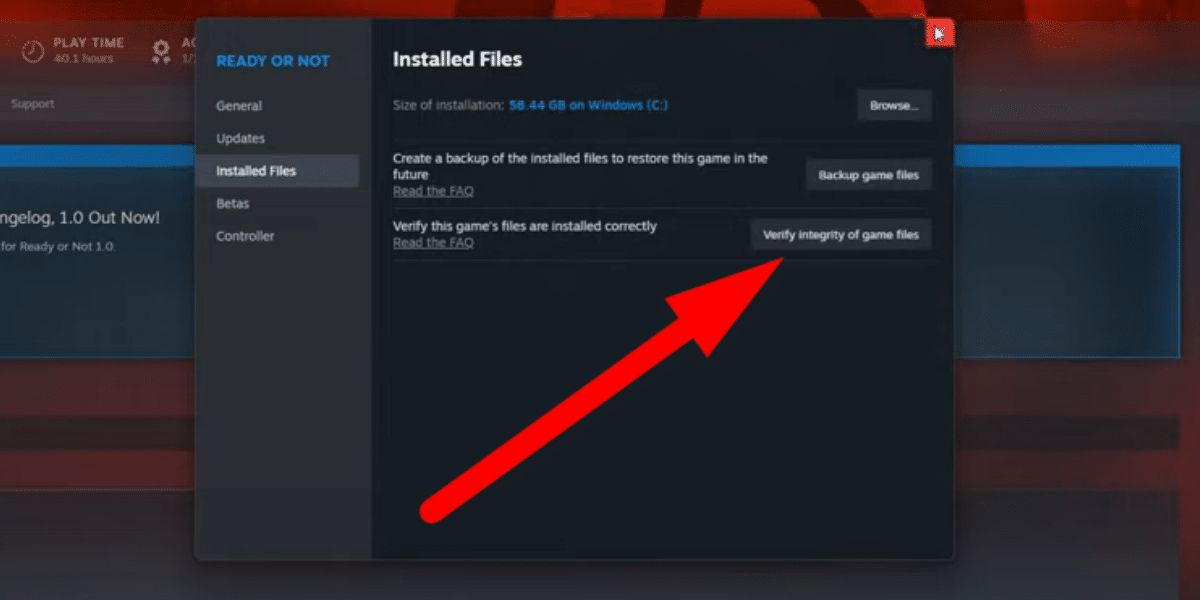
To remove the mods in your game, you’ll first need to go to the game’s directory. The easiest way to do that is right click on the game on Steam, go to properties, and then install files.
Click the Browse button and it should open a window where the game is installed.

Once you’re in the installation folder go to the ReadyOrNot/Content/Paks and then delete all the items in the Paks folder.
When you’ve done that go back to Steam and click on the “Verify Integrity of game files” button under the Installed Files tab.
Steam will then download the files needed – and once it’s done, you can start the game again. You’ll know it’s the Vanilla version of the game when there’s no “Modded” word on the upper right of the main menu.
That’s how you can fix the Modded game issue for the 1.0 update of Ready Or Not. Now, go out there and try it out yourself!


