The Update 1.0 of Sons of the Forest has finally arrived, and with it, comes all the juicy content that concludes the game. It includes newer endings, exploration, mechanics and blueprints! Speaking of blueprints, I know that you’re interested in collecting all of them – So, here’s a complete guide which will help you locate all 16 blueprints in Sons of the Forest Update 1.0!
All Blueprint Location Guide
There’s a total of 16 Blueprints that you can get and craft in the Update 1.0 of Sons of the Forest! In the Table of Contents below, I’ve put all the Blueprint locations, so you can easily navigate to whichever you need. Feel free to use it accordingly!
Grind Trap
I’ve gone ahead and marked the Cave Entrance you need to get to for the Grind Trap Blueprint above. Fortunately, you’ll also get an in-game indicator to help ensure you reach your destination.

Once in the area you’ll find yourself surrounded by Wooden Huts. You’ll want to make sure that you head inside the open huts (the one that isn’t locked down by Wooden Planks), as they have both resources and a Note.

Once you’ve gone through the huts, you’ll want to head to the one barred by Wooden Planks, and chop them down with your Axe. Inside, you’ll find more resources, and an Underground Entrance, also barred by Wooden Planks. Let your Axe do the work.

Once you enter the cave, keep hugging the left wall until you reach a path blocked by Wooden Planks. Next to it is a Skeleton with yet another Note. Make sure to get the Note and smash your way through the planks.

Once through, you’ll find a tunnel downward that you can rappel with a Rope. Fortunately, all you have to do is hit the E button. You’ll find yourself dropped onto a pool, and all you have to do is find the path out of the water (it’ll have Wooden Planks as an indicator). It’s the only path up, so you won’t get lost.

Once again, you’ll want to hug the left wall, as doing so will eventually lead you to another Blocked Door (which you smash through with your Axe). Along the way to the Blocked Door, you’ll also find a small Broken Bridge and a Dangling Rope, which is your way back up to the Surface.

While the path is relatively straightforward, be careful when dropping off the edge in this part. The way to the Blueprint goes downward. Eventually, you’ll have to smash your way through another Blocked Door. This will lead you to a small area where the path to progress means climbing down the Rope.
Almost there!
At this point the path diverges, but I’ll make sure to guide you. Once you drop down the rope, all you have to do is go left, and under the Waterfall.

Alongside the Chests you can smash, you’ll also find the Grind Trap Blueprint. Great job!

Oh, before I forget, the path opposite to this leads you to an Artifact. Make sure to pick that one up as well!

Spear Thrower
To find the Spear Thrower Blueprint Location, go to the Cave location marked for you on the map down below. This cave is in the Snowy Mountains biome and is somewhere to the south.

When you get there, you will be able to see the entrance of the cave. In the image below, you will see how it looks.

This cave is quite small so you can just walk to the very end very easily. Once you’ve reached the end, you will be able to find the Spear Thrower Blueprint on the ground, next to a skeleton.

Once you’ve obtained the blueprint, you can start building the Spear Thrower. In the image below, you will see how it looks. This trap does not need to be powered using a power source, which is great. However, you will want to refill it with Spears, and it can carry a maximum amount of 5.
The trap will automatically activate once an enemy steps on the yellow wire/string. You can also fire it manually by standing behind it and pressing the interaction key. This trap has high damage, however, the fire rate is slow.

That’s how you can find the Spear Thrower Blueprint Location in Sons of the Forest 1.0. Since the fire rate is slow, the trap is not that effective if you are playing against hordes of enemies. Overall, this is a great trap you can place around your base for some extra protection.
Cross Light
To find the Cross Light Blueprint – First, you will need to go to the Cave shown in the map down below.

On the in-game device, you will also be able to view a cave entrance indicator to show you the exact location.

When you enter the cave, make sure you bring an axe with you to break the wooden planks that are blocking the entrance.
Inside, there will be an important laptop that you’ll want to interact with. This will allow you to unlock the Entertainment Bunker GPS.

Nearby, there is also a body with a piece of newspaper next to it. Pick up the newspaper as well.

Then, keep going inside the cave and pay attention to your surroundings. There might be Mutants that can attack you and lower your health. Bring a weapon with you as you go deeper into the cave and always be prepared.

As you go, you will reach a place with two different paths. Take the path on your right.

Keep going and you will have another two paths to choose from. This time, go for the path on the left.

Keep going along that path until you see an entrance that you can go through. This entrance is blocked by the wooden planks. Break those wooden planks first before going deeper in.
Once you’ve reached the end of it, you will be able to find a zipline. Interact with that zipline to go down.

Once you’ve taken the zipline, keep going to the end of the cave. There, you will be able to find the Blueprint for the Cross Light.

After you’ve built the Cross Light, you will not be able to activate it yet. You’ll then want to find a power source, such as a Solar Panel to light it.
In the image below, you will be able to see how the Light looks at night.

That’s how you can find the Cross Light Blueprint Location in Sons of the Forest 1.0. This is a great way to light up your surroundings at night and navigate around more easily.
Clock
To find the Clock Blueprint – First, you will want to go to the Snowy Mountains biome in the middle of the world map. There, you will be able to find a cave next to a river. You can check the map down below to know the exact location.

Once you are there, you will be able to enter the ice cave. Inside the ice cave, there is a piece of note that you can collect.

Next, you will want to use the ziplines and get to the very bottom of the cave. There are multiple floors so you’ll want to keep looking for them until you reach the bottom.
On each floor, there can be useful materials that you can collect, so do not miss out on them.

At the bottom of the cave, you will be able to find the Clock Blueprint next to a skeleton. Pick it up and add it to your inventory.

With the Clock Blueprint, you can now build a Clock. In the image down below, you will be able to see how it looks.
The great thing about it is that it helps you tell the time without a power source, meaning that it can function on its own.

That’s how you can find the Clock Blueprint Location in Sons of the Forest 1.0. This is a great build that lets you tell the time so you can plan your day more effectively in the game.
Spin Trap
In order to craft a spin trap in Sons of the Forest, you will need to get the blueprint first. You can find this blueprint in the northeast part of the map. Check out the images below to see the Spin Trap Blueprint location easily and clearly.


Once you reach this destination, you will need to enter a hut. There will be more than one at that location, but the one you need to go inside is the biggest and farthest one. After you get inside this hut, you will see the Spin Trap Blueprint lying on the table.

Crafting Spin Trap
Now that you have found the blueprint, you can check out the ingredients you are going to need to use to craft a Spin Trap in the Sons of the Forest. Let’s see what you will need:
- 5 Wires
- 37 Sticks
- 1 Golf Cart Battery
- 1 Light Bulb
Open your crafting book and mark the location of the trap once you have all the supplies you need to craft it. Once the layout has been marked, just proceed to add all of the collected components to make the trap.
This is how you are going to find the Spin Trap Blueprint location in Sons of the Forest.

Repel Shrine
In order to find the Repel Shrine Blueprint in Sons of the Forest, you should head inside a small cave located to the southeast of the map. Check out the images below to see its exact location easily.


Once you arrive at the entrance of the cave, use your axe to break down the wooden planks covering it. The cave is going to be very dark, so make sure to have your flashlight prepared as well.

Inside the cave, you only need to walk straight for a while, and then you are going to see the Repel Shrine Blueprint lying on a blue barrel on the right.

Craft Repel Shrine
To craft a Repel Shrine in the Sons of Forest, you are going to need to get an Artifact first. You can use any artifact you have, but if you need help finding any, take a look at our guide on how to find All Artifact Piece & Activation to get one quickly!

If you already have an artifact that you can use, you can move on to the Crafting part. As you will see on the blueprint, you are going to need three different ingredients to craft a Repel Shrine in the game. These are:
- 6 Skulls
- 49 Bones
- 7 Stones

What is the Repel Shrine?
The Repel Shrine is an item that you can use to repel any mutants that are headed your way. You can easily use it to get rid of a hoard of mutants quickly.
This is where you are going to find the Repel Shrine Blueprint location in the 1.0 patch of Sons of the Forest.

Gore Chair
You will need to go to an abandoned settlement in the map’s lower right corner. This is where you will locate the Gore Chair blueprint. If you zoom in on the map, you can notice that the location is located slightly south of a pond.

Upon arriving at the destination, you are going to see three little houses. If you enter the one in the middle, you can find the Gore Chair Blueprint right next to a skeleton on the ground.

Crafting the Gore Chair
Once you pick up the blueprint, you can examine it to see which items you will need to have to craft a gore chair. In order to get yourself one, you should have:
- 1 Wire
- 1 Head
- 2 Legs
- 6 Arms
- 1 Light Bulb
- 2 Creepy Armor
This is where you need to head to find the Gore Chair Blueprint in the Sons of the Forest 1.0 Patch.

Armor Plating
Armor Plating blueprint is an easy find if you already know where the Luxury Bunker is. If you don’t know where it is, the bunker is all the way to the east overlooking the sea. You’ll also have to unlock the bunker by exploring the Residential Bunker first.

Explore the inside and head to the furthest room in the bunker with the Golden Door. Take your time exploring this place if you want as there’s no enemy in here. Just follow the trail of blood and bodies and eventually, past the broken-down wall in a bathroom is the Golden Door.
Timmy will tell you that there has to be some sort of a key to open the door. That key isn’t really a “key”. You need the Ancient Golden Armor and to do that, you need plate your Golden Armor on the device.
For more details, here’s our dedicated guide on how to open Golden Doors in Sons of the Forest Update 1.0!

The Armor Plating Blueprint is being hold by the skeleton near the door.
To build the Armor Plating, you need 1 Skull, 4 Wire, 25 Stones, 33 Bones, and 4 Batteries. But that’s not all–once you build the device, you need the Golden Armor and 12 Solafite Ore. So you’ll definitely need to come prepared to save some time from going back and forth here.

Do not put in the Golden Armor until you’re ready! Activating this device will send a wave of strong mutants your way. You have to kill and survive them all to get your Ancient Armor. Arm yourself with grenades, shotgun ammos, molotovs, and armor because you cannot wear your Golden Armor!
You can also alternatively, set up the area before you begin the plating process. Build towers, prepare traps around you, and just prepare to the surge of mutants which can get extremely challenging the harder the difficulty you’re on.
And with that, you can now open the Golden Door.

Multi Trap
The Multi Trap blueprint is inside the cave at the tip of the west side of the island. The cave isn’t marked but is right out in the open, so it’s hard to miss this one.

Go inside the cave and take the rope to descend. Loot the resources and break open the planks blocking the way. The Multi Trap blueprint is laying on the table here.

Materials to make the Multi Trap: 4 Wires, 2 Skulls, 2 Vodka Bottles, 14 Sticks, 3 Leaves, 1 Battery, 15 Bones, 2 Ropes, and 6 Rocks.
Now, for the implementation. The Multi Trap is a combination of fire and then iron maiden style mouth that closes when the cannibal is stuck in place from the spikes. It looks very deadly, but most traps can one-shot your average cannibals, so it’s really more about style.
Spot Light
The Spot Light blueprint is located inside the cave near the bottom right corner of the map before the isles. It’s hidden on the map, so try to find an area with rocks that look like they’re stacked.

Here’s an easier look of the map, zoomed out and in. The cave mouth faces south.

Head inside the cave and take the rope down. There are only two ways to go once you’re down here, both you can easily go through with an axe. One of them is an immediate dead end with loot and the other leads deeper into the cave. Follow the pathway until you see another rope you can take.

Right after the descend, you will find the Spot Light blueprint just laying on the crate.
Now you can craft the Spot Light. This lighting source costs 2 Wires, 36 Sticks, 1 Rope, 2 Light Bulbs, and 1 Tarp. Make sure to have an electrical source using the solar panel connected to the battery. Connect using the wire to turn it on.
Attract Shrine
First, you’ll want to go to the Seashore at the bottom left of the map.

In the image down below, you will be able to view the exact location for you to find the Attract Shrine Blueprint.

Once you’ve arrived at the location, you will find a small cave that you can enter. Before you enter, make sure you have an axe to break the wooden planks that are blocking your way in.

Once you are in the cave, keep going straight forward until you reach the very end. There is only one way in and out so you will not get lost!
At the end, you will be able to find the Attract Shrine Blueprint near some skulls. Then, press the interaction key and you will be able to collect the Blueprint.

Next, you can walk out of the cave and view your blueprints. You will then be able to build the Attract Shrine.

After you have placed down the Attract Shrine, you must use an Artifact to activate the device. When it is activated, it will attract enemies to it.
To stop attracting enemies, use the Artifact and interact with the device one more time. This will stop the device from attracting more enemies.

That’s how you can find the Attract Shrine Blueprint in Sons of the Forest! If you want to fight some enemies, you can always use the device. By defeating the enemies, you will be able to collect some of the materials that you need from them.
Teleporter
Simply put, the teleporter blueprint can be found on the southwestern corner of the map. Refer to the highlighted part of the image below for the exact location on the map:

Once you make it to this location, you will find a hole in the ground. Enter the cave below by interacting with the rope to the side.

Inside the cave, whip out your light source (such as the flashlight) and follow through the corridors. At the end, turn right and keep walking forward until you see a skeleton. The teleporter blueprint will be right beside it.
The teleporter itself will require the following materials to craft:
- 8x Skulls
- 50x Bones
- 33x Rocks

And that is pretty much everything you need to know when it comes to finding the Teleporter blueprint in the Sons of the Forest 1.0.
Glider Launcher
To find the Glider Launcher Blueprint in Sons of the Forest 1.0, you’ll need to do the following:
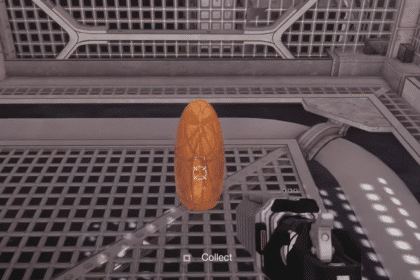
- Go to the strange orange blip on your GPS map
- Enter through the cave near the bodies
- Navigate to the end of the cave
- Pick up the Glider Launcher Blueprint
Glider Launcher Cave Location
The Glider Launcher Blueprint is actually located inside a secret cave in Sons of the Forest. To get to the outside of the cave, you’ll need to look at your map, where there is a strange orange blip. This orange blip actually indicates the location of a GPS Locator.
The location of this orange blip zoomed out on the Sons of the Forest GPS map is shown below. It’s right next to the Glider Launcher Cave.

Additionally, here is the location of the orange blip zoomed in. Both these images should help you find the Glider Launcher cave location.

You’ll know you’re in the right location when you see some bodies lying around. One of these bodies will have the GPS Locator.

Acquiring the Glider Launcher Blueprint
Once you’re at the right spot, look towards a small gap in a ridge nearby. This gap leads to the cave entrance, which is where the Glider Launcher Blueprint is. Enter this small gap.

When you enter the gap, you’ll see that the entrance is blocked by some wooden boards. So equip an axe or something similar to break through. After that, enter inside and make your way ahead.

Once you’re in, navigate to the end of the cave. There is only one path that goes ahead although it will curve around and open up at some points. You will find all sorts of resources that will benefit your survival, and plenty of gore and bodies! Be on the lookout for enemies too!
After you reach the end of the cave, you’ll see some skeletons lying about. Near one of these skeletons, you’ll see a piece of paper that you can pick up. This is the Glider Launcher Blueprint added as part of Update 1.0 for Sons of the Forest!

The Glider Launcher Blueprint will show you that you need the following resources:
- x14 Sticks
- x14 Logs
- x4 Wires
- x4 Turtle Shells

That’s everything you need to know about getting the Glider Launcher Blueprint in Sons of the Forest 1.0. Just one more additional blueprint that you’ll need to take care of, among the scores of others you can get in the game.
Leg Lamp
The blueprint for the new Leg Lamp can be found in the easternmost edge of the map. You will have to look for a ruined building in the highlighted spot on the map below.

In the building itself, you will see that there is a hole that’s been boarded up. Whip out your axe and break the wooden boards to gain access to a small hidden mine.

At the end of this dark cave, you will find several skeletons and a table where the Leg Lamp blueprint is. Simply pick it up and you should be able to craft it now.

You don’t need much to make one of these. The resources required to craft a leg lamp are the following:
- 1 Wire
- 1 Deer Hide
- 16 Sticks
- 1 Bulb
- 1 Leg
And that’s how you find the blueprint for the new Leg Lamp in Sons of the Forest 1.0, as well as how you can make one yourself!
Gore Couch
The new Gore Couch blueprint can be found near the upper right corner of the map. You are looking for a building beside the shore, and this location is highlighted in the map below.

In this small area, you will find various buildings. You will want to break into the one that’s beside a blue golf cart.

Once you enter the building, there will be a table in the middle of the room with a variety of items. Among these items will be the blueprint for the Gore Couch.

You will need quite a lot of resources in order to craft the Gore Couch. The required items are as follows:
- 14 Creepy Armor
- 4 Arms
- 2 Legs
- 40 Sticks
And that’s how you find and craft the Gore Couch in Sons of the Forest! The blueprint itself is easy to find, but building this grotesque chair may require a bit of farming due to the number of resources needed to make it.
Rifle
The closest point to the rifle is after you get out of the cave where you got the Katana. Just across the lake is the entrance to this cave system where the rifle is, so it’s still in the same cave. But the interior has been slightly altered. Do note that you do need the Rebreather here.

The cave is easy to navigate through. The key is to stick to the right side of the cave. Previously, this cave had golden glows and has a lot more space, but now, it’s actually easier to know you’re on the right path.
To your right, you’ll immediately see that the path is separated from everywhere else. As you keep going the path will get narrower in some spots.
By sticking to the right wall, you’ll finally find a right turn into a narrow tunnel with glowing golden wall.

You know you’re at the right spot if you see water at the end of this path that you can dive into. Just dive and keep swimming until you can resurface again. There will be a forked path here. For the rifle, turn left.
Be careful as there’s going to be the Fingers and some babies here, your staple annoying enemies.
As you emerge from the waters, there’s only one way to go. Walking deeper will get you into the Mutants’ nest with the soldiers hanging on from ceiling. One of them has the Rifle.

You can just leave the cave by going back the way you came from. But there’s also the option to explore further in for the Golden Armor. And that’s going to be in our next guide, so stay tuned! That’s how you can find the Rifle blueprint in Sons of the Forest!
Summing things up
There you have it! All the 16 Blueprint locations in Sons of the Forest Update 1.0. It’s very much worth it collecting all of them, as they all offer unique benefits that you can use throughout your playthrough – from combat, base building, utility, and more!
Up next, we have a guide on how to find All Artifact Piece & activate them in Sons of the Forest 1.0 as well, make sure to check it out!