Raids in MMOs can be quite tough, there are raids that require certain builds and party compositions to actually get through it. Not only that but there are also mechanics that you need to worry about when it comes to these things. In Destiny 2 there are raids and there are also strikes, the latter one being a smaller kind of raid that players tend to go through quick and easy. Sometimes these strikes can be just as difficult as raids though, and in this guide we’ll show you how to run through Arms Dealer Grandmaster Nightfall.
Destiny 2: Updated Arms Dealer Grandmaster Nightfall Guide
Before you go into the strike there are a few things that your group needs to have to do this strike properly. You can understand all the mob placements and bosses all you want, but without the proper gear you might as well be wasting more time.

For this strike there will be a lot of barriers and shields, so make sure that you equip yourself properly. Most shields for this run will be void shields so keep that in mind.
Make sure your team also all has Rocket Launchers because they’re a great weapon to have in this strike. Aggressive frame is also a great addon to your rocket launcher if you don’t have it already.


The reason why your teammates need to have rocket launchers is because of the Gjallarhorn. With the proper setup you’ll get wolfpack rounds and pack hunter, the latter gives all of your teammates wolfpack rounds when they’re close-by so it’s a great combination to get for this strike.
The start of the strike isn’t that difficult at you’ll only need to worry about the void shields at the beginning.

Remember to take out ships when they appear, they’re quite easy to take down but are annoying when they’re up for long periods of time.

There are a lot of barrier colossus in this strike. So, make sure to get ready for those. Do finishers when you can but also remember that they can have some stomp attacks that can easily take you out.

This may not be useful for players who have not run the strike yet but in your future runs you should always remember where the adds will spawn, this is so you can set up with grenades and so on to easily wipe them out. This saves you a lot of time in the future.
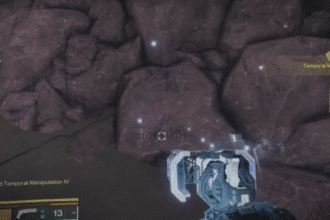
At the middle point of the strike is where most of the tricks come in. When you’re going through this area shown on the bottom picture with your sparrow there’s going to be a tank there.

When you get there, you need to go to the very back of the room with the second button. You need to press the button to progress through the strike. Of course one of the players has to stay to get the first button. The second button is where 2 barriers will be there to fight. So make sure to keep an eye on that.

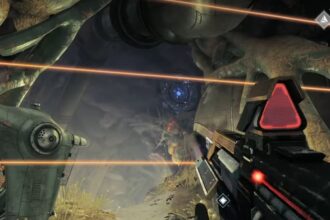
Once you’ve interacted with the two buttons a second tank will appear. It will drop down with a bunch of adds around it. This is the perfect time for you to fire your rocket launchers and any area damaging weapons. This is so that you clear the mobs before the platform even gets down.
Before the area where the boss usually spawns, there should be at least one person that runs up the ramp. That’s because when you do it normally, the ramp will go up with the players. The game waits for the players to get into a certain height before spawning the boss. When a player gets to that height before you start the ramp elevator then when you do start it, the boss appears immediately.

We want this because when the elevator starts you can quickly dispatch the boss.

Congratulations you now know how to run Arms Dealer Grandmaster Nightfall, now go out there and try it yourself. Many thanks to Ekuegan for making a guide for every player out there who wants to do these runs. If you want more information check his video out here: UPDATED ARMS DEALER GRANDMASTER NIGHTFALL GUIDE | Destiny 2 – YouTube
READ NEXT: Monster Hunter Sunbreak: How To Unlock A5 Tier Anomaly Quests + Afflicted Dire Materials