Chest Grinding in Critical Revengeance is such a chore in the game that can really take out the fun. Unless you know where exactly to look and what you want. This guide aims to bring the most effective chest grinding runs to get the best loot with your time spent.
Complete Chest Grinding Guide
We’ll start by talking about the different grades of chests and then the best route to take for chest grinding.
Chest Grades
There are currently 4 grades of chests: Common (Grey, 55.8%), Uncommon (Green, 29.1%), Rare (Blue, 11.6%), and Legendary (Red, 3.5%).
To explain why Common and Uncommon chests aren’t worth it, they have the worst drop rate for the most important items. Here are some facts about them:
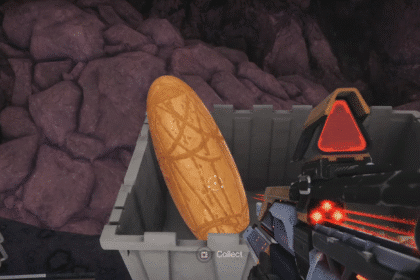
- Common: Does NOT have runes, 1.3% for fragments, and 2.7% for Chaos Fragment. Gives potions.
- Uncommon: 1.1% for runes, 2.2% for fragments, and 10% for Chaos Fragments.
- Rare: 2% for runes, 25% for fragments, and 20% for Chaos Fragments.
- Legendary: GUARANTEED Chaos Fragments and other fragments, 20% for runes, and 1% for Necklace Catalyst.
Chest Grinding Routes
Disclaimer, we’re not going to show the location to every single chest (130) that spawns in the game. Some chests are also not worth the extra trip. There are several reasons:
- Some chests spawn very way out of the chest clusters.
- Some chests spawn in locations nearly impossible to reach.
- Some are low grade chests (common and sometimes uncommon, too) not worth an effective chest run unless you’re min-maxing it or need to find some potions.
Remember that you can always redo the routes, especially Sakura Forest and Library. Especially if the first round barely give you any chests.
Sakura Forest
The easiest way to chest grind Sakura Forest is to hug the wall to your right and do a full circle around the area. Nearly every corner here is a chest spawn. If you start from the corner where a chest spawns between two trees, keep hugging the right wall.

The first corner you meet behind a tree is a chest spawn. And then before jumping up the platform in the corner is another spawn spot. Up the platform among the trees is another one.

Past the temple gate, there’s another one in the corner. Keep going and the next two corners you bump into are also chest spawns.
And then this area below where you can find several buildings and a bridge with the Mountain area underneath. The four corners of this area are also chest spawns.

Sakura Forest is probably one of the easiest to grind for chests. If you have little time, going around this place takes barely 3 minutes. Nor do you have to memorize the locations as all you need to do is hug the wall and do a full round.
Library
Make sure your respawn point is in the Sakura Forest. Instead of heading into the Mountain, just drop down to the entrance of Library. The 2nd easiest place for chest grinding is Library.

It might be confusing at first, but the Library is not that huge of a maze as you think. Similar to the Sakura Forest, you simply hug the left wall and trace it until you reach a junction with 4 ways to go. That’s it. Don’t leave the left wall or you’re going to get lost inside.
At the junction, make sure to explore all routes before going left. Each route gives 1-2 chests and are very quick to reach. And then take the left route to reach the final room, shown below, where there are 4 chest spawns.

Mountain
Mountain chest grinding is tricky, but still easier than Forest. Easiest place to start from is the bridge that leads out of the Sakura Forest. Look down from the bridge and you can see several chests spawn points in Mountain. Ignore if grey, jump down if blue or above.
Make sure to reset so you spawn back on top and jump down to this area that has an inclining path up. While you walk up, you’ll find 2-3 chest spawns on your left side.

After you reach the top, go left to find these platforms. There’s a chest spawn snuggled between the platforms here. Make your way up by jumping on them.

At the top, to your right between these trees is a chest spawn you can see from here. And to your left in the small corner here is another spawn. Keep going around the path.

You’ll find another chest at the end of this path. Now you can use a speed potion to jump across and immediately next to the tree is a chest spawn spot. Follow the path and don’t miss checking the corners of stepways. Edge of the cliffs don’t have chest spawns along this path.

And the final recommended chest spawn to check in Mountain is the one between the trees next to the Purple Slime here.

Desert Highlands
Desert area is easy to grind. Here’s what you need to do:
- Check behind every rock pillars that are next to the wall. There are only 3-4 pillars with chests here.
- Follow the bridge.
- Check below the bridge every now and then. If there’s a high grade chest, drop. If not, keep going.
Follow the route to the right to the temple first. There’s only a few spots that’s slightly out of the way. Upon entering, these two sides can have 3 chest spawns which you can check by just jumping.

At the end of the route is a structure. There’s one chest spawn spot in front of the building and on the building. Climb up and jump into the temple for 2 more chest spawns.

Now we head to the Empty Lot area. Hug the left wall for two chests in the corner and one behind a pillar.
Climb up here for a chest spawn spot on the edge right here. Use the tree to jump up to reach it. Turn around the corner and there’s a double chest spawn.


And that concludes the Desert Highlands.
Forest
The Forest area itself actually has decent chest spawn points. You don’t have to purposely check every corner here. As you make your way to the Explorer’s Guild, check your left and right because if there are chests, they’ll be immediately visible.

Over at the Explorer’s Guild, there’s a small corner on your right before the entrace. That’s a chest spawn point. Inside, behind a tree, is another spawn point.

Then to Plains of Initia. The easiest place to start with your chest grind is the area around Town of Initia: two chests on and next to the waterfall, two chests next and on the shop, and one behind the house.

Take the stairs as you make your way down the beach, The Seaside. There are two chest spawns next to the stairs area. Nearly every corner in the beach area is a chest spawn point!

From the beach, climb back up into the Forest. There are three more spots worth checking here. You can easily just scan your surrounding to see if any of them spawns.


And that concludes the Chest Grinding guide for Critical Revengeance! We know how tedious it can be to grind for the chests. So, may this guide be helpful in helping you curate the most effective way to spend your time in grinding for chests!
Don’t miss out our other Critical Revengeance guide! Here’s the location for all classes and here’s how to find the Mage Guild!