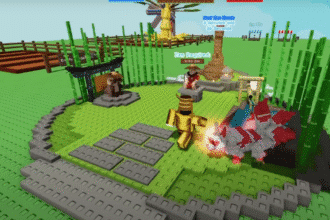
The new Anime Simulator promises to bring back the iconic mechanics associated with some older anime games on Roblox. With its launch, you can now access some interesting content. Part of this includes completing quests, so you can progress through the game.
However, to do the Quests you’ll need to talk to certain NPCs in the world of Anime Simulator. In this guide, we’ll show you the exact locations for each of them. In this way, you’ll be able to start these quests. Let’s get into it!
All Quest NPC Locations
You can identify Quest NPCs in Anime Simulator by the red exclamation mark above their heads. Currently, there are a total of 4 Quest NPCs that you can talk to in the game.
They are Dio, Kaneki, Rayleigh and Zoro. You can look at their relevant quests via the Quests menu in the lift side of the screen.
We strongly recommend that you also use the map that can be found at the spawn building. It will give you a clearer idea of all the islands and their directions!

Feel free to use the Table of Contents if you’re only interested in a specific Quest NPC.
The World (Dio)
Starting off, we have the closest Quest NPC in Anime Simulator. This quest is given to you by Dio, or The World, in the game.
Starting from the spawn area, you want to head towards the area shown in the map below. It is right next to the spawn building that is in the middle.
You’ll know you are in the right area because of a tree that is in the middle of some dirt.

Approach the tree and you’ll see Dio there. Talk to him to start Potente Quest, which is considered a Gem Quest in Anime Simulator.

Eyepatch (Kaneki)
The next NPC that you’ll want to visit is Kaneki, or Eyepatch, in Anime Simulator. For this one, you’ll need to head to the Bridge that connects to the starter island.
It can be found towards the East side of the island, if you use the map that can be found in the spawn building.
You should be able to spot the bridge in the distance as it rises up really high. When you find the bridge, walk on it and keep an eye on the sides. You should spot an NPC with a red exclamation mark standing there.

This is the Eyepatch NPC. Talk to him to start your next Quest. This quest is considered a part of the Kill Quests!

Dark King (Raleigh)
For this NPC, you’ll want to use the starter island as a reference point again. From here, you want to go towards the glowing Purple forest in Anime Simulator. You can find it towards the North side of the starter island.
When you reach the purple forest, start going towards the water. You should be able to spot the docks there.

Go to the docks and walk the way to the end of it. Here, you’ll be able to spot the Dark King NPC, or Raleigh. Talk to him and you’ll now be able to do his quest. It is considered a Bandit Quest!

Lost Swordsman (Zoro)
Last, but not least, we have the Lost Swordsman NPC, or Zoro. He is the hardest to find NPC in Anime Simulator.
Starting off, you want to make your way to the island that is to the North of the starter island. An image of this island is shown below as reference.

From this island, make your way towards the sea behind the mountains. You should be able to spot a ship in the water. From here, you want to fly or swim to the Ship.

When you’re on this ship, make your way to the front of it. You should be able to find the Lost Swordsman NPC here. Talk to him to start his quest, which is considered a Weapon Quest.
And with that, you’ll be able to do all the Quests that are currently in the game!

That’s everything you need to know for all the Quest NPC Locations in Anime Simulator. We strongly recommend that you do all these quests so that you can get all the rewards. You can then use these rewards to make your character stronger.
Are you starting out with the game and having some trouble with it? Our Complete Beginner’s Guide has you sorted. It will not only show you the basics, but some tips to get stronger and get coins faster!


