With the latest update of Doors, we finally have an entirely new level called the Mines. This means around a hundred new doors to go through, but this time with an entirely different environment beyond the typical hotel setting. In this guide, we will quickly go through the steps needed to get past The Nest, which is on the 150th door.
How to Beat Door 150 Boss Fight Guide
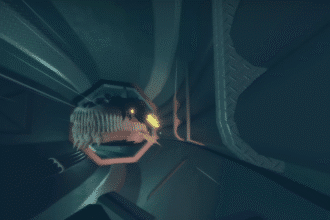
At the beginning, you will find yourself riding a minecart while being chased down by a large monster known as a Grumble. As soon as you fall off the cart, start running and don’t even bother looking ack.
Eventually, you will stumble into a room with a terminal in it and a red button. On the screen, it will say “Press for power”, so obviously you will have to press the red button!
Upon pressing it for the first time, the monitor to the left will start loading up at a somewhat slow pace. There is nothing you can do to speed up this process, so just wait for it to load all the way up to 100% and watch out for any nearby monsters.

Once the terminal has finished loading, you will see that there is a whole lot of things going on that will not make sense for now. Let’s take a look at the monitors and see what these mean. Refer to the image below for some visual aids.
- Yellow box – The monitor under the yellow highlight shows you how many anchors you need to activate. These are placed in alphabetical order and you will need to turn them on one by one.
- Red box – At the monitor in the red highlight, you will see the code that you need to input at the corresponding anchor. For the example in the picture below, it says that Anchor A will require the code “498”.
With this information, you will have to find Anchor A and then input the code that was provided to you by the machine. Before we continue, though, a few important notes first:
- Tip #1 – The codes that you will have to input will be random for every run. This means that we can’t help you by putting a series of codes here.
- Tip #2 – In the same vein, the number of anchors that you need to activate will also vary. Supposedly, there will be one anchor for each surviving player. If you are solo, you will have to activate four anchors. Goodluck.

Finding Anchors – Perception Check
In order to find each anchor¸ you will need to follow the beeping sound. We don’t have much information on the spawn locations yet, as there are a few randomized factors in play here. We will have to rely on both our sight and hearing for this one.
The first anchor, however, is always going to be in the same room as the terminal. Simply turn around and you should see Anchor A right there. While you’re at it, listen to the beeping noise to get a feel for what it sounds like.
In addition to the sound cues, there is also a green light that will periodically flash above the anchor that is currently active. This flash is very bright and should make it easy to detect them. For the first one, you should already notice Anchor A flashing and beeping nearby.
Simply approach it and press E to zoom in on the keypad. From here, enter the code and then pull the lever on the right to activate the anchor.

Other Anchors – Math Check
Now that you know the basics of how to find and activate anchors, turn back around and head to the terminal once more. Press the red button again to bring up the next code on the screen.
Once the new code has appeared, it is time to head out and search for the next anchor. The anchor letter and code should be on the lower left corner of your screen, so there is no need to memorize or write it down.
NOTE: There is a small antenna / satellite on top of the main terminal. This will actually point at the general direction of the current anchor. Use this as another guide to help you find it.

As mentioned earlier, follow the beeping noise. The sound should get progressively louder as you get close to it. Since anchors seemingly spawn in random areas or at least activate in different orders (as far as we know), this part’s all on you.
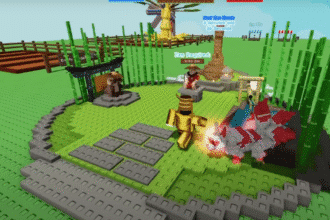
One important survival tip though is to watch out for Grumbles. There are going to be many small rooms scattered throughout this level. Use these to hide from the giant monsters lurking around, as they cannot enter them due to their size.

Sticky Note Modifiers
Once you make it to Anchor B, you will notice that there is a sticky note on the monitor. This means that the code must be modified in accordance to the plus or minus value on the note.
Feeling a little confused? It’s actually really simple, so let us try to explain this as clearly as possible. Let’s go through this step by step in bullet points:
- Step #1 – Separate each digit of the code.
- Step #2 – Look at the sticky note on the anchor.
- Step #3 – Add or subtracteach digit of the code based on the note.
- For example: If the note says “+1”, then you should add 1 to each digit. If the code is “123”, then it should now be “234”.
- The same logic goes with a negative number. If it says “-1”, then you should subtract 1 from each digit. With a code like “123”, the buttons to press will be “012”
- IMPORTANT: If a number goes past 9, you go up from zero again. For example, “8 + 3 = 1” because it goes like this: “8 -> 9 -> 0 -> 1”
- Step #4 – Finally, bring up the keypad and then input the modified code.
- If you pay close attention after pressing the numbers, you should notice that the monitor will display the “correct” code. Going back to our +1 example above, pressing “234” should still display “123” on the screen.
Here is another example in the image below. The code for Anchor B here is “864”. Upon finding the device, there is a “+1” note on the screen. In order to get the correct code, we have to press “975” instead before pulling the lever.

Finishing Up the Level
Once you have activated all of the anchors, you should return to the main terminal one last time. With all of the anchors turned on, all you need to do now is press the red button again.
This will trigger a cutscene where the bridge right outside will start to lower, giving you access to the next zone. In addition to that, the other gate will close, keeping the Grumble locked out for just a brief moment.
After the cutscene, the Grumble will start banging on the gate. Run past the bridge as fast as possible! The Grumble will break through almost immediately, so you need to make a quick escape.
At the end of the straight path, you will find Door 151. Needless to say, you should run through it and keep going forward until you find a tunnel leading underground. Climb down the ladder as soon as possible, as the Grumble is still chasing you!

That’s pretty much it, as you should now be at Door 152 once you reach the very bottom of the ladder. If you are struggling to get past this area, or any others for that matter, check out our guide on how to get some free revives in Doors to get some extra 1ups!