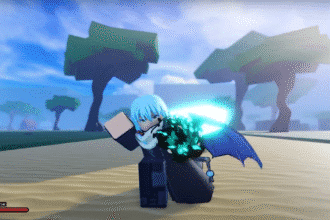
There is a new One Piece game in town in the form of Legacy Piece. Roblox players now have a new adventure to look forward to with all sorts of leveling, quests, fighting styles and more. It will only get better as more updates roll in.
With so much in the game to explore, it can be quite overwhelming for beginners to get a strong start. Not to worry, we have you sorted out. In this Legacy Piece guide, we’ll be providing you with a complete beginner’s guide that covers important stuff. Let’s get into it!
Complete Beginner’s Guide
There is a lot that you will be able to find and explore in Legacy Piece. We’ll only be looking at the aspects that will provide you with a good beginner foundation to build upon. Feel free to use the Table of Contents below to easily navigate the guide.
Starting Out (Customization and Spins)
When you start the Legacy Piece game, you’ll be met with a beginning menu. Here, you’ll see the option for Customization, Play and AFK Farm.
We recommend that you go with the Customization option first.

Once you’re in Customization, click on the Spins option that you can see in the bottom right corner. This will take you to the Spins menu where you’ll be able to Spin for your race.

You will have 3 Free Spins that you can use to get Races. After that, you’ll need to purchase Spins with Robux.
Here are the Races that you can get alongside their chances:
- Human (65%)
- Skypian (18%)
- Fishman (10%)
- Mink (5%)
- Oni (2%).
After that, you can customize your character however you want. Once that’s done, you can proceed to the game.

UI and Menus Explained
When you load into the game, you’ll be able to see various meters in the bottom left corner. You will want to familiarize yourself with everything in this UI when playing the game.
Here is the breakdown of the UI in Legacy Piece:
- First Meter: Health Bar (Green)
- Second Meter: XP Bar
- Third Meter: Stamina Bar (Stamina)
- B Icon: Beli (Currency)
- Level.

After that, you should also familiarize yourself with the Menu. You’ll be able to find a variety of options here.
Here’s a breakdown of everything in the Menu:
- Settings: Change Sounds and Textures
- Shop: Purchase Boosts and Gamepasses for Robux
- Inventory: All Items you obtain will be stored here
- Party: Create a Party to join other people
- Crew: Form a Crew with other people (currently unavailable).

Important Starting Locations and NPCs
Next up, we’ll be looking at key locations and areas that you need to be aware of in Legacy Piece.
Starting off, we have the Ship Sailor (Boat Shop) that you can find near the docks. This is an NPC that you’ll be visiting if you want to travel between islands by sea.
Interact with him and you’ll be able to see all the Ships on sale. Some of them will be available for Beli while the others can be bought with Robux.
Here’s a How To Spawn Ship Guide to also help you out with this part!

After that, you will need to turn your attention to the Spawn Crystal. This is a green crystal that you can find in key areas of islands. Interact with it to set it as your spawn point.
So whenever you die or reload the game, you will spawn in the area where the Spawn Point is set

Moving ahead, you can also find an in game shop where you can find all sorts of starting items. It’s indicated in the image below.

Enter this shop and you can find all sorts of items that you can purchase with Beli. Here are some of the items that you can get:
- Foosha Logpose
- Alvida Logpose
- Stamina Potion
- Health Potion
- Crude Cutlass.
Keep in mind that these are items just to help you at the start of the game. You can even get some of them from Chests.
Later on, you’ll be able to get more useful weapons through drops and quests. So, do not end up investing too much Beli at the Shop since you’ll likely need it for other stuff.

Finally, we’ll be looking at the Legacy Piece map with all the locations marked. This map also has the quests and fighting styles marked, which we’ll touch upon later. So we recommend referring to this map whenever you get lost in the game.
Additionally, you’ll need to go to each island based on a certain level. Here are all the islands with their recommended levels marked:
- Fusha Island (Level 1 – 15)
- Alvida Island (Level 15 – 25)
- Shells Town (Level 25 – 40)
- Shimotsuki Island (Level 40 – 50)
- Haki Island (Level 45)
- Orange Town (Level 50 – 65)
- Baratie (Level 65 – 80)
- Mink Island (Level 80 – 95)
- Arlong Park (Level 95 – 99)
- 1SS (One Sword Style) Island.

Quest System Explained (Leveling Up)
The main way in which you will be leveling up in Legacy Piece is by doing quests. Leveling up is crucial if you want to make your way towards the other islands in the game.
There are various quest givers you can find in the game. All of them will have different colored exclamation marks (!) above their head.
Here is what the colors represent for each quest giver:
- Blue Quest Givers – Story Missions
- Yellow Quest Givers – Side Missions
- Red Quest Givers – Boss Missions.
You can refer to the map mentioned earlier in the guide. It has all these quests marked out on it.

You will also see some quest givers that have an icon above their head. These are Story line quest givers and they will change as you complete them. We recommend that you do these quests first and follow the story line.

When you finish a particular story line mission, the icon will move to another story NPC. So keep following the icon and doing missions. They will eventually lead you towards a Boss.

Fighting Styles (1SS, Blackleg, Electro)
There are various fighting styles that are available in Legacy Piece that you can get. You won’t be able to get these at the start as they’ll come later on in the game. However, we’ll still touch on them briefly so you can get an idea of when you can get them.
Here are each of the Fighting Styles and how to get them in Legacy Piece:
- 1SS (One Sword Style) Fighting Style – Complete Sword Style Trainer quest and tasks on 1SS Island
- Blackleg Fighting Style – Purchase for 1k Beli from Sanji (Black Leg Trainer) on top floor of Baratie (Level 65 – 80)
- Electro Fighting Style (Mink Race only) – Purchase for 1k Beli from Lizzy (Electro Trainer) on top of temple at Mink Island (Level 80 – 95).
If you want to check out how to get each of these fighting styles in detail, we encourage you to check out our All Fighting Styles guide. It even has a showcase of all of the styles!

Haki
Next up, we’ll be looking at how you can get Haki. Obtaining Haki will also come a bit later on in the game when you are around Level 45. Nonetheless, we will touch upon how you can get Haki in Legacy Piece.
Starting off, you’ll need to make your way to Haki Island. Once you’re there, make your way to the top of the large mountain. You should be able to find a ladder on the side of the mountain that will help you out.

Once you’re up, you’ll find an NPC by the name of X Shotgun Daichi. Talk to him and complete his quest line. It’ll cost you 2500 Beli to start his questline.
Here’s a How To Get Haki guide, which will cover all the details you need for this part.

Obtaining Fruits
No One Piece game is complete without Devil Fruits – and Legacy Piece is no exception. There are a variety of Fruits that you can get in the game of differing Rarities. Each of these Fruits have their own movesets.
We encourage you to check out our Fruits Showcase guide if you’re curious about the best fruits.
In essence, you can get Fruits by looking under Trees. They have a very low chance of spawning under trees. We recommend looking for them on Starter Island, since it has the most Trees.
Here are all the Fruits that you can in Legacy Piece alongside their Rarities and chances:
- Common Fruits (75%)
- Chop
- Spin
- Rare Fruits (20%)
- Wax
- Bomb
- Weapon
- Diamond
- Legendary (1%)
- Mera
- Hie
- Paw.

That’s everything you need to know for the Complete Beginner’s Guide of Legacy Piece. We encourage you to continue exploring the game as you’ll be able to discover quite a few more things. For example, did you know that you can also get Geppo in the game?


