Side quests are also a thing in God of War Ragnarok. These are not necessary to complete the progress of the main story of the game. However, finishing the side quests also provides you with a good piece of additional information about the game’s lore and characters. Completing these also grants you rewards.
One example of God of War Ragnarok side quests is the Quaking Hollow Favor.
Your goal in this side quest is to locate and eliminate the source of tremors. Unfortunately, finding out the location of the tremors is still part of your mission.
Source of Tremors Location | Quaking Hollow Favour in God of War Ragnarok

The Quaking Hollow side quest will start once you heard the tremors in The SInkholes located in Vanaheim.
From the marked location in the photo, head straight and get on the zipline-like rope to get to the ground.

Once you land, look to the right and you will see an area blocked by a purple mist. What you have to do now is to aim at the marked spot and throw your axe to remove the barrier.
Then, you can now enter the area.

As you walk a little further, you will hear and feel a sudden heavy thump. These are the tremors that you have to stop.
The goal is for you to locate the source and take it down.
Find Out the Tremor Source

From the entrance where you first felt the tremor, head straight until you see another elevated area. Climb your way up there, and just follow the path.

You will eventually realize that it is a dead end. Use this object to open a way. Throw your spear and blast it.

Once it opens up a passageway, turn right and you will see a wide area and a dragon circling above. From there, turn another right and fight enemies attacking you.

From your spot, you will see pillars of stone in the middle of the area. Aim your spear the same as shown in the picture, and use your weapon to let it explode as well.
Doing this will let disturb the dragon which will cause it to transfer spots. Follow the dragon and it will land on the other pillar adjacent to the previous one. Break it the same as what you did from the first one.

Doing this will activate the next objective. Here, you have to locate the dragon’s lair.
Head to the right wing of the area until you find a gate. Interact with the chain on its side to pull this down.

Head straight and you will see a blocked passage. Use your weapon to burn and destroy this.

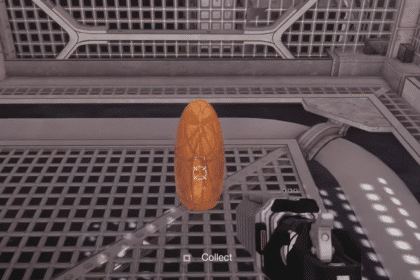
After that, aim at this object inside and throw your axe. Then you have to approach the right side of the place. You will see a gap wherein you can squeeze yourself to enter.

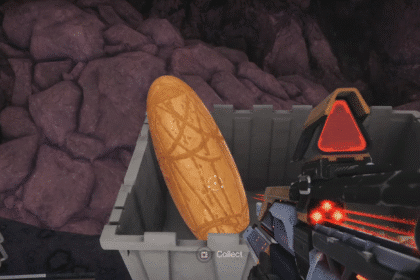
Move to the right and you will see stairs and an elevated area. Once you successfully made your way up, you will see a chest on the right. Pick it up and throw it to the other side.

Look up and look for this spot and use your weapon to collapse this. The falling debris will be used as anchor points.

Interact with this spot to grapple your way to the other side. Make sure to fight enemies blocking you.
Now, head straight and jump down to the lower ground. Turn right and duck to enter this area.

After finally entering the area, a gigantic Craw Jaw Boss will appear. You have to defeat it in order to stop the tremors.

If you look closer at it, you will see certain spots that are lit up. These are the vital points where you have to land your shot.
However, make sure not to get too close to it as it can slam you around using its heavy tail.

Once knocked down, this is the perfect timing to commit close combat. Deal as much damage as you can to decrease its HP indicated at the top of the screen.

Once it returns to its stance, watch out for this signal. The Craw Jaw Boss is charging its attack and will release an AOE with great damage that can somehow push you back.
Release continuous burst damage to easily take this giant down. Once it is slain, you will be able to pick up loot such as +15 Purified Crystalline, Dragon Claw, Dragon Touch, and XP for both you and Freya. Aside from that, you will also be rewarded with a Regenerating Essence amulet enchantment.