Minecraft is already a game with endless possibilities, but still, players find a way to take it a step further. Modding has been always something which a huge chunk of the player base is interested in. In fact, most of Minecraft’s popularity was largely due to content creators making mods content. Nevertheless, many find the process overwhelming. For example, how to install mods on MacOS? Those that aren’t tech savvy are overwhelmed, when in fact, it is quite easy.
How to Install Mods on MacOS – Minecraft
The process of installing mods on Minecraft on MacOS is quite similar to PC. Like on PC, Forge must be installed to allow the game to be compatible with mods.
Without further ado, let’s get to how to install mods in Minecraft on MacOS:
Install Forge – Mac
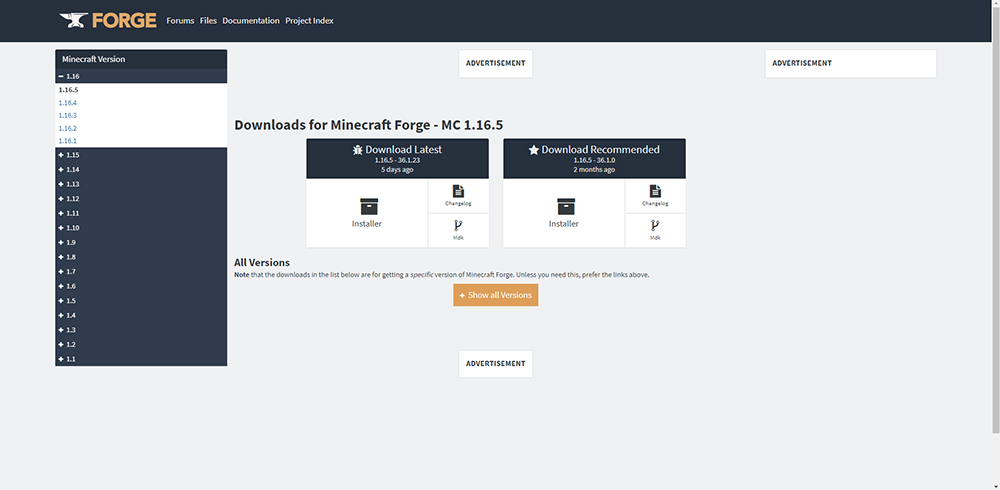
- Go to Forge’s official download page.
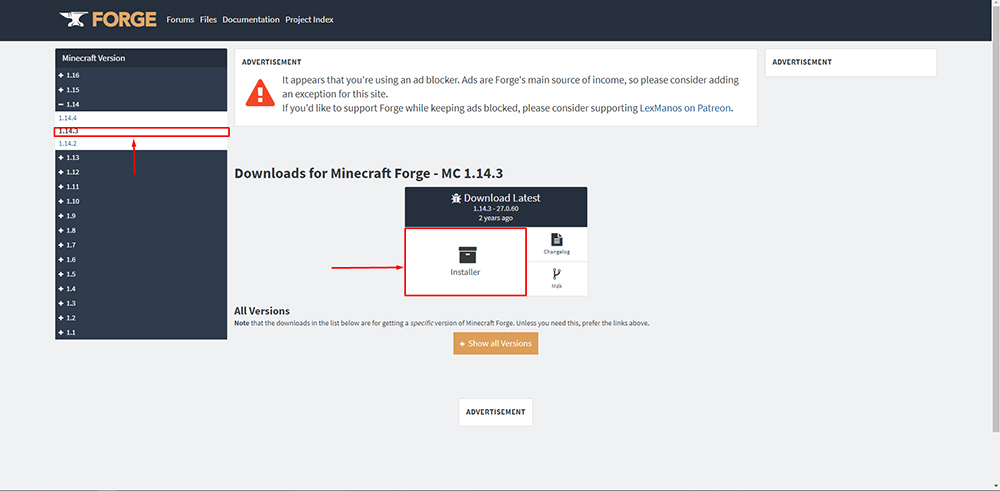
- Select a version for which you want to install mods on the left side of the screen.
- In the ‘Download Recommended’ tab in the middle, click on ‘Installer’.
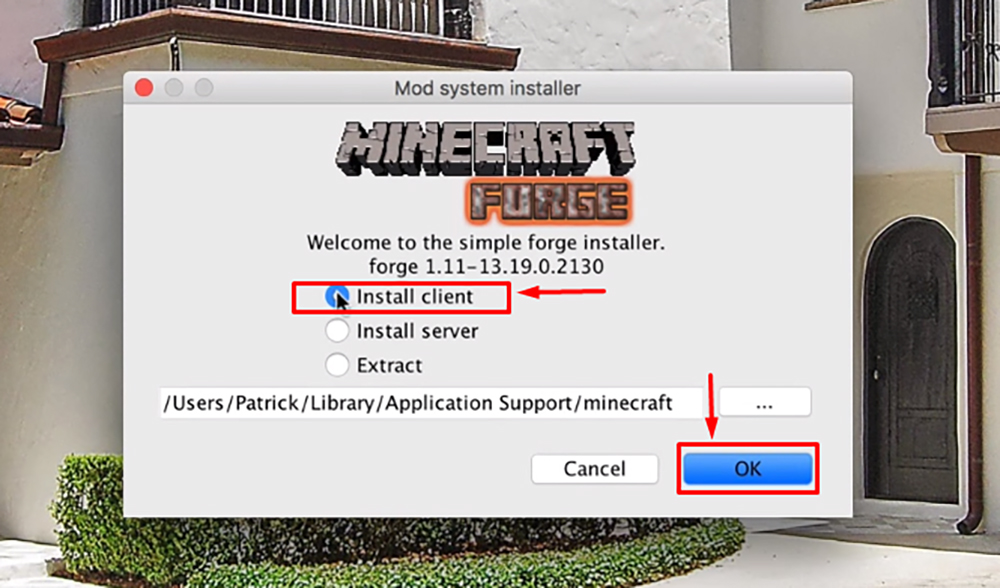
- After that, navigate to your downloads folder, and open the Forge installer.
- Make sure to select ‘Install Client’ and then press OK.


After you have installed Forge, it is time to create a folder, in which the mods will need to be placed. So, to do that, open Finder and then go to the Library. Then, go to Application Support > Minecraft, and create a new folder here, called ‘mods’.
Install Mods – Mac
Time needed: 7 minutes
After all that, mods can be installed on your Minecraft client, and that goes as follows:
-
Download a mod from a website like MinecraftMods, or others.

-
Make sure the downloaded mod is a version of Forge that you installed earlier. Ex. 1.7.2, 1.12.1, etc.
-
Go to your Minecraft folder, and open the mods folder that you made earlier.
-
Select the downloaded mod, and then place it in the mods folder!
In the main menu of Minecraft, you will now have a new menu called ‘Mods’. There, players can enable or disable mods.
Also, make sure that you run Minecraft with the Forge version of the game.
READ NEXT : Factorio: How to Install Mods on Linux


