Another Crab’s Treasure is a new action adventure which lets you explore the vast ocean for treasures and stuff. It is available to play on PC and various consoles such as PS5 and the Xbox ONE & Series X | S. If you like to play on the go, then you can also find the game on Nintendo Switch.
The game gives you various tools which are used in exploration and fights. One of them is the Fork. And to upgrade your Fork, you will need Stainless Relic. Some of those Stainless Relics are very well hidden. Read the guide below to learn the location of every Stainless Relic in the game.
All Fork Upgrade Locations
There are 15 Stainless Relics that are mentioned in this guide. They are arranged in the order of progression you do in the game.
Stainless Relic #1
You can find the 1st Stainless Relic after the Duchess Magista Boss fight. Once you are done with the fight, you will notice an area (shown below) at one side of the bridge. Go there and with the help of your Fork, make your way to the location circled in the image below.

You will notice a Glowing Yellow object on the ground, pick it up to get your 1st Stainless Relic.
Stainless Relic #2
The 2nd Stainless Relic is located in the Lower Crust (New Carcinea). Once you get to that area, make your way to The Prawn Shop. Talk to Prawnathan (NPC) to open up The Prawn Shop Menu.

After the dialogues, click on Buy Junk. Here you will be able to see the 2nd Stainless Relic for sale. Buy it for 5000 Microplastics.

Stainless Relic #3
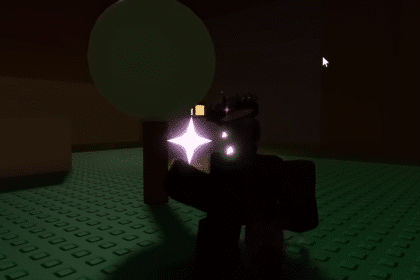
The 3nd Stainless Relic is located in the Expired Grove. To get this Stainless Relic, you will have to defeat the Heikea, Intimidation Crab Boss (shown in the image below). You will come across this Boss as you are naturally progressing through the game.

Once you defeat the Boss, you will get your 3rd Stainless Relic.
Stainless Relic #4
The 4th Stainless Relic is located in the Village Gates (Expired Grove). Once you Shelleport to the Village Gates, head straight through the door which is marked in the image below.

Once you get to the end of the path, head towards your left. Follow the arrow that is marked in the image below.

Just keep heading straight, you will come across platforms which you can see in the image down below.

After traversing through the small platforms, you will come across 2 Hooks which you can use to reach the next platform by using your Fork.

After using the Hooks, you will land on the platform which you can see down below. From here go towards the left (look at the arrows for assistance).

Keep heading straight until you reach the end of the platform. From here, use the Hooks to get to the platform in the far left (marked in the image below).

After getting across, keep moving straight. You will eventually see Net on the bottom of a platform (look at the image below). Use your Fork to reach the Net and then go towards the left side of the Net until you reach the end.

Once you are at the end of the Net, turn around and you will see a platform. Make your way to the platform. It is marked in the image below.

After that, just keep heading straight, you will have to deal with some enemies here. At the end of this area, you will come across a Seashell.

Open the Seashell to get your 4th Stainless Relic.
Stainless Relic #5
The 5th Stainless Relic is located in the Expired Knoll (The Sands Between). To get this Stainless Relic, you need to acquire the Mantis Punch Adaptation which you get by defeating the Grovekeeper Topoda Boss.
Once you have the Mantis Punch Adaptation, go to Expired Knoll and head in the direction of the arrow which is marked in the image below.

You will eventually reach a Block which is shown in the image below. Use the Mantis Punch on the Block to break it. Once broken, it will open up an Air Vent which will take you to the top of a platform.

Once you reach the platform, head towards the left side (as marked by the arrow below).

You will reach the area shown below. Here you will find some enemies guarding the Relic. Go to the location marked by the arrow below and deal with the enemies. And you will be able to get your 5th Stainless Relic.

Stainless Relic #6
The 6th Stainless Relic is located in the Central Vista (The Sands Between). Once you Shelleport to Central Vista, jump down and head in the direction shown by the arrow in the image below.

You will eventually reach a Block which requires the Mantis Punch to be broken. Once you break it, the path behind it will be opened. Just keep heading straight from here.

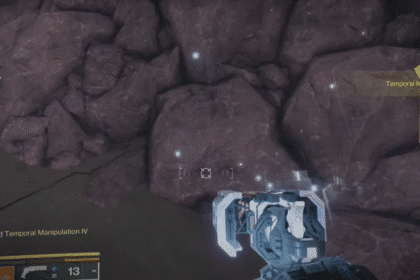
Use the Map shown below and navigate to the area marked by the arrow.

Here you will find a Glowing Yellow object in the middle of some eaten apples. Pick it up to get your 6th Stainless Relic.

Stainless Relic #7
The 7th Stainless Relic is located in the Locker Room (Flotsam Vale). Once you Shelleport to the area, head in the direction shown by the arrow down below.

You will reach a machine which will give you a Slinky which you can attack to yourself. Once done, a Giant Magnet will come, get yourself attached to the Giant Magnet by walking in the red area under it.

The Giant Magnet will take you to the platform which you can see in the image below. From here you need to go towards the hole in the structure (marked in the image below).

After getting through the hole, make your way to the Net which you can see in the image below.

After climbing that Net, you will notice another Net on the opposite side (check image below). Get yourself on that Net.

Once you get on this Net, go towards the right and there will be yet another Net which you need to reach. Follow the direction of the arrow which is marked below.

After you climb the last Net, you will notice a platform on your left. Get on that platform. Once you are on the platform, move straight and then take a right.

You will come across a Seashell. Open it to get your 7th Stainless Relic.

Stainless Relic #8
The 8th Stainless Relic is located in the Survivors’ Camp (Flotsam Vale). Once you Shelleport to this area, go towards the hole in the ground directly in front of you and make your way down.
Once you get down below, you will find a Giant Magnet moving around. It is circled in the image below. Get yourself attached to this Giant Magnet.

Get down from the Giant Magnet once it reaches the end of its path. On the platform that you land on, you will have to deal with some enemies. Once dealt with, move a little towards the left and you will be able to see a Hook in the distance (marked in the image below).

Use the Fork with the Hook and it will take you up to another platform. Once you reach that platform, head towards the left and climb up using the Net which you can see in the image down below.

After climbing, head straight and then jump down. Look at the arrow in the image below for guidance.

You will land on a small platform held by chains. From there use the Net to get across to the location marked in the image below. That is where you will find a Glowing Yellow object. Pick it up to receive your 8th Stainless Relic.

Stainless Relic #9
The 9th Stainless Relic is located in the Mag-Rail Platform (Flotsam Vale). After you Shelleport to the area. You will notice two Giant Gas Cylinders. Go through and around them to reach the area marked in the image below. The path is pretty straight forward.

After you reach the marked area, go inside the hole in the wall (as you can see in the image below).

Once you go through the hole, you will find a Net directly in front of you. Climb the Net to get to the platform on the opposite side (look at the image below).

Once you get there, you will notice electricity running on your left. Jump over the electricity running in the middle. If confused, refer to the image below.

You will notice a couple of platforms on the bottom. You want to land on the one that is marked in the image below.

After doing so, turn around and you will notice another platform in the distance. There is a Glowing Yellow object surrounded by some enemies. You need to get on the platform and then defeat the enemies. Once done, get your 9th Stainless Relic.

Stainless Relic #10
The 10th Stainless Relic is located in the Expired Knoll (The Sands Between). For this Stainless Relic, you need to first acquire the Electrocute Adaption which you get by defeating the Voltai, The Accumulator Boss.
Once you have acquired the Electrocute Adaptation, Shelleport to Expired Knoll and make your way to the Air Vent which you used to get the 5th Stainless Relic. It’s the Air Vent which you uncovered by using Mantis Punch on a Block.
Use the Air Vent to get to the top of the platform. But this time, go towards the right. Look at the image below for more clarity.

As you go towards the right, you will come across a Battery. Use the Electrocute Adaptation on the Battery and two Hooks will line up for you. Use those Hooks to get to the platform marked in the image below.

On the top of this platform, you will find an enemy (circled below). Defeat this enemy to get your 10th Stainless Relic.

Stainless Relic #11
The 11th Stainless Relic is located in the Flotsam Runoff (The Sands Between). After you Shelleport to Flotsam Runoff, head in the direction of the arrow in the image below.

Just keep going straight and you will eventually reach the end. There is a Battery which you need to charge using your Electrocute Adaptation.

Once you charge the Battery, the platform held by chains will come down. There is a Glowing Yellow object on the platform that is lowered. Pick it up to get your 11th Stainless Relic.

Stainless Relic #12
The 12th Stainless Relic is located in the Luminous Respite (The Unfathom). Finding this Stainless Relic is pretty easy. Just Shelleport to the Luminous Respite and from the spawn location head towards the Hooks (marked in the image below). With the help of those Hooks, get to the platform down below.

Once you get there, you will have to deal with some huge crabs. Go to the middle area of this platform (where the huge crabs were moving around) and you will see a Glowing Yellow object out in the open. Pick it up to get your 12th Stainless Relic.

Stainless Relic #13
The 13th Stainless Relic is located in the Luminous Respite (Sleeping Giant). Once you Shelleport to this area, just head in the direction of the arrow which you see in the image below.

You will eventually reach the lair of the Inkerton, Crab Hunter Boss. You need to fight and defeat this Boss.

After defeating the Boss, you will receive your 13th Stainless Relic. If you are having trouble identifying this area, look at the image below for guidance.

Stainless Relic #14
The 14th Stainless Relic is located in the Lookout Tower (The Old Ocean). From the Shelleport location, go straight in the direction of the arrow. Deal with the enemy standing at the stairs. After you do that, climb up the stairs.

Once you get up the stairs, move straight for a bit and you will notice the area shown below on your left. Use the Foam Spray to create a foam cloud which you can use to get across the platform marked in the image below.

After you cross over, head to the broken platforms on your right. At the end of those platforms you will notice a Seashell.

At the back of this Seashell, if you look down, you will be able to see another Seashell at the bottom (circled in the image below). Make your way to that Seashell and open it up to get your 14th Stainless Relic.

Stainless Relic #15
The 15th Stainless Relic is located in the Lookout Tower (The Old Ocean). After you Shelleport to the Lookout Tower, go towards the back where the arrow is pointed in the image down below.

There will be a Sponge at the end which will send you to the 2nd Floor of the Lookout Tower. Get the exact location of the Sponge from the image below.

Once you get to the 2nd Floor, there is another Sponge. Use this Sponge to get to the top of the roof. The arrow below shows where you should be going.

After you get on top of the roof, there will be some enemies waiting for you. Deal with and then go to the Seashell located on the roof of the building near you. You can see the Seashell circled in the image down below. Open it and you will get your 15th Stainless Relic.

Congratulations on getting here! Chances are that some of the areas might be locked for you (if you are in the early stages of the game). Which is why I suggest you bookmark this page so you can easily get back here when you need to.
This completes this comprehensive guide on all the Fork Upgrades. You probably know by now that the game has a lot of hidden Bosses. Check the guide below to get information on the hidden Boss of Expired Grove: Consortium Secret Boss Fight Guide in Another Crab’s Treasure.