The release of Gray Zone Warfare comes at the perfect time with Escape From Tarkov’s recent controversy, as it is yet another extraction shooter with intense PvPvE combat. In this guide, we will help you complete most of the tasks that you can get as a member of the Mithras Security Systems faction in no particular order.
Mithras All Tasks Guide & Location
Mithras tasks mainly take place in or around the town of Nam Thaven, which is actually pretty much the exact same layout for the other factions’ starting towns, but with a different name and a rotated map.
If you are not a member of Mithras, you can still get some use out of this guide due to the similar layouts. Just remember that the coordinates and orientation of the map itself will be different.
These tasks will help you build up your reputation with the corresponding vendors that gave them. These are relatively easy if you know where to find the objectives, which is what we’ll try to help you with below.
NOTE: This will miss a few tasks as there is little information about some of the later ones at the moment and new ones will be added over time. From what we can tell, though, most of the missing ones will have you going back to previously visited locations.
- Handshake’s Tasks (Mithras)
- Handshake Task #1. First Recon
- Handshake Task #2. Little Bird Down
- Handshake Task #3. Restoring Order
- Handshake Task #4. Rat’s Nest
- Handshake Task #5. Helping Hand
- Handshake Task #6. Radio Silence
- Handshake Task #7. First Hit
- Handshake (or Lab Rat) Task #8. Reclamation/Covert Research
- Handshake Task #9. The Shadow Over Ban Pa
- Handshake Task #10. New Neighbours
- Handshake Task #11. Up to Snuff
- Handshake Task #12. True Grit
- Handshake Task #13. One Shot, One Kill
- Handshake Task #14. Shortcut
- Handshake Task #15. I Went, I Saw, I Conquered
- Handshake Task #16. I Went, I Saw, I Conquered II
- Handshake Task #17. Business or Pleasure
- Handshake Task #18. Rebel Scum
- Handshake Task #19. Manifest Destiny
- Handshake Task #20. Final Check Out
- Handshake Task #21. What Comes Up
- Handshake Task #22. I Went, I Saw, I Conquered III
- Handshake Task #23. Fort Narith Stroll
- Handshake Task #24. Hacker
- Handshake Task #25. The More The Merrier
- Handshake Task #26. UNLRA
- Handshake Task #27. Deepest, Darkest Fantasies
- Handshake (or Turncoat) Task #28. Priceless Possessions
- Handshake (or Banshee) Task #29. The Congressman
- Handshake Task #30. The Man Who Disappeared
- Handshake Task #31. Lip Out
- Handshake (or Banshee) Task #32. Celebrity Crash
- Handshake (or Gunny) Task #33. Left Behind II
- Handshake Task #34. Paparazzi
- Gunny’s Tasks (Mithras)
- Gunny Task #1. Cache Retrieval
- Gunny Task #2. Leave No Man Behind
- Gunny Task #3. Medical Detective
- Gunny (or Handshake) Task #4. Last Farewell/Left Behind
- Gunny Task #5. On the Range
- Gunny Task #6. The Negotiator
- Gunny Task #7. Guns & Ammo
- Gunny Task #8. A Single Drop
- Gunny Task #9. Out of the Blue
- Gunny Task #10. Living in Burrows
- Gunny Task #11. Fuel Shortage
- Gunny Task #12. Neighborly Help
- Gunny Task #13. Wanted Man
- Gunny Task #14. Wanted Man II
- Gunny Task #15. Aye Aye, Captain
- Lab Rat’s Tasks (Mithras)
- Lab Rat Task #1. Meds Wanted
- Lab Rat Task #2. Lost and Found
- Lab Rat Task #3. Secret Compassion
- Lab Rat Task #4. Native Negotiations
- Lab Rat Task #5. It’s in the Water
- Lab Rat Task #6. Duty to the Country
- Lab Rat Task #7. Carnivore
- Lab Rat Task #8. The Brave
- Lab Rat Task #9. It’s in the Water II
- Lab Rat Task #10. Check Out Computers
- Lab Rat Task #11. Seeker of Change
- Lab Rat Task #12. Uncanny Files
- Lab Rat Task #13. What Remains
- Lab Rat Task #14. Girls Just Wanna Have Fun
- Artisan’s Tasks (Mithras)
- Artisan Task #1. Tools of the Trade
- Artisan Task #2. At the Mounds of Madness (Part 1)
- Artisan (or Handshake) Task #3. At the Mounds of Madness (Part 2)/The Shadow Over Ban Pa (Part 2)
- Artisan Task #4. Save the Rebellion
- Artisan Task #5. The Most Dangerous Game
- Artisan Task #6. Night Ocean
- Artisan Task #7. When a Tree Falls
- Artisan Task #8. Missing Colleague
- Artisan Task #9. Missing Colleague II
- Artisan Task #10. Evacuation Question
- Artisan Task #11. Last Flight
- Artisan Task #12. Invaders From Afar
- Artisan Task #13. Crime Doesn’t Pay
- Turncoat’s Tasks
- Turncoat Task #1. The Value of Sharing
- Turncoat Task #2. Warm Welcome
- Turncoat Task #3. Final Liberation
- Turncoat Task #4. Family Heirloom
- Turncoat (or Banshee) Task #5. A Small Favor
- Turncoat Task #6. Downsizing
- Turncoat (or Lab Rat) Task #7. Name Your Poison
- Turncoat Task #8. Who’s In Charge
- Turncoat Task #9. Dragonslayer
- Turncoat Task #10. Know Your Enemy
- Banshee’s Tasks
Handshake’s Tasks (Mithras)
Handshake Task #1. First Recon
First Recon is a simple quest that will have you going to three different locations at town. The coordinates given to you will vary depending on your faction, so for Mithras, check the image below.
Literally all you have to do is just get to these locations. Once you reach the general vicinity of each objective, a “Task Completed” popup should appear on the bottom right corner of your screen.

Handshake Task #2. Little Bird Down
First up, you must find the helicopter crash site, which will be somewhere around this zone highlighted below. Once the task objectives have updated, you can proceed to the next step.

Your objective will now be to find out what happened to the crew. For this one, you have to head down just a bit to the southwest, where you will find an abandoned building with dead bodies inside. Watch out for enemies as you approach this location.
Simply walk near both of the bodies until you get the “Task Completed” notification on the bottom of your screen. You may have to step right on top of each corpse for this to work.

Handshake Task #3. Restoring Order
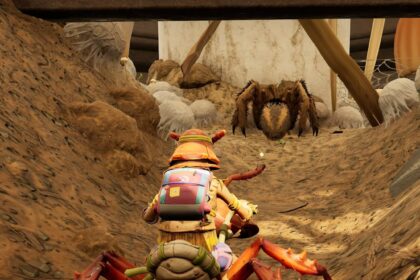
This task does not have a specific location, as it merely asks you to kill 15 enemies. Just carefully roam around the town and take out the required number of enemies as you see fit.
Supposedly, this can be done either solo or with a group, the latter of which will likely speed up your completion by a significant margin.
Handshake Task #4. Rat’s Nest
For this quest, you have to collect intelligence from two different hideouts in the town. Simply head over to the two locations marked in the maps below and get the Convict’s Notebook (northwest) and Thug’s Smartphone (east) from a table in each building.
For more details, here’s our dedicated guide for the Rat’s Nest task!

Handshake Task #5. Helping Hand
In this quest, Handshake will ask you to bring back intel from a restaurant. This one is a bit tricky as you will first need to find a Nam Thaven Restaurant Storage Key by killing random enemies in town.
Once you have the key, the restaurant can be found in the marked spot below. All you have to do from this point is to go to the second floor and open the locked “NT Attic” door. Grab the intel on top of a blue folding chair and that’s pretty much it for this quest.
For more details, here’s our dedicated guide for the Helping Hand task!

Handshake Task #6. Radio Silence
This one will require you to head over to the house marked in the image below. From there, just go up to the upper floor and sabotage the comms equipment in one of the bedrooms. You can’t possibly miss it, as it is the only thing in these rooms that have glowing lights on them.
For more details, here’s our dedicated guide for the Radio Silence task!

Handshake Task #7. First Hit
This task is a little tricky due to how there are many other players doing the same objective. Basically, you have to head over to the marketplace for it. This is the largest shape in the town if you look at the map, so it’s impossible to miss.
There, you must find and kill the criminal leader. He is wearing a red beret and round sunglasses, and this boss will also drop an AKM on death. Unfortunately, he has a respawn timer of over 10 minutes, so you’ll just have to hope he’s alive when you get there.
For more details, here’s our dedicated guide for the First Hit task!

Handshake (or Lab Rat) Task #8. Reclamation/Covert Research
This is actually done in tandem with Covert Research, which is a task from Lab Rat. The steps are the same, but you will have to decide for yourself as to who is the better option.
Basically, you must head over to a fortified location to the southwest of Nam Thaven highlighted in the map below. This place will have enemies roaming around, so be ready for a fight if you’re doing this quest.
Once the place is cleared, head over to the second floor and look for a Metal Container that you can take from the ground in one of the rooms. It has a cylindrical shape and will take up a significant amount of space in your pack.
After that, you have to choose to give the cargo to either Lab Rat or Handshake. Both of which will give you drastically different rewards for doing so, as well as some reputation.
For more details, here’s our dedicated guide for the Reclamation & Covert Research tasks!

Handshake Task #9. The Shadow Over Ban Pa
This one is relatively simple, as all you need to do is head over to the two main entrances of Ban Pa (north and south). The coordinates of each are roughly at around (204x, 136y) and (205x, 138y).
Just run around in the general area until the task objectives update. Watch out for hostile players as you’re doing this, especially this early in the game’s lifespan as many people are doing the same objectives.
For more details, here’s our dedicated guide for the “The Shadow Over Ban Pa” (Part 1) quest!

Handshake Task #10. New Neighbours
This task will be a fair bit more challenging as it will feature enemies that are better equipped than the ones you’ve been facing in the starting town.
Basically, head over to the military complex YBL-1 near Fort Narith as shown in the map below. There, you will have to fight your way through the compound and search for some intel that you will have to hand over to Handshake.
For more details, here’s our dedicated guide for the New Neighbors task!

Handshake Task #11. Up to Snuff
For this one, you will have to travel over to Hunter’s Paradise. In a building near the firing lanes, you will find a guest list beside a lamp. Extract with it to complete the task. This area will be covered in greater detail later down the guide.
For more details, here’s our dedicated guide for the Up to Snuff task!

Handshake Task #12. True Grit
This task will have you searching for an antique revolver somewhere near Hunter’s Paradise (check the marked location in the map below). You will find it in case inside a locked room that requires the HP 102 key, so kill nearby enemies until it drops.
For more details, here’s our dedicated guide for the True Grit task!

Handshake Task #13. One Shot, One Kill
Coming straight back to Hunter’s Paradise, you are going to have to kill a boss NPC who is roaming around the general area near the firing lanes. He has a blue polo shirt and a black baseball cap, and he is armed with a shotgun.
For more details, make sure to check out our dedicated guide for the One Shot, One Kill task!

Handshake Task #14. Shortcut
This one is relatively simple, as long as you’re ready to fight your way in and out of the bunker. That’s right, you’re gonna be heading over to YBL-1 yet again. Explore the compound until you find the blocked passageway below near the Fort Raksmei sign. Walk close to it and the task should be completed.
For more details, here’s our dedicated guide for the Shorcut task!

Handshake Task #15. I Went, I Saw, I Conquered
This task will have you doing some simple recon over the Sawmill at the western part of the map. Simply head over to the marked location below, which is overlooking the Sawmill itself, and the task should be completed.
For more details, here’s our dedicated guide for the I Went, I Saw, I Conquered task!

Handshake Task #16. I Went, I Saw, I Conquered II
This one will pretty much have the same goal as the previous mission, except this time, you will be doing recon within the Sawmill itself. Clear out the area and explore the place until the task objective updates.
For more details, here’s our dedicated guide for the I Went, I Saw, I Conquered II task!
Handshake Task #17. Business or Pleasure
For this task, you must travel over to Pha Lang Airfield and search the building in the marked location below. There, you will find a small flash drive on a table beside a laptop. Grab it and extract to hand it over to Handshake.
For more details, here’s our dedicated guide for the Business or Pleasure task!

Handshake Task #18. Rebel Scum
For this one, all you have to do is eliminate 20 enemies in the bunker. Head on back to good ol’ YBL-1 and start blasting until you take down a total of 20 rebels. You will likely be able to do this at the same time as Lab Rat’s Duty to the Country (more info on this further down).
Handshake Task #19. Manifest Destiny
Head back to Pha Lang Airfield and enter the Terminal building. There, search for a computer that is turned on. Just approach it and press F to transfer database and complete the task.
For more details, here’s our dedicated guide for the Manifest Destiny task!

Handshake Task #20. Final Check Out
Another task that will have you going to Pha Lang Airfield, this time go to the Hangar and look for a purple suitcase. It sticks out due to its color, and all you have to do is search it to complete the quest.
For more details, here’s our dedicated guide for the Final Check Out task!
Handshake Task #21. What Comes Up
For this task, you will have to find a crashed plane somewhere around the southeast of Pha Lang Airfield. There are actually two planes that you can run into, and the one you want is further ahead (around 192x, 152y).
Once you find the plane, you should see an orange flight recorder in it. Grab this and extract so you can hand it over to Handshake.
For more details, here’s our dedicated guide for the What Comes Up & Too Close To The Sun task!

Handshake Task #22. I Went, I Saw, I Conquered III
The third part of this task chain will have you going back to the Sawmill again. This time, though, all you have to do is kill 20 enemies in the area. Simple enough.
Handshake Task #23. Fort Narith Stroll
As the objective implies, all you have to do here is go to each entrance in Fort Narith. There are four in total, and each of their general locations will be marked in the map below.
For more details, here’s our dedicated guide for the Fort Narith Stroll task!

Handshake Task #24. Hacker
When you accept this task, don’t forget to grab the Camera Wiretaps from your messages. This one will be trickier than the previous mission, as you will have to enter the compound now.
Basically, you must find and wiretap four cameras scattered throughout the fort. Their coordinates are the following:
- Camera #1 (144x, 130y) – It right at Fort Narith Main Entrance
- Camera #2 (143x, 129y) – Right at the front door of the Headquarters
- Camera #3 (142x, 131y) – On the outer part of a gate.
- Camera #4 (142x, 128y) – In a building at the Airfield.
For more details, here’s our dedicated and more detailed guide for the Hacker task!

Handshake Task #25. The More The Merrier
For this one, you’ll realize that hacking the cameras was not enough, Handshake wants more intel. Return to Fort Narith and head over to the Barracks at the northern part of the compound.
Look for the room labeled “A 106” and the Military Patrol Schedule document should be on the bed directly to the left upon entering.
For more details, here’s our dedicated guide for The More The Merrier task!

Handshake Task #26. UNLRA
This is the first task you will get that will send you over to Tiger Bay, which is southwest of Ban Pa. At the UNLRA Refugee Camp (coordinates: 200x, 131y), you will find a blue folder labeled “UNLRA File”. Grab it and extract without losing this item.

Handshake Task #27. Deepest, Darkest Fantasies
For this one, you must find a flash drive in a building within the Midnight Sapphire region (coordinates: 174x, 167y). Once you have it, you can extract at Hotel 1 in the clearing directly to the east of where you grabbed the drive.
For more details, here’s our dedicated guide for the Deepest, Darkest Fantasies task!
Handshake (or Turncoat) Task #28. Priceless Possessions
This is done in tandem with Turncoat’s Local Golf Star task, so just pick whichever rewards you value more when turning it in afterwards.
All you have to do is travel to the northwestern part of Midnight Sapphire (specifically at around 168x, 169y). In one of the buildings in the marked spot, you will find a golf club. Both NPCs will reward you with a weapon for this, but only Handshake will offer cash as well.

Handshake (or Banshee) Task #29. The Congressman
This task is done in tandem with Banshee’s Felony and Punishment, so again, just decide on which rewards you fancy more.
Once again, return to Midnight Sapphire and search for Villa Erica (174x, 166y) within the Whitewater Villas area. Inside, you will find a lost smartphone on the floor behind a chair. Extract and decide which NPC to give it to.
For more details, here’s our dedicated guide for the The Congressman / Felony & Punishment tasks!
Handshake Task #30. The Man Who Disappeared
Before leaving for Midnight Sapphire, don’t forget to grab the passport from the command tent at base. Go to the reception area of the Midnight Sapphire Hotel (huge white building in the map, you can’t miss it) and place the passport in the file cabinet under the front desk.
For more details, here’s our dedicated guide for The Man Who Disappeared task!
Handshake Task #31. Lip Out
For this one, head over to the Golf Club (170x, 167y) at Midnight Sapphire and check the guest list on the front desk. After that, head over to the villa at 174x, 166y and search for the client’s phone in a bloodied bathroom.
For more details, here’s our dedicated guide for the Lip Out task!

Handshake (or Banshee) Task #32. Celebrity Crash
This is done in tandem with Banshee’s Dirt Digger task, so as usual, just go with whichever reward you want more. Both will give you weapons, but only Handshake will reward you with cash as well.
Just head over to the villa at Midnight Sapphire under the coordinates 165x, 174y. You will find the VHS that both men want on top of the dining table.
For more details, here’s our dedicated guide for the Celebrity Crash & Dirt Digger tasks!
Handshake (or Gunny) Task #33. Left Behind II
Just like one of the starter quests, this one will be done at the same time as Last Farewell II by Gunny. You will be doing the exact same thing as before: find the body and either put a tracker in it or simply confirm its identity.
The body can be found at the golf course in Midnight Sapphire, somewhere near the marked location in the map below. Once there, decide whether you want to side with Handshake or Gunny.

Handshake Task #34. Paparazzi
For this one, you will be returning to Midnight Sapphire Hotel. In one of the rooms near the reception area, you will find a locked door. Kill nearby enemies until you can get the MS Supply Key. Once you have gained access to the room, read the documents on the desk.
After checking the documents, you will be tasked with checking an interrogation room near the Lakeside Villa. Check the marked location in the map below to see where you have to go.
For more details, here’s our dedicated guide for the Paparazzi task!

Gunny’s Tasks (Mithras)
Gunny Task #1. Cache Retrieval
Before you head off into town, don’t forget to get the trackers that were placed in your locker. You will need these to actually complete the objectives, so try not to die while you’re carrying them.
In both the lumberyard and warehouse, you will have to find a box that you can interact with. Specifically, you should have the option to hide the tracker. After that, the mission should be completed.

Gunny Task #2. Leave No Man Behind
Again, you will be provided with a tracker for this quest. Instead of a container, however, you will be looking for a corpse to place the tracker in.
Just go to the general area marked in the map below and you should be able to see a body on the ground as you walk around. There will be a large blood splatter on the wall marking where it is.

Gunny Task #3. Medical Detective
Just like Handshake’s Helping Hand quest, you will first have to find a Nam Thaven Doctor’s Office Key from AI enemies roaming around the town. Once you have it, head over to the building marked below and use the key to enter.
Inside the building, you will find the Doctor’s Diary in one of the rooms beside a computer. Take it and hand it over to Gunny to finish your mission.
For more details, here’s our dedicated guide for the Medical Detective task!

Gunny (or Handshake) Task #4. Last Farewell/Left Behind
This quest is actually done in tandem with Handshake’s Left Behind task, so you will have to decide between the two as to which rewards you value more. If you are going to do this for Gunny, make sure to have a tracker with you.
The body that you will have to find is in the marked spot in the map below. For Mithras players, this will be around west of the gas station. Be careful of enemies that can spawn here, especially since the body is out in the open.
To help you with your choice, Gunny’s reward for placing a tracker on it is an M4A1, while Handshake will give you two pieces of armor for simply identifying the body.
For more details, here’s our dedicated guide for the Last Farewell & Left Behind tasks!

Gunny Task #5. On the Range
This is a relatively simple recon mission that will have you checking three different locations, just like one of Handshake’s first tasks. This one will put you way up north of the map, though, right between the two other faction’s bases.
All you need to do here is explore the area near Hunter’s Paradise. The shooting lanes, dumping ground, and motel are all close to one another, so you just have to run to each location until the task updates.
For more details, here’s our dedicated guide for On The Range task!

Gunny Task #6. The Negotiator
For this one, you will be coming back to YBL-1, which is the bunker you visited for Handshake’s New Neighbours if you did that first. Check the map over in that section for the exact location.
Basically, just look for a key from one of the nearby enemies and search for a locked room in the bunker’s lower floors. Inside will be the negotiator you are looking for, who was unfortunately tortured to death.
For more details, here’s our dedicated guide for The Negotiator task!

Gunny Task #7. Guns & Ammo
This task will have you returning to the firing lanes that you had to scout in during the On the Range quest. You just need to find a key from nearby AI enemies and unlock a door to the weapon storage building.
For more details, here’s our dedicated guide for the Guns & Ammo task!
Gunny Task #8. A Single Drop
All you have to do for this task is to check three tanker trucks scattered around Pha Lang Airfield by approaching them and pressing the F button when prompted. Check the map below for their exact spots.
For more details, here’s our dedicated guide for A Single Drop task!

Gunny Task #9. Out of the Blue
As stated in Gunny’s message, you will have to travel over to Blue Lagoon. There, you will find a building in the marked location below, and the Organization Notes will be on a table near some equipment. Extract with this item to finish the task.
For more details, here’s our dedicated guide for the Out of the Blue task!

Gunny Task #10. Living in Burrows
Yet another mission that involves the bunker over at YBL-1, you must find and interact with the water filtration unit and generator inside. For the latter, you must find a YBL-1 Generator Room Key to access it, and this can be found by killing nearby AI enemies.
For more details, here’s our dedicated guide for the Living in Burrows task!

Gunny Task #11. Fuel Shortage
This task will have you going to the Sawmill (you probably have this quest as you are doing Handshake’s I Went, I Saw, I Conquered 3 as well). Just go between the Warehouse and Offices and you should find a fuel truck that you can investigate.
Gunny Task #12. Neighborly Help
This will have you going to the Fuel Storage over at Fort Narith (at around 145x, 127y). There, you will find two fuel gauges. All you have to do is approach them and press F to check them.
Gunny Task #13. Wanted Man
Again, going back to Fort Narith, you must head over to the Headquarters this time. Search for the room labeled “Office 1-3”. In one of the desks inside, you will find a folder labeled “Interrogation Order” under an unopened can of food. Extract with it and report back to Gunny.
For more details, here’s our dedicated guide for the Wanted Man task!

Gunny Task #14. Wanted Man II
For this task, head to the same building from The More The Merrier (Handshake). This time, head to the room labeled “A 102”. On the table to your right will be the Interrogation Transcript that you must extract with.
For more details, here’s our dedicated guide for the Wanted Man II task!
Gunny Task #15. Aye Aye, Captain
This task will have you searching the harbor over at Tiger Bay. Once you’re at that region, simply head over to the marked area below and walk around until the task is completed.
For more details, here’s our dedicated guide for the Aye Aye, Captain task!

Lab Rat’s Tasks (Mithras)
Lab Rat Task #1. Meds Wanted
This simple fetch quest will have you going to the location marked below and grabbing a box of UNLRA Medical Supplies. You will have to extract with these supplies, so try not to die on your way out.

Lab Rat Task #2. Lost and Found
For this one, you will have to head over to the spot marked in the map below and look for a corpse inside the building. Once you have identified the body, pick up the medallion beside him before leaving, as you will need to hand it over to Lab Rat.

Lab Rat Task #3. Secret Compassion
Before heading out into Nam Thaven, don’t forget to bring the supplies that were sent to you. Basically, just head to the three marked spots in the map below.
Beside the door of each house, you will have to place the supplies in the box. These are marked with a red-carpet underneath.
For more details, here’s our dedicated guide for the Secret Compassion task!

Lab Rat Task #4. Native Negotiations
Upon accepting this task, you have to grab the briefcase in the command tent back at HQ before heading out to Nam Thaven. All you have to do is head to the car repair store highlighted in the map below.
Once you make it there, you must place the briefcase beside the white truck that has a blue box under it. You will get a “Place Briefcase” prompt when you approach it at a certain angle.
For more details, here’s our dedicated guide for the Native Negotiations task!

Lab Rat Task #5. It’s in the Water
After you accept this task, make sure to grab all three Sample Collection Kits that were sent to you. Once you are ready, head over to the village of Ban Pa, which might have some hostile players nearby.
You will need to collect samples from three different locations in this small village. To be more specific, look for the following landmarks and approach them until you are prompted to “Collect Samples”:
- A mound of dirt near the coast up the northeastern corner of the village.
- A well with a blue wooden cover at the northwestern corner of the village.
- A bird house at the southern part of the village.
For more details, here’s our dedicated guide for the It’s in the Water task!

Lab Rat Task #6. Duty to the Country
Once again, you will be returning to the bunker at YBL-1 for this task, so be ready to face some well-armed rebels. You’ve already been here before to complete New Neighbors and The Negotiator.
Basically, you will have to navigate your way through the bunker once more until you find the body of Long Vong. Approach his corpse until you are prompted to “Check Body” and press F to finish the task.
Alternatively, you can also drop down the hatch on the outer west side of the compound to reach his body faster. You will have to fight your way out if you choose this path and the bunker hasn’t been cleared.
For more details, here’s our dedicated guide for the Duty to the Country task!

Lab Rat Task #7. Carnivore
Check the map for On the Range for this one, as you will need to head over to the unmarked restaurant right in the middle of the three marked locations there.
Once you’re in the restaurant, head to the back room where you will find an open fridge. Approach it and collect samples to complete the task.
For more details, here’s our dedicated guide for the Carnivore task!

Lab Rat Task #8. The Brave
Another mission near the firing lanes at Hunter’s Paradise (just slightly northwest of the previous task’s objective), you will have to find a missing person and bring any proof of identity back to Lab Rat.
A little to the west of the firing lanes, you will find a body tied to a pole. This is the person you are looking for, unfortunately. Behind them will be a goodbye letter on the ground, which you should pick up before extracting.
For more details, here’s our dedicated guide for The Brave task!

Lab Rat Task #9. It’s in the Water II
Upon accepting this task and returning to Ban Pa, you will need to kill nearby enemies to find a BP Elder key and unlock a room in the marked location below. You’ll find an improvised chem lab here that should complete the task.
For more details, here’s our dedicated guide for the It’s in the Water II task!

Lab Rat Task #10. Check Out Computers
For this task, you are gonna be traveling to YBL-1 once again. Explore the bunker until you find a set of diskettes labeled “Bunker Computer Data” on a table with a very old computer on it. Survive until extraction as you need to hand this over to Lab Rat.
For more details, here’s our dedicated guide for the Check Out Computers task!

Lab Rat Task #11. Seeker of Change
Upon starting this task, don’t forget to bring the Sample Collection Kit given to you. For this one, you must travel to the barracks at the northwesternmost corner of Fort Narith.
In one of the rooms here, you will find a bloodied bed. Simply approach it and press F to collect samples. The task should be completed afterwards.
For more details, here’s our dedicated guide for the Seeker of Change task!

Lab Rat Task #12. Uncanny Files
Yet another task that will have you going to Fort Narith, Uncanny Files will have you looking for medical records at a tent just slightly south of the Barracks area. Specifically, this folder can be found at around the (141x, 131y) coordinates.
For more details, here’s our dedicated guide for the Uncanny Files!
Lab Rat Task #13. What Remains
Head to the UNLRA Headquarters at Tiger Bay. Once you’re there, kill nearby enemies until you can get a UNLAB Key to unlock a locked door that has the corresponding label on it. Once inside, grab the samples and extract with them.
For more details, here’s our dedicated guide for the What Remains task!

Lab Rat Task #14. Girls Just Wanna Have Fun
All you have to do here is enter a certain villa within Midnight Sapphire (specific coordinates: 173x or 174x, 165y) and check the body in one of the rooms. Specifically, she will be found on top of a bed.
For more details, here’s our dedicated guide for the Girls Just Wanna Have Fun task!
Artisan’s Tasks (Mithras)
Artisan is a vendor who will only be unlocked after you complete certain tasks from the other NPCs. Supposedly, the only requirement is Native Negotiations (Lab Rat), though there may be a few others as well.
Artisan Task #1. Tools of the Trade
For this one, it’s a simple fetch quest wherein you will have to enter the house near the construction site in Nam Thaven. In it, you should find the Artisan’s Toolbox on a workbench. Just grab it and extract.
For more details, here’s our dedicated guide for the Tools of the Trade task!

Artisan Task #2. At the Mounds of Madness (Part 1)
For this task, you will have to search for a set of murals and a strange statue within or around the village of Ban Pa. Again, be careful when you travel here, as the AI enemies and hostile players can be quite a pain to deal with.
The following coordinates are where you will find each objective or at least be within range of them. The murals each have different designs and are painted on wooden walls:
- Mural #1 – 205x, 135y
- Mural #2 – 204x, 137y
- Mural #3 – 207x, 138y
- Disturbing Statue – 207x, 137y
For more details, here’s our dedicated guide for the At The Mounds of Madness (Part 1)!

Artisan (or Handshake) Task #3. At the Mounds of Madness (Part 2)/The Shadow Over Ban Pa (Part 2)
This task is done in tandem with The Shadow Over Ban Pa II by Handshake. Both of these vendors want the intel, and either choice will have different rewards.
Basically, you will have to enter the Elder’s House near the center of the village (205x, 137y). At the second floor, there will be a shrine with the weird book that you need to get.
The Artisan will reward you with an AKMN, while Handshake will be giving you two M4A1s and some money for the intel. Again, pick whichever you value more out of these, including the reputation for both.
For more details, here’s our dedicated guide for the At The Mounds of Madness 2 & Shadow Over Ban Pa 2 tasks!

Artisan Task #4. Save the Rebellion
When you start this task, don’t forget to pick up the flash drive labeled “Appeal to the Rebels” at your command tent back at base before you leave. Once you are ready, head over to YBL-1, where the rebels are at.
Instead of entering the bunker as you did in previous tasks, all you have to do for this one is go to the guard house and place the flash drive on top of a clipboard.
For more details, here’s our dedicated guide for the Save the Rebellion task!

Artisan Task #5. The Most Dangerous Game
Continuing to build on the mysterious rumors around Hunter’s Paradise that you investigated back in Lab Rat’s Carnivore, you must return tothat spot and investigate the so-called VIP section.
At the location shown below, you will be able to complete one part of the task by investigating the mass grave with still-decaying bodies on it.
For more details, here’s our dedicated guide for The Most Dangerous Game task!

After that, you must head into a nearby building and pick up the VIP Program Info on top of a green table. Extract when you’re done.

Artisan Task #6. Night Ocean
If you remember Blue Lagoon from Gunny’s Out of the Blue task, then you know where this place is. Basically, you will have to roam near the Makeshift Hideout in this zone until you can find and kill the boss NPC that spawns here.
For more details, here’s our dedicated guide for the Night Ocean task!

Artisan Task #7. When a Tree Falls
This task will have you searching for a dead body at the Sawmill (around 139x, 144y). Look around until you can see a pile of logs with a bit of blood on the side. If you look closer, you will find the man’s body underneath, so just walk up to it and confirm identity by pressing F.
For more details, here’s our dedicated guide for the When a Tree Falls task!

Artisan Task #8. Missing Colleague
Head to Savanpha Village just to the east of Fort Narith. At a building at around 146x, 129y, you will find an Arrest Warrant on top of a table. Grab it and extract with it to finish the task.
For more details, here’s our dedicated guide for the Missing Colleague task!
Artisan Task #9. Missing Colleague II
This one will have you collecting yet another document, this time in Fort Narith. Specifically, head over to the third floor of the Headquarters and enter Office 3-3. On one of the desks, you will find the Interrogation Transcript. Extract with it.
For more details, here’s our dedicated guide for the Missing Colleague II task!
Artisan Task #10. Evacuation Question
Once again, you must enter Fort Narith. Go to the same barracks that you went to for The More The Merrier (Handshake) and Wanted Man II (Gunny). In room “A 112”, you will find Evacuation Orders on the desk. Take it and extract to finish the task.
For more details, here’s our dedicated guide for the Evacuation Question task!
Artisan Task #11. Last Flight
For this one, you must find and identify a body near a crashed plane close to Pha Lang Airfield. This can be found directly south of the Golf 2 landing zone.
For more details, here’s our dedicated guide for the Last Flight task!

Artisan Task #12. Invaders From Afar
At the offices in the Sawmill (around 139x, 144y), you will find the Medic’s Notes document on a well-lit desk. After that, simply run around the Warehouse until the objective is updated. Extract when you’re done (don’t lose the Medic’s Notes).
For more details, here’s our dedicated guide for the Invaders From Afar task!
Artisan Task #13. Crime Doesn’t Pay
At the Employee Housing area of Midnight Sapphire, you must search for the missing person indicated in your objectives. He can be found in a building at 168x, 165y, tied up to a chair and very much dead.
For more details, here’s our dedicated guide for the Crime Doesn’t Pay task!
Turncoat’s Tasks
Turncoat Task #1. The Value of Sharing
For this one, you just have to enter a building at Ban Pa in the marked spot below. There, you will find a stash of fentanyl, and you are going to have to deliver some to Turncoat.
For more details, here’s our dedicated guide for The Value of Sharing & Line in the Sand tasks!

Turncoat Task #2. Warm Welcome
For this one, all you have to do is kill the gang leader at Ban Pa. He roams around the village and we are unsure where exactly he spawns, so just look around and hopefully get the killing shot on him.
He wears civilian clothing and has a shotgun on hand, so it can be a bit tricky to identify and distinguish him from the other AI enemies around.
For more details, here’s our dedicated guide for the Warm Welcome task!
Turncoat Task #3. Final Liberation
It is possible that you can do this task alongside Lab Rat’s Check Out Computers. Similar to the previous task, all you have to do here is kill a boss at the YBL-1 bunker.
For more details, here’s our dedicated guide for the Final Liberation task!
Turncoat Task #4. Family Heirloom
For this one, you must head over to the Nakasa Village area northwest of Fort Narith. At the house in the coordinates 141x, 135y, you will find the Turncoat’s House Key on a table outside. Once you gain access to the house, head to the second floor and grab the briefcase under a bed.

Turncoat (or Banshee) Task #5. A Small Favor
When you accept this quest, Banshee will also offer you a reward for the folder you need to get (No Escape task). All you need to do is enter the room labeled Archive at the first floor of the HQ in Fort Narith. The Personal Folder will be on one of the shelves.
Turncoat Task #6. Downsizing
For this one, all you need to do is kill 30 enemies at Fort Narith. If you have friends to help you with this part, you should be able to finish it significantly faster, especially with how large the place is.
Turncoat (or Lab Rat) Task #7. Name Your Poison
Upon accepting this task from Turncoat, Lab Rat will also give you the Spit Out the Poison quest. From here, just decide which rewards you value more between the two NPCs’ offerings.
Simply head over to the northwesternmost Barracks at Fort Narith and search for the water storage tank outside. From here, either poison it (Turncoat) or dump the substance under the faucet (Lab Rat)to finish either task.
For more details, here’s our dedicated guide for the Name Your Poison & Spit Out The Poison tasks!
Turncoat Task #8. Who’s In Charge
For this task, you must head over to the Headquarters at Fort Narith. In one of the rooms at the third floor, you will find the Commander Details Folder beside a window. There is also a safe in this room with extra loot.

Turncoat Task #9. Dragonslayer
This one is fairly straightforward. Just head over to Fort Narith and kill the commander. He is dressed in military fatigues and wears a black beret and aviator sunglasses. On death, he will drop his AK-74M.
Turncoat Task #10. Know Your Enemy
For this task, you must head over to Midnight Sapphire and kill nearby enemies until you find the Villa Katherine key. Once you have it, open the door to Villa Katherine (173x, 165y) and look for the Military Intel folder on top of a table.

Banshee’s Tasks
At some point, you will be acquainted with a new character named Banshee. He will be providing you with even more tasks, with a lot of them clashing with the other characters (as you probably already know).
Banshee Task #1. Timber
Banshee’s very first task will have you fighting the boss NPC over at the Sawmill. He will be roaming around the area, and you can snipe him from the ridge that you did recon at during one of your earlier missions.
For more details, here’s our dedicated guide for the Timber task!
Banshee Task #2. EOD
For this one, you are gonna be heading back to the Sawmill. Kill nearby enemies until you can get a Sawmill Office key. Once you get past the locked door at the offices, you will find the Detonator Case on a desk. Take it and extract.
For more details, here’s our dedicated guide for the EOD task!

Banshee Task #3. Jets’n’marks
For this one, you will be going over to the airstrip at Fort Narith. Just head over to the Underground Hangars area at around 144x, 127y and you will find three blue jets parked out in the open. Just head over to each one and mark them to complete the task.
Banshee Task #4. State of Weapon Shipment
Once again, return to Fort Narith and head over to the marked location in the map below. Right outside the bunker here, you will find the manifest on top of one of the boxes. Simply interact with it to finish the task.
For more details, here’s our dedicated guide for the State of Weapon Shipment task!

Banshee Task #5. Deal of the Century
This one will have you going back to the Headquarters over at Fort Narith. This time, go to the second floor and search for the room labeled “Office 2-2”. Inside, you will find a document titled “Jet Fighter Deal”. Take it and extract to finish the task.
For more details, here’s our dedicated guide for the Deal of the Century task!
Banshee Task #6. Lamang Connection
Just to the east of the Elder’s House in Ban Pa, you will find a little shack with a document inside called “Organization Notes”. Simply grab this notebook and extract to hand it in and complete the task.
For more details, here’s our dedicated guide for the Lamang Connection task!

Banshee (or Turncoat) Task #7. Noble Powder
At the Midnight Sapphire Hotel (again, big white building in the map at Midnight Sapphire)you must head over to the kitchen and grab a suspicious box hidden under the shelf in a small room.
Either give it to Turncoat (Academic Interest task) for an AK-74M or hand the evidence over to Banshee for a decent chunk of cash and some ammo. Of course, reputation for either of them is on the line as well.

Banshee Task #8. What’s in the Box
This task will have you going to one of the villas at Midnight Sapphire (coordinates: 172x, 165y). Before you can enter the building at these coordinates, you will need the Villa Anna Jana Key dropped by nearby enemies.
Once inside, all you need to do is interact with the laptop on the table and the task should be completed.

And those are currently all of the tasks that Mithras players will get that we know of so far in the game, with more being added over time. While you’re here, check out our beginner’s guide to Gray Zone Warfare if you are still new to the game!